Showing posts with label HOLIDAY TUTORIALS 2023. Show all posts

Wednesday, December 13, 2023

HOLIDAY TUTORIALS 2023 - DAY 7

WELCOME to DAY 7 of our HOLIDAY TUTORIALS 
featuring our latest Holiday 2023 Release

Sam here sharing with you my tutorial:
- Quick and Easy Gift Card Holders -


I am sharing two examples I made to create quick and easy gift card holders, perfect for sharing with family and friends during the holidays.   This was an idea inspired by a YouTube video I watched by the wonderful card designer, Claudette San Pedro.  

I will provide product and scoring details for both examples, and we will dive into all the steps used to create the Winter Circle gift card holder

PRODUCTS
Winter Circle Die
Stitched Nested Circles Die


CUTTING & SCORING

Winter Circle Gift Card

White cardstock:
3 1/2" x 8-1/2"  - Score at 2" and 6"
4" x 4" x rectangle for circle base
2" x 2" rectangle for the sentiment

4" x 4" cardstock in the following colors for the die cuts:
Ivory Shimmer cardstock
Ivory Glitter cardstock
Dark Blue Cardstock
Dark Green Cardstock
Gold Cardstock

Pattern Paper:
3 1/2" x 5" for the background

Penguin Gift Card

White cardstock:
3 1/2" x 8-1/2"  - Score at 2" and 6"
3" x 3" (2) rectangle for penguin base and body
2" x 2" rectangle for the sentiment

3" x 3" cardstock in the following colors for the die cuts:
White Glitter cardstock
Black Cardstock
Red Cardstock

Pattern Paper:
3 1/2" x 5" for the background
3" x 3" for the hat and scarf


HOW TO:

Step 1. Cut your card base and score at both the two inch mark and the 6" inch mark.  Using your bone folder, fold at the crease and burnish the edges. 


Step 2. Die cut two pieces of pattern paper using the 3 1/4" sized die from the Scalloped Squares Die set.  You don't need to cut the full size of the square because once cut, you will trim one end using your paper trimmer. 


Step 3. For the top of  your gift card base, cut off the bottom of your square at the 2 1/4" mark.  For the bottom of your card base cut the bottom of your second square at the 1 3/4" mark.  Adhere each piece to your card base.


Step 4:  Glue both the left and right edges of the folded bottom of your card-base to the inside of the card-base to create a pocket for your gift card as shown below. 


Step 5:  After using your Winter Circle die to die cut all of the pieces from the cardstock colors listed above, create a base from white cardstock to adhere the die cuts using the 3" in diameter circle from the Stitched Nested Circles Die.  Using scissors cut along the stitching to create the perfect sized base for your Winter Circle. 


Step 6:  I wanted the Winter Circle to have a lot of shimmer and shine but I didn't have any green glitter cardstock so before gluing down, I used a shimmer pen to add some sparkle to my die cuts. 


Step 7:  Once the Winter Circle was assembled, I stamped a sentiment from the Let it Snow clear stamp set and die cut it using the smallest die from the Scalloped Rectangles Die.  I then applied glue to the back of the top half of my circle and adhered it to the top fold of my card base.   As for the sentiment, I glued it onto the bottom fold of my card base, just under the Winter Circle, so the recipient can see the message upon opening.   All final images are below. 


These were very quick and easy to put together. I hope you enjoy.  

click HERE to SHOP


PLUS A GIVEAWAY!

For your chance to WIN a $50 store credit to our online store,
COMMENT on each of the HOLIDAY TUTORIAL BLOG POSTS in December!
click HERE to COMMENT on Blog Posts
 
Thank you so much for visiting today!
Please come back tomorrow for another TUTORIAL!


Tuesday, December 12, 2023

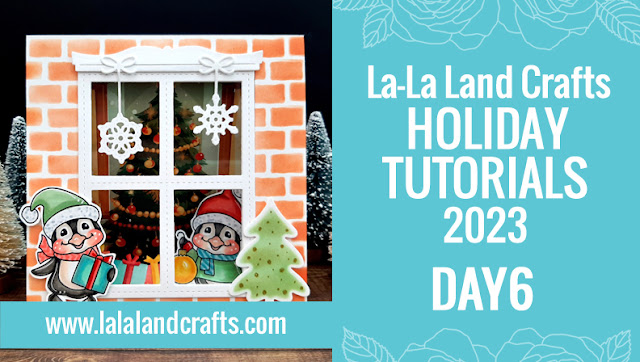
HOLIDAY TUTORIALS 2023 - DAY 6

WELCOME to DAY 6 of our HOLIDAY TUTORIALS
featuring our latest Holiday 2023 Release

Kristine here sharing with you my tutorial:
- SEE-THRU WINDOW TENT CARD -


This is a cute & easy card to make and adds a fun feature with the penguin inside looking out the window!  I'm loving these cute penguins ♥

PRODUCTS

CUTTING & SCORING

White Cardstock:
(1)  5-1/2" x 11" - scored at 5-1/2" 
(1)  5-1/2" x 3" - scored at 1/2", 1-1/2" and 2-1/2"

Acetate / Window Sheet:
(1)  5-1/4" x 5"

Christmas Tree Paper (from Winter Time Paper Pack):
(1) 5-1/4" x 5-1/4" 
--- Trim off 3/8" from left and right side to get it to 5-1/4" 

COPIC COLORS USED
- Greys:  W2, 3, 5, 7; 100
- Reds:  R00, 20, 22, 24, 46
- Blues:  BG72, 53, 45, 11
- Greens:  G21
-Yellows:  Y15, 19
- Browns:  E000, 0000, 41
+White gel pen
+Gold gel pen 

DISTRESS OXIDE INK PADS USED
- Crackling Campfire
- Old Paper

TUTORIAL:


If you cannot watch this video embedded, you can watch it HERE.


Thank you so much for stopping by today! 
 
I hope you are enjoying our holiday tutorials this year!

click HERE to SHOP


PLUS A GIVEAWAY!

For your chance to WIN a $50 store credit to our online store,
COMMENT on each of the HOLIDAY TUTORIAL BLOG POSTS in December!
click HERE to COMMENT on Blog Posts
 
Thank you so much for visiting today!
Please come back tomorrow for another TUTORIAL!


Sunday, December 10, 2023

HOLIDAY TUTORIALS 2023 - DAY 5

WELCOME to DAY 5 of our HOLIDAY TUTORIALS 
featuring our latest Holiday 2023 Release

Meg here sharing with you my tutorial:
- SNOWMAN SNOWGLOBE ORNAMENTS -


A festive tree ornament or gift tag for the holidays (don't forget to add a string!)

PRODUCTS:
SUPPLIES:
Glue
Sequins

COPICS:
penguins - 100, T7, T5, E44, E43, E42, E40, RV14, R22, R21, R20, R01, R00
red - R29, R35, R24, R22
white - T3, T2, T1, T0
gold - YR23, Y19, Y35, Y32
blue - BG53, B12, BG11

TUTORIAL:
(1) This is our starting point for this tutorial:


 Tip: Die cut your scenes from the Winter Time Paper Pack using the largest Double Stitched Arches Die. (Hint: you can pick where you cut, it doesn't have to be at an edge! I centered the scenes I wanted in the die). Also - if you want to make an ornament/tag, I would punch a hole and attach a string at this step onto the winter scene!


Tip: Using white cardstock roughly 5" wide, cut your hills using the Double Stitched Hills Border Die like the below photo. You'll use both of them!


(2) Using the 2 largest Double Stitched Arches Die, create frames that look like this. Cut 6 white and 2 red frames. (Tip: make sure you tape your dies together as shown so that you get identical frames each time you cut!)


(3) Using the largest Double Stitched Arches Die, further cut your 2 hills like this:


(4) Now you are ready to assemble! Each ornament consists of the following pieces. You will first glue 2 white frames together and then glue onto your wintry scene.


Now, you will glue your hill into place. The result looks like this.


(5) Before continuing to layer your frames, the next step is to stamp your sentiment as shown.
 

(6) Now, glue the white frame and then the red frame onto your scene. Once you adhere your penguins using dimensional foam, you're ready for the final touches! I used the Snowflake Ornaments Die and sequins to add just a touch of bling.


Once you've adhered 1 snowflake with a sequin center onto each ornament, you're done! Enjoy!


click HERE to SHOP

PLUS A GIVEAWAY!

For your chance to WIN a $50 store credit to our online store,
COMMENT on each of the HOLIDAY TUTORIAL BLOG POSTS in December!
click HERE to COMMENT on Blog Posts
 
Thank you so much for visiting today!
Please come back tomorrow for another TUTORIAL!


Saturday, December 9, 2023

HOLIDAY TUTORIALS 2023 - DAY 4

WELCOME to DAY 4 of our HOLIDAY TUTORIALS 
featuring our latest Holiday 2023 Release

Sheri here sharing with you my tutorial:

- WINTER SCENE SHAKER CARD -


PRODUCTS:

PAPER CUTS AND SCORING:
110 lb white cardstock
(1) 4 1/4 x 11 inch scored at 5 1/2
(1) 4 x 5 1/4 embossed using Christmas Tree Stencil Set
(5) windows using the Window Die
(2) window sills using the Window Sills Rounded Die
(1) snowflake using the Snowflake Ornaments Die

Patterned paper from the Wintertime paper Pack
(1) 3 1/2 x 4 1/2

Clear Acetate
(1) 3 1/2 x 4 1/2

COLORING DETAILS:
Copics
Penguin: C9, C7, C5, C3, C1, C00, B01, B000, B0000, R30
Hat/Scarf: V25, V22, V20
Beak/Feet: Y26, Y23, Y06
Candy Cane: R39, R24, R05, B00

VIDEO TUTORIAL:

If you are unable to see the video above, please visit this link:

click HERE to SHOP

PLUS A GIVEAWAY!

For your chance to WIN a $50 store credit to our online store,
COMMENT on each of the HOLIDAY TUTORIAL BLOG POSTS in December!
click HERE to COMMENT on Blog Posts
 
Thank you so much for visiting today!
Please come back tomorrow for another TUTORIAL!


Thursday, December 7, 2023

HOLIDAY TUTORIALS 2023 - DAY 3

WELCOME to DAY 3 of our HOLIDAY TUTORIALS
featuring our latest Holiday 2023 Release

Tamara here sharing with you my tutorial:
- WINTER SHAKER CARD -
 

PRODUCTS:
 
 SUPPLIES:
double sided tape 
score board
scissors 
liquid glue 
acetate
white gel pen
shaker pieces (diamonds, pearls, clear sequins)

DISTRESS INK PADS:
spiced marmalade
victorian velvet
vintage photo
broken china
worn lipstick

TUTORIAL:

Die cut from white card stock 2 of the largest arched die. Place them as on the picture so you get an arched frame. Cut 6 of these.


Take the largest arched frame and cut a piece from the design paper so you get a background for the shaker. 


Add acetate to the back of one of the frames. Glue them together, the one with the acetate is the top one.


Add shaker mix of your liking.


Glue the bakground frame on (the one cut from the design paper).


Stamp your chosen image and sentiment and make diecuts (1 snowflake, 2 trees). Use Distress inks to colour up the image, then fussy cut it.


Once you have the shaker piece done you need to decorate the cardstock which will hold the shaker piece. Cut a white rectangle size 4" x 5 1/8" and add a bit of low tack tape on the top before using stencil. I used one of the newest stencils and made a pattern with white paste and then I covered it up with clear rock candy glitter.


... and that's it. You just glue this piece to the card base.


click HERE to SHOP

PLUS A GIVEAWAY!

For your chance to WIN a $50 store credit to our online store,
COMMENT on each of the HOLIDAY TUTORIAL BLOG POSTS in December!
click HERE to COMMENT on Blog Posts
 
Thank you so much for visiting today!
Please come back tomorrow for another TUTORIAL!