Hello everyone! Welcome to Tutorial Thursday!
Kristine here with you today to share a tutorial with you!
Today's tutorial is: "M" Shaped Treat Box
"M" is for MOM - or - MOTHER'S DAY!
Hello everyone! I want to start off by saying that you may have seen this box on the internet recently - the original designer of the box is Mixed Up Craft! I'm sharing my take on it with slightly different measuring instructions and of course decorated with MY favorite crafting goodies... La-La Land Crafts!
This box IS easier than it looks! There are lots of steps, however I show you in photos every step of the way! So I hope you'll give this a go and share with us how YOU decorate your "M" box with your favorite La-La Land Crafts products!
*Note: all of the products listed below (except the circle die) are for decorating purposes
- feel free to switch those up and use your favorite LLLC products☺
PRODUCTS:
SUPPLIES:
Scissors
Glue
T-ruler
Scoring Board
Bone Folder
Paper Trimmer
Die-cut machine

~ now for the tutorial you have been waiting for ~
CUTTING & SCORING:
Pink/Blush Cardstock:
o (2) 6” x 6” for front and back of the letter.
o (1) 6-1/2” x 2-1/2”
- Score along the longest side at 6”
- Score along the shortest side at 1/2” and 2”
o (1) 4-3/4” x 2-1/2”
- Score along the longest side at 2-1/4” and 4-1/4”
- Score along the short side at 1/2” and 2”
o (1) 11” x 2-1/2”
- Score along the longest side at 1/4”, 2-1/2”, 4-1/2”, and 10-1/2”
- Score along the short side at 1/2” and 2”
o (1) 6-3/4” x 2-1/2”
- Score along the longest side at 2” and 5”
- Score along the short side at 1/2” and 2”
o (1) 7-1/4” x 2-1/2”
- Score along the longest side at 2”, 5”, and 6-3/4”
- Score along the short side at 1/2” and 2”
Designer Paper (Magical Forest Paper Pack used in sample)
o (2) 5.3/4 x 5.3/4 (for front and back of the “M”)
White Cardstock for your stamping your images
Kraft Cardstock for sentiment
HOW TO:
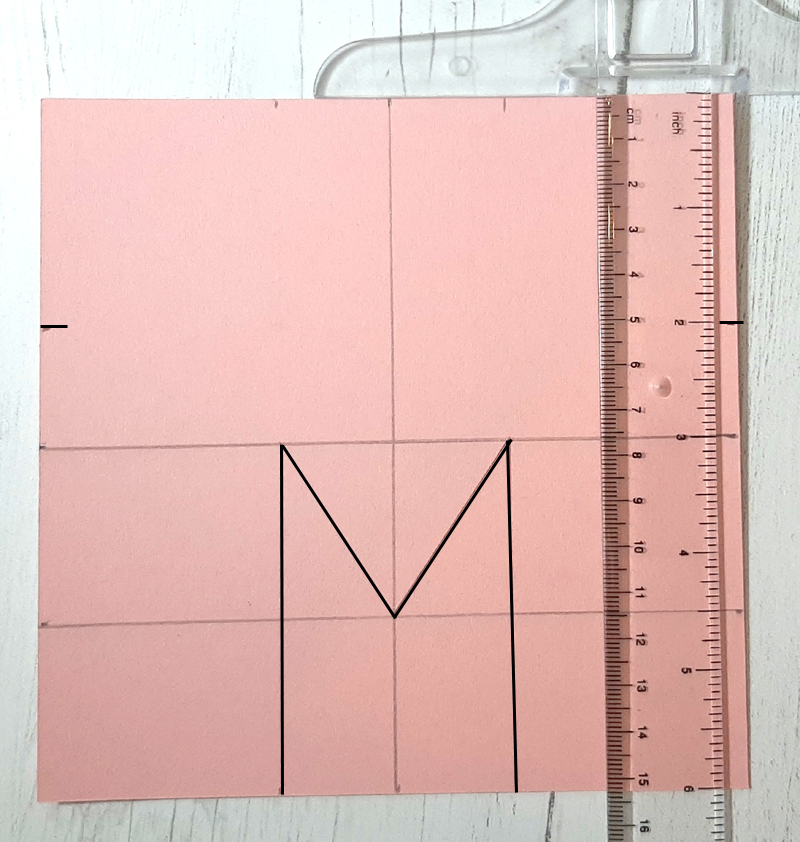
- With one of your 6” square Pink/Blush cardstock and a T-ruler, place a mark at 3” on opposite sides and draw a pencil line to connect.
- Turn so your midline is horizontal. Measure and place marks across the TOP and BOTTOM at 2", 3", and 4" as shown below.
- Draw lines on one half of your card from the 2" and 4" marks just up to the center line as shown.
- Measure from the top of your cardstock down to 4-1/2" and place a mark on opposite sides.
- Draw a line to connect your 4-1/2" marks horizontally.
- Connect your 3" marks vertically down the whole length of card as shown below.
- On the bottom half, starting at the midline (the 3" line), draw diagonal lines from the top of your 2" and 4" lines down to the middle of the 2nd horizontal line (the 4-1/2" line) as shown.
(This creates the bottom of our "M" shape)
- Measure from the top of card down to 2" and place a mark on opposite sides as shown.
- Connect your marks as shown.
- Draw 2 diagonal lines from the top of card at the 2" and 4" marks down to the center of that horizontal line you just drew, as shown.
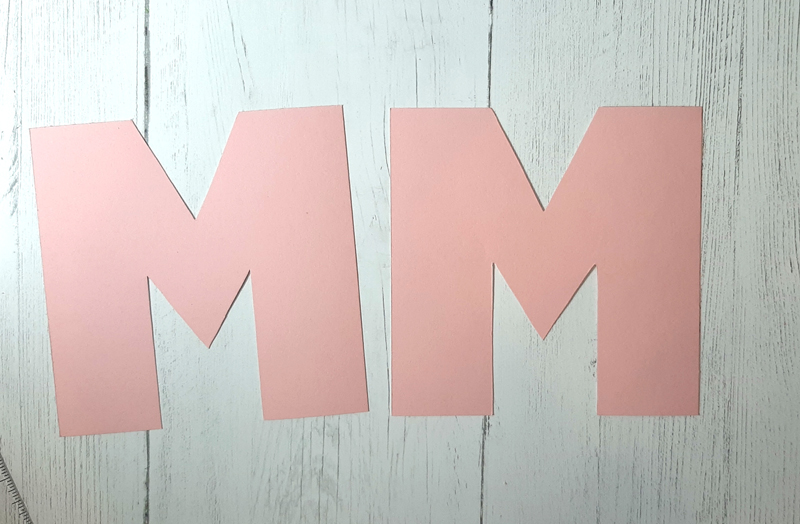
- CUT on the dark black lines as shown in this photo below to get your "M" shape.
- Place this template on top of your other 6" square cardstock piece and cut out.
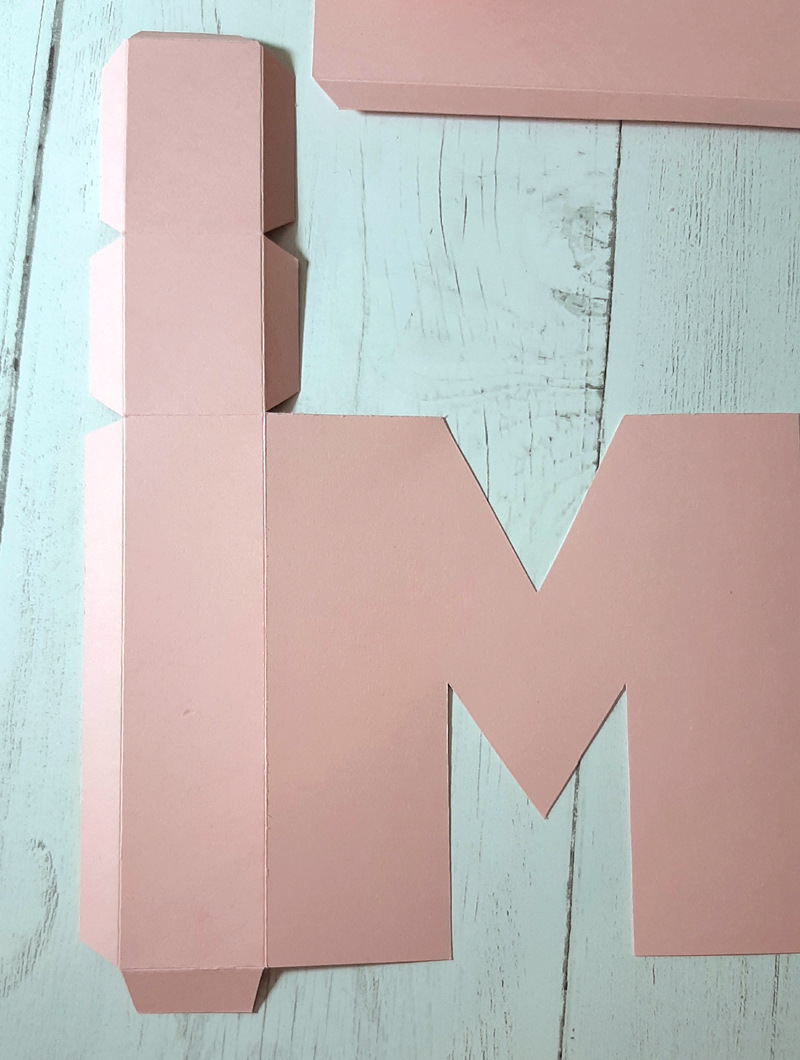
- All of the tabs on your strips are going to be connecting pieces for our box, so miter/angle all the tabs as shown below.
- With the longest piece flipped so the folds are mountain folds and the longest section is closest to you, add glue to the RIGHT longest tab as shown below.
- With your "M" lines facing down, attach the left side of your "M"on top of your glued tab as shown.
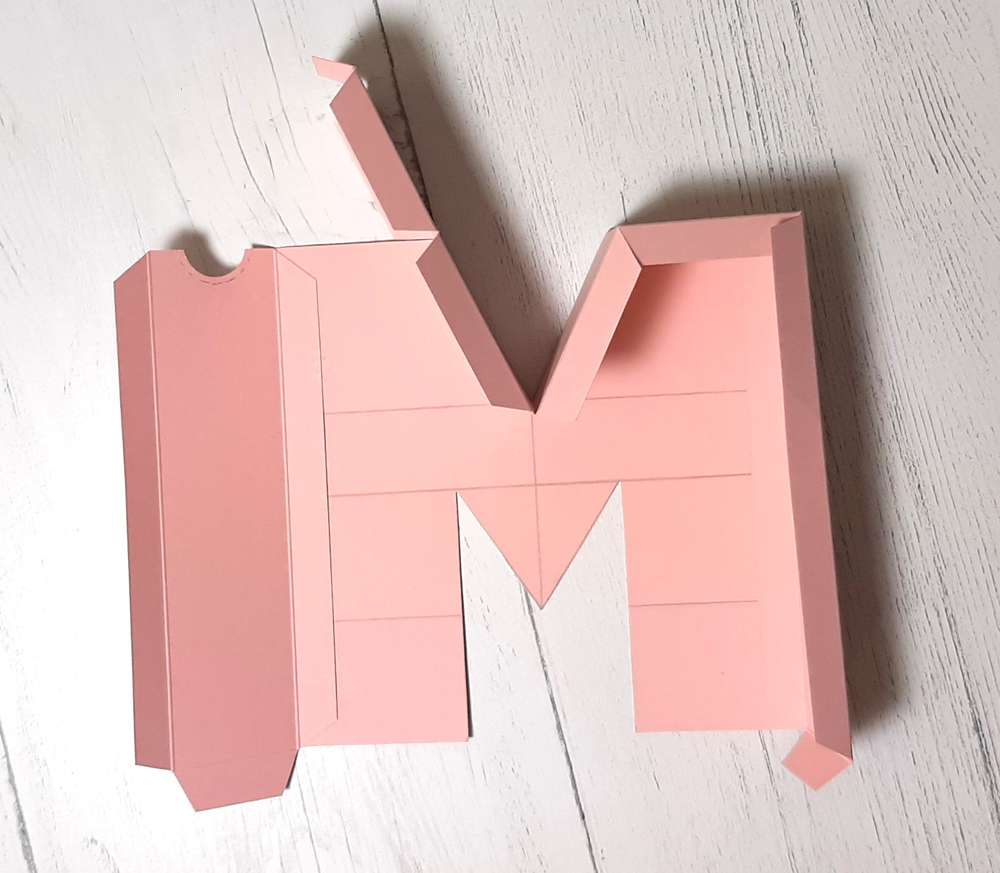
- Flip your piece over so you are seeing the lines on your "M". Add glue to the 2 tabs as shown.
- Attach those tabs, following the "M" shape.
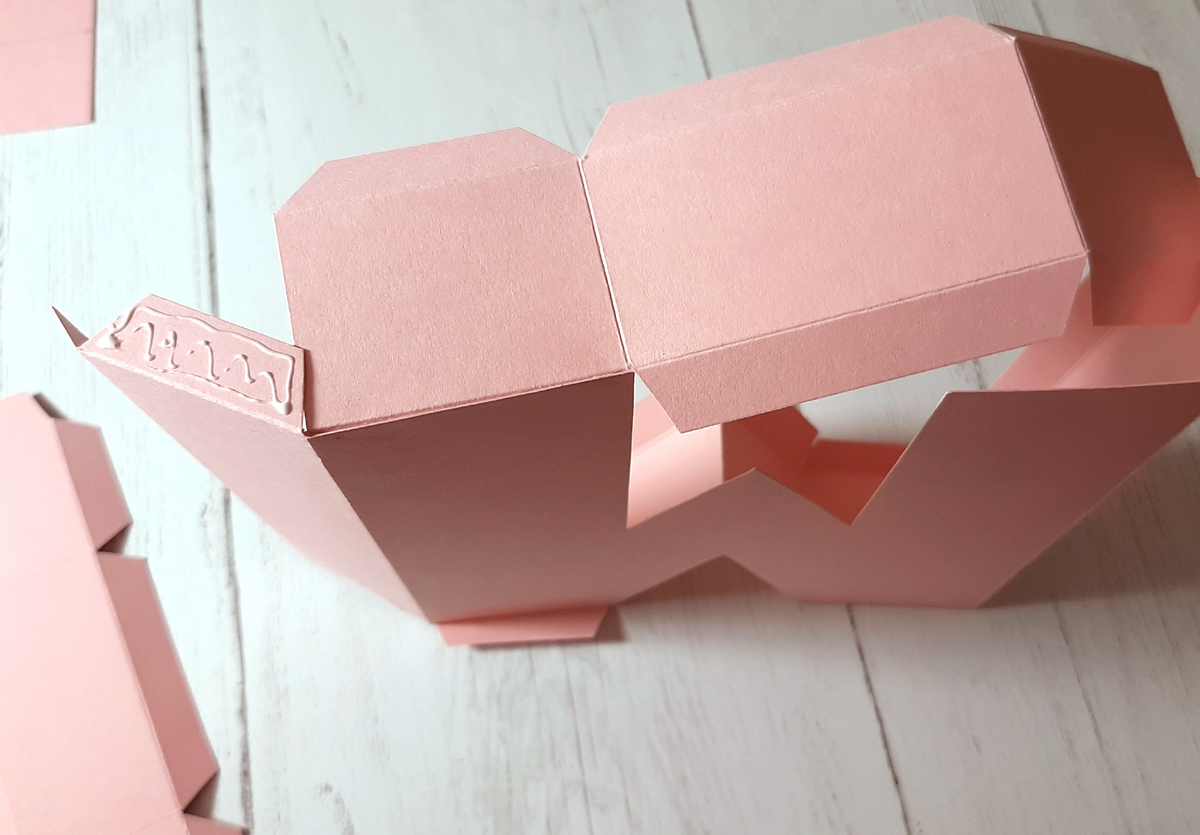
- Grab your 4-3/4" x 2-1/2" strip, and add glue to just the one tab as shown below. Add glue to the top of your 1/4" tab from the last piece you added and connect as shown.
- The part circled in red is going to be our LID that will open and close, so never glue that section!
- Grab the piece that looks like the photo below. We want to cut a HALF CIRCLE from the end without a tab. The smallest die in the Double Stitched Circles set is perfect for this! (You want your half circle cut-out to be less than the 1/2" tab of your lid.)
- With that piece turned so the folds are mountain folds, add glue to the LEFT tab as shown.
- Flip that piece over and attach to the left side of your "M" (with the circle cut out at top)
- Add glue to the underside of the bottom tab as shown below.
- Of the 2 pieces you have left, grab the one without an end tab and add glue to the tab as shown.
- Attach the tab (from the strip) to the bottom of your "M"
- Tuck in that shorter tab and glue to underside of the piece you just added.
- Add glue to the 2 tabs as shown below.
- Attach, following the shape of the "M" as shown.
- With the LAST strip...☺ ... (folds are mountain folds in photo) add glue to the 4 tabs as shown.
- Starting with the short end tab, connect to the last section you added and follow the shape!
- Glue down all the li'l tabs so they're not sticking up.... EXCEPT that top LID section! ☺
- Add glue to the whole top tabs - EXCEPT that LID section as shown below.
- Attach your other "M" piece on top! Congrats, your box base is complete! Now it's time to decorate!
CREATE A TEMPLATE OUT OF PATTERNED PAPER
- Magical Forest used here -
We are going to mark up the BACK SIDE of your pattern that you want showing on the front of your "M" - so be sure when you turn it to the back side, to mark which is the TOP so your pattern will be right side up! ☺
- Measure across the top and place a mark at 1-3/4", 2-7/8" and 4". Turn it 180 degrees and repeat.
- Connect your marks in vertical lines as shown.
- With your T-ruler, measuring from the TOP down, place a mark on the CENTER LINE at 2-1/4" and at 4" as shown below.
- Measure down on the 1-3/4" and 4"LINES and place a mark at 2-3/8" as shown.
- Draw 2 diagonal lines from the top of your 1-3/4" and 4" marks down to the 2-1/4" mark on the center line as shown below.
- Mark 2 diagonal lines from your 2-3/8" marks down to your 4" mark on the center line as shown below.
- CUT on thick black lines as shown below to get your "M" shape.
- Place that "M" on top of your 2nd patterned paper and cut out.
- You now have your front and back M's - attach to your box ☺
- Die-cut (2) each using the Open Lily and Side Lily dies. (I cut one of each from the Magical Forest paper, as well as the stems and leaves, and I cut one of each flower from plain blush cardstock.)
- Glue your stems and leaves to box. Use foam dots or foam tape to attach lilies.
- Die-cut stump with twig and attach with foam tape to the bottom left of "M" as shown.
- Stamp, color and cut out your ADORABLE images and attach with foam tape!
- Stamp (or emboss) your "Happy Mother's Day" stamp from A Good Day set and die-cut using the smallest Rounded Stitched Rectangles die.
- Fill with small wrapped candies or other treats! You might want to shake it as you add to fill in all the areas of the "M". ☺
COPIC COLORS:
Skin: E00, 000, 21
Cheek & lilies: R00, 20, 21
Hair: E33, 35, 25, 29
Blouse: E50, 53, 43, 31
Skirt: R20, 21, 22
Vase: BG00, 10, 11
Fox body: R11, 20, 21, E50, 51
Grey highlights: C1
Leaves: G00, YG03
We hope that you are inspired to try out your own creation with the amazing stamps and dies from La-La Land Crafts!
Make sure to join our LLLC FAN GROUP on Facebook for more ideas, inspiration and a general chit chat about our products!
Hoping you all have a great week of Creating
Kristine
Click on the buttons below to find us on these social media sites: