


Hello everyone! Welcome to Tutorial Thursday!
KRISTINE here with you today to share a fun fold card that is new to me, although I realize it's been around for a while. It's easy and quick to make and I thought it would be a fun way to display this adorable gnome in the Hey Gnomie clear stamp set, but feel free to substitute with any La-La Land Crafts stamps and dies you have in your stash!
Today's tutorial is: TRIANGLE POP UP CARD

PRODUCTS USED
*Additional Supplies Needed:
2 coordinating colors of cardstock
thick white cardstock
very thin, small magnets
strong double sided tape like Score tape
foam strips/tape
COPIC COLORS
Skin: E00, E21
Pinks: R81, 83
Blues: BG10, 11, 72
Greys: C3, 5, 7, W2, 3
Yellows: Y11, 21, E50
Greens: G20, 21, YG95

~ now for the tutorial you have been waiting for ~
CARD BASE:
*Diagram - red dashed lines = scoring; blue solid line = cutting

- Using the diagram above, CUT an 8" square from yellow (or your card base color) and SCORE it in half at 4", then turn 90 degrees and SCORE in half again.
- On the top half of card, SCORE from top middle score line diagonally down to the next score line where it meets to the edge of cardstock. Repeat on opposite side.
- On the bottom half of card, CUT on the score line from the bottom edge to the middle score line.
- Fold the bottom 2 flaps up, burnish score line, open back up.
- Fold the left half of card over the right half, burnish score line. Keeping it folded in half, Fold the top right corner down and burnish score line. Flip over and repeat with top left corner. Open card up and set aside.
DECORATIVE LAYERS:
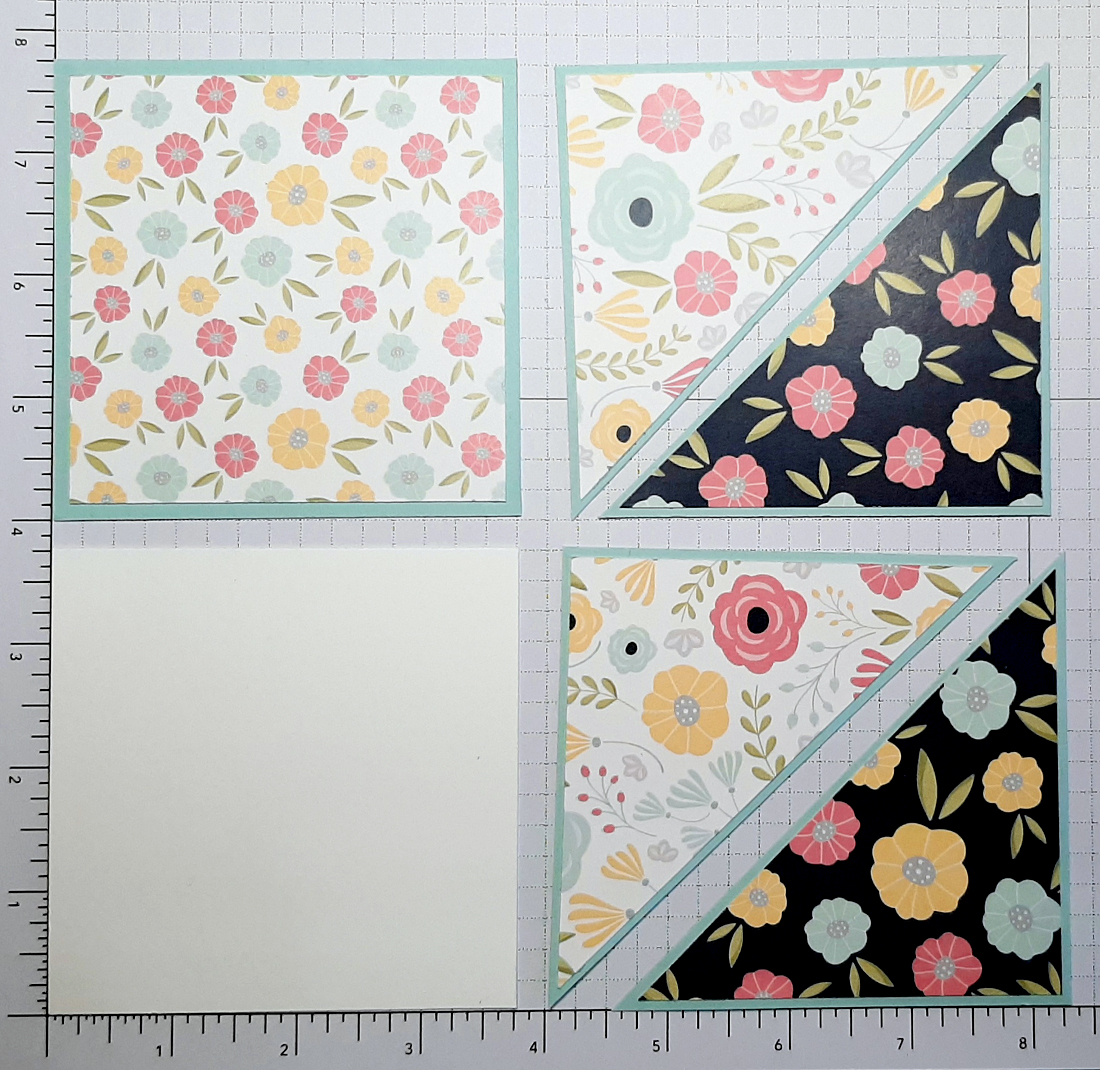
- CUT (3) blue squares that are 3-3/4". Leave one of the squares whole, and cut 2 of them in half diagonally. (see photo below)
- CUT (3) patterned papers that are 3-1/2" squares. Leave one whole (this will be the platform piece that your popped up mechanism will be on), and CUT the other 2 in half diagonally. (see photo below)

- CUT (1) piece of white cardstock that is 3-3/4" square. This is your 'hidden" square for writing a message, so if you'd like to stamp on it, do it now. I used the 1x stamped off method to add the ladybugs from this stamp set around in a border.
- Adhere the patterned square to the blue square, and the patterned triangles to the blue triangles. (see photo below)
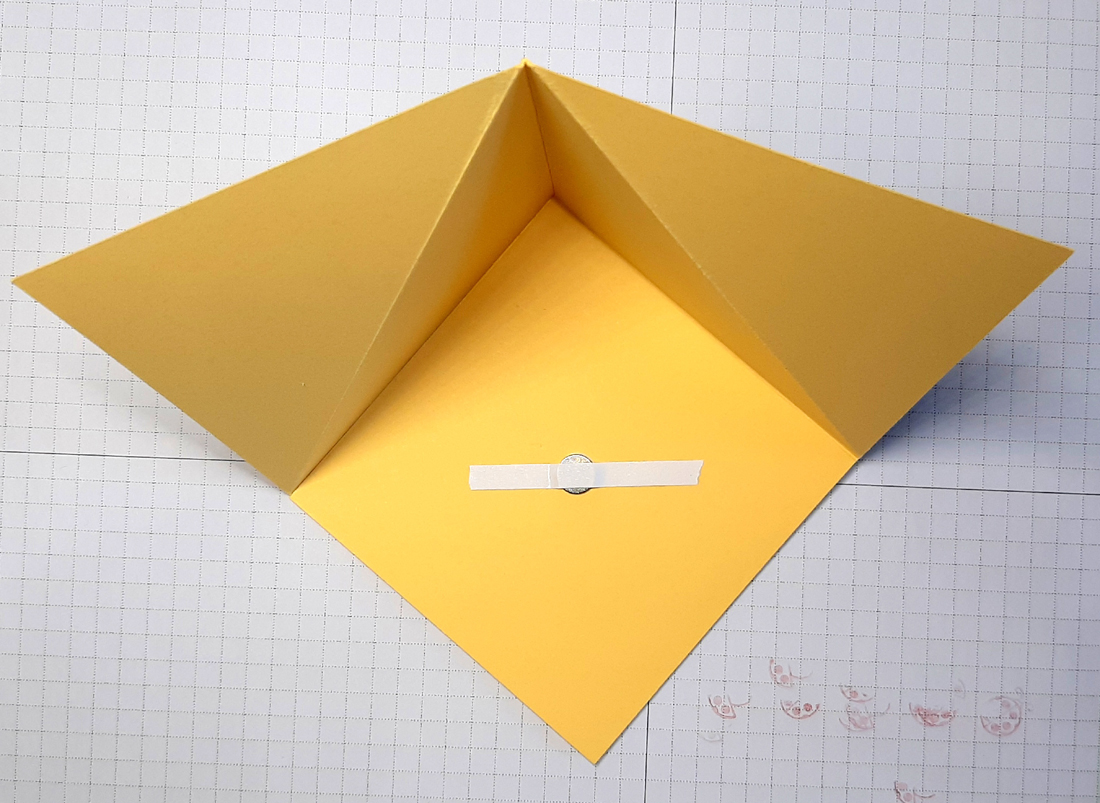
*Before we add our decorative layers, we need to add our magnets that will help hold the card in the folded position for display.
- Add a small dot of glue to the middle of the bottom left square of card base and add one magnet. Add a piece of Score Tape over it so it's held in place well.

*NOTE: for this next step, it's easier to write on your white square before adhering over the magnet, so if you are not ready to write your message, you can keep the backing of tape on (over the magnet), and skip to the next step. Just remember to store your white square with this card so you have it to write your message and attach it later! ☺
- Remove your tape backing (if there is any). Add tape or glue to the backside of your white square and adhere to the bottom left square over your magnet.
- Pull the bottom right square over the top of the left so it covers your white square completely. Hold it there while you place your 2nd magnet on top. The magnet should be attracted to the one under white square - if it detracts, turn it over.

- Add a dot of glue under the magnet and place a piece of Score Tape over it to hold it in place. (see photo below)
- Adhere your matted square to bottom right corner of card base, over your magnet (see photo below)
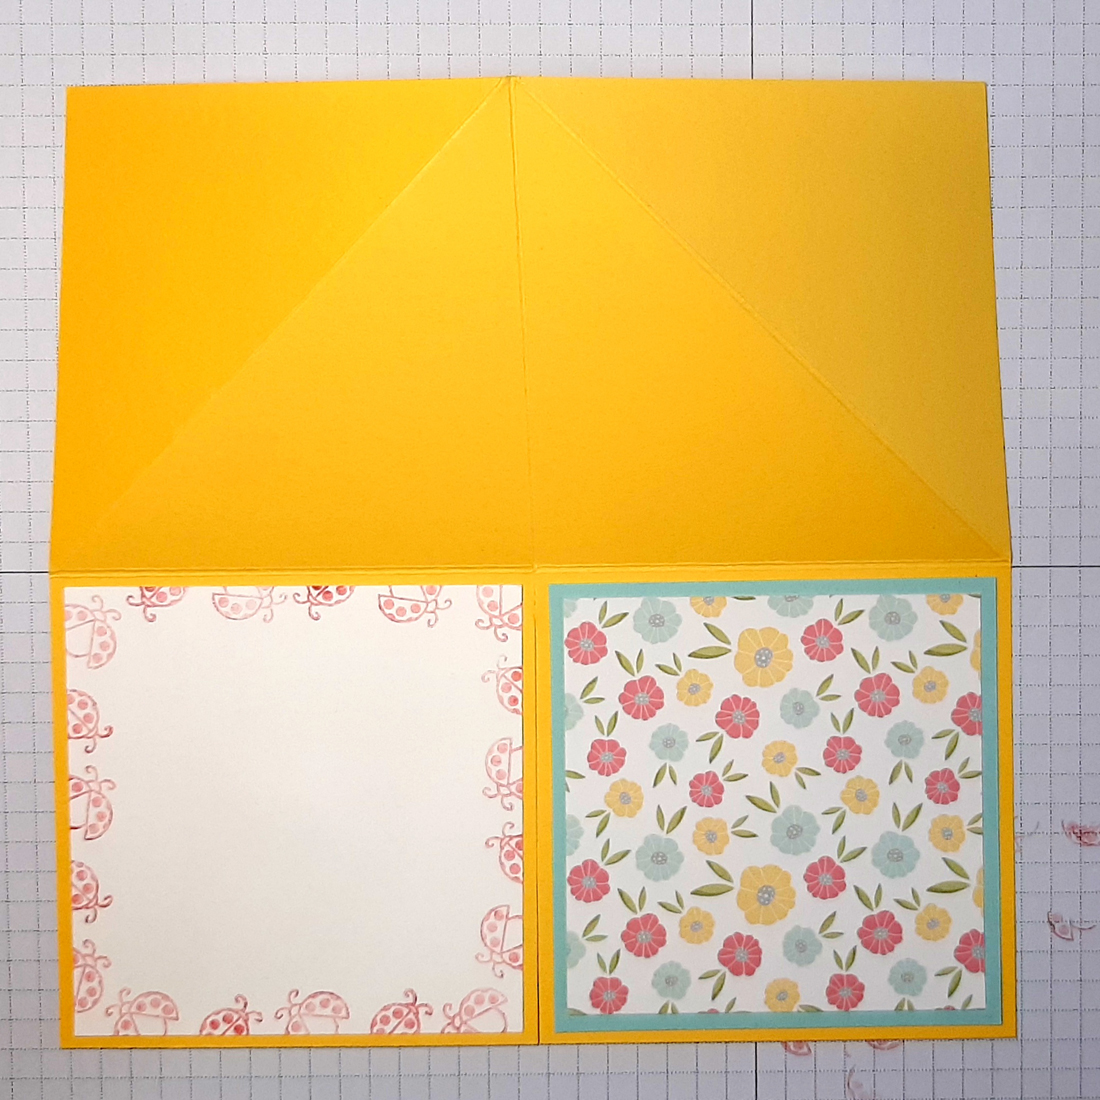
- Adhere your triangles as desired.

- CUT a piece of green cardstock to 5" x 2-1/2" and SCORE in half at 2-1/2".
- Place the 4th (from smallest) circle die over the fold line so that part of the circle is not cutting that fold line off (see photo below) Die-CUT it out.

- FOLD the top half of the circle in half and place (not attach) on card. To decide on placement of the easel, you'll need to have your gnome stamped and cut out.
- Stamp, color and cut out your gnome and other images. Stamp your sentiment and die cut with the smallest Double Stitched Dome die. Die cut the pink scalloped dome die and adhere the sentiment piece to it.

- Attach the bottom part of gnome to the top, lower half of green circle so that the bottom edges of both are lined up.
- With the gnome lying down (top of circle is flat, not propped up), place him on the card base so that his hat is close to, but not touching, the back 2 sides of card. Add glue or tape to underside of green circle.
- Add Foam Tape to back of sentiment piece and attach to front of card so that it covers a li'l bit of the bottom green circle. Prop the gnome up against the sentiment piece.

- Adhere your other stamped and fussy cut images with foam dots.
- Die cut Snapdragons and Side Daisy from white cardstock and color with Copics.
- *Optional: Fold the bottom of Snapdragons forward and add glue to bottom curved part only and adhere just behind the circle easel.
*NOTE: It's a li'l tricky with the Snapdragons doing it this way, but when card is folded flat, the gnome will go back to lie flat and the snapdragons will come forward. If this is too fussy, feel free to attach them to the back side panels instead! :)


Here is a close up:

and here it is flattened out:

To fold it for an envelope, first fold it in half LEFT to RIGHT. Then fold the 2 square flaps back, so it will look like this on one side and the message piece will be on the back. ☺

We hope that you are inspired to try out your own creation with the amazing stamps and dies from La-La Land Crafts!
Make sure to join our LLLC FAN GROUP on Facebook for more ideas,


inspiration and a general chit chat about our products!
Hoping you all have a CRAFT-astic week!
KRISTINE
Click on the buttons below to find us on these social media sites:


