Thursday, October 31, 2019

Get More From Your Border Dies


Hello, Everyone!

Nicolette here with you today to share with you a way to get more from your border dies.  I don't know about you, but I love finding different ways to use my crafty products.

Border dies are a fun way to create frames for your cards when you don't have the right size frame from another set or you just want something different.

You may think this isn't anything new, however, have you ever used the left over portion of the die cuts to enhance a border or to create a whole new border?

That is what I am going to share with you today.


CARDSTOCK MEASUREMENTS
White Cardstock - 5 1/2" X 11" scored at 5 1/2" to create card base.
White Cardstock - 4 7/8" x 4 7/8 to adhere border die cuts to create frame.
White Cardstock Layer - 5" x 5"
White Cardstock Layer - 4 3/4" x 4 3/4"
Green Cardstock Layer - 4 5/8" x 4 5/8"
White Cardstock - 4 1/4" x 4 1/4" (Background Stamp)
Green Cardstock - 4 1/2" x 4 1/2" (Scallop Circle Die Cut)
White Cardstock - 4" x 4" (Stitched Circle Die Cut)
Green Cardstock - (4) 1" x 6" Strips; (1) 1 1/2" x 6" Strip
White Cardstock - (1) 1 1/2" x 6" Strip; (2) 1" x 6" Strips
White and Green Cardstocks for Leaves

STEP 1
Using the Small Scallop Border Die, die cut 4 borders from the (4) 1" x 6" green cardstock strips.  You will not be using the actual border die cuts but rather the remaining portion you would normally throw away.  You can save the actual border die cuts for a later project.  I save mine in the packaging the die comes in.  Trim off the sides so the scallop portion is remaining.


STEP 2
To create a new decorative border, die cut the 1/ 1/2" x 6" green cardstock strip using the same Small Scallop Border Die.  Lay the die on the cardstock close to the edge and adhere in place using low tack tape.  Run it through your die cutting machine.  Remove die and set border die cut aside.  Turn the cardstock and adhere the die again to the cardstock using low tack tape, this time matching the scallops across from one another.  There should be about 1/8" between scallops.  Run through your die cutting machine again.  Remove die and set border die cut aside.  Once again, you will not be using the actual border die cut.  Trim sides of cardstock.  Now you have created a whole new border.


STEP 3
Using the white cardstock strips, you will repeat the steps above, however, this time you will be using the actual border die cuts except one that you will set aside.


STEP 4
Adhere scallop border die cuts to the newly made green border die cuts using adhesive of choice.


STEP 5
Adhere new borders to the white 4 7/8" x 4 7/8" piece of cardstock.  I like to lay my borders down first to figure out exactly where they need to go.  Adhere the top and bottom borders first then adhere the sides.  Trim edges at an angle (see photo) so they will not show past the next layers that you will attaching.


STEP 6
Stamp the basket weave background stamp from the Stress Free Zone Background Stamp Set using Pear Tart Memento Ink on the white 4 1/4" x 4 1/4" piece of cardstock.  Adhere to green cardstock and adhere to remaining white cardstock layers.  Adhere to card base using foam tape.


STEP 7
Die cut white cardstock using largest circle die from the Stitched Nested Circles Die Set.  Adhere newly created borders offset from each other using adhesive of choice.  Lay border strip over die cut circle to figure out where you would like it to go.  Do not adhere to circle yet!


STEP 8
Lay the stitched circle die over the border strip and adhere with low tack tape.  Run through your die cutting machine.


STEP 9
Die cut green cardstock using the largest scalloped circle die from the Pierced Scalloped Circles Die Set.  Adhere border to white circle die cut.  Adhere to green scalloped cardstock.


STEP 10
Stamp sentiment from the Filler Words - Cursive Clear Stamp Set onto white circle die cut.


FINAL STEPS
Stamp and color succulents from the Wood Planks Background Stamp Set.  These may be succulents, but I think they make beautiful flowers, too!  Trim around images leaving a 1/8" white border.  Die cut green and white cardstock using the Two Branches Die Set.  Adhere leaves offset from each other.  Adhere circle die cut to card using foam tape.  Adhere leaves and stamped images using foam tape.  Adhere silver rhinestones to border.


~ La-La Land Crafts PRODUCTS ~

~ Copics ~
R81 R83 R85 R89

~ Misc. ~
Low Tack Tape
Silver Rhinestones
Pear Tart Memento Ink Pad
Versafine Only Black Ink Pad

HAPPY STAMPING!

~ NICOLETTE ~

Tuesday, October 29, 2019

Club La-La Land Crafts October 2019 Kit Inspiration - Day 3


It is DAY 3 of inspiration for the new OCTOBER 2019 CLUB LA-LA LAND CRAFTS KIT!

Look at this adorable October 2019 Club Kit!


Click HERE for more information and to SUBSCRIBE.


To get this wonderful WINTER themed kit, you needed to subscribe by October 20, 2019! 

But, one of the perks of being in our Club is the option to add-on past kits!

Subscribe today to be set up for the November kit, then if you are interested in this on - you can request it as an add-on in December!

See our website HERE for more information and to sign up!


PRODUCT KIT $39.99
• Warm Hugs Marci
• Winter Piggies

• Mountains
• Lakes
(valued at $68.99)

STAMP KIT $19.99
• Warm Hugs Marci
• Winter Piggies

(valued at $24) 

DIES KIT $29.99
• Mountains
• Lakes
(valued at $44.99)


Click HERE for more information and to SUBSCRIBE.


• • • and now - INSPIRATION from our DESIGN TEAM • • • 


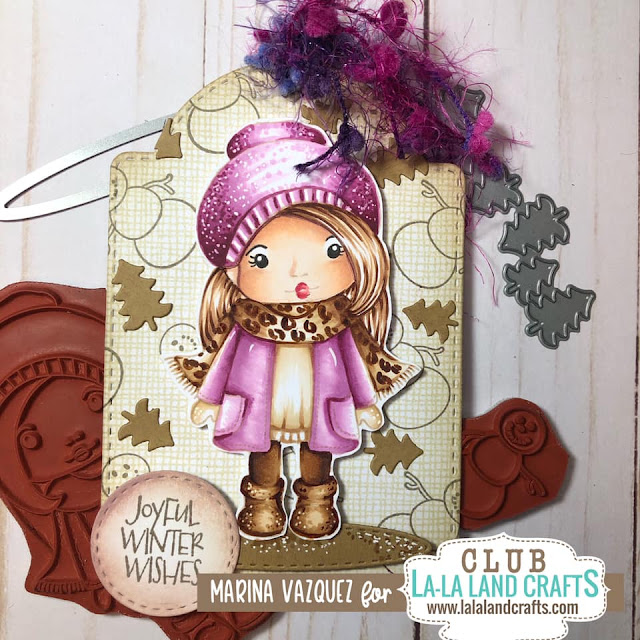
Card by MARINA


Additional Products:

Copic Colors:
Marci skin: E000, E01, E11, E04, R20
Marci hair: E51, E23, E49
Marci Blouse: T1, T3, T5,
Marci boots: T1,T3,T5 100
Marci tights: YR15, YR16, YR18

Card by MARINA

Additional Products:


Copic Colors: 
Marci skin: E000, E01, E11, E04, R20
Marci hair: E31 E35, E39, E49
Marci Blouse: E41, E42, E40
Marci coat and beanie: RV63, RV66, RV69
Marci boots: E41, E42,E44, E49
Marci tights: E47, E44
Marci scarf: E41, E 43, E47


Card by AMADOR
Additional Products:
Large Stitched Tags Die Set


Copic Colors:
Skin: E000, E00, E02, E01
Hair: E33, E35, E37
Piggies: R00, R22, R24
Clothing: R24, R27, R29, G06, G09, C0, C01, C03, E50, E51, E53
Snowman: BG10, BG000


Card by AMADOR
Additional Products:

Copic Colors:
Piggies: R00, R22, R24
Clothing: R24, R27, R29, G06, G09, C0, C01, C03, E50, E51, E53
Snowman: BG10, BG000


Card by AMANDA
Copic Colors:
Pig Skin R20, 21, 32
Red Jacket R27, 37
Green Jacket YG03, 13
Trim: BG23, 15
Skates: C1, 3
Sled E33, 37

Card by AMANDA

Copic Colors:
Skin: YR000, 00, E00, 11, 33
Hair and Boots: E15, 33, 37, 29, 47, 49, 79
Pants: B26, 29


How amazing are all the projects?! So many wonderful ideas! 


Are you ready to join the CLUB!

We would LOVE for you to be a part of our community!


Click HERE for more information and to SUBSCRIBE. 
~~~~~~~~~~~~~~~~~~~


Make sure to join our CLUB LLLC FAN GROUP on Facebook for more ideas, 

inspiration and a general chit chat about our CLUB!


Click on the buttons below to find us on these social media sites:


Monday, October 28, 2019

Inspiration Monday - Thanksgiving/Gratitude

Hi everyone, it's Cristena here with this week's theme and it is

Thanksgiving/Gratitude

Let's take a look and see what our Team Monday has created.

Card by LARISA
PRODUCTS:

Colored with Copics

Skin: E000, E00, E11, E04, R20
Yellow: Y21, Y26, R22
Orange: YR04, YR16, YR27
Hippo: W0, W1, W3, W5
Purple: BV000, BV01, BV12
Pink: RV10, RV11
Red: R24, R27, R56, R59
Blue: B24, B26, B29
Pig: R000, R11, R20

~~~~~~~~

Card by
ALLISON
PRODUCTS:
YG17, 23, 21, 03, Y23

~~~~~~~~

Card by JENNY
PRODUCTS:

Colored with Copics
C05, C07, C09, BG11, BG13, BG15, Y15, Y17, YR16, R05, R08, R29

~~~~~~~~

Card by ALEXANDRA
PRODUCTS:

~~~~~~~~


Card by BECKY
PRODUCTS:

Copic Colors:


Skin: E04, E11, E21, E00, E000, R20
Hair and Shoes: W10, E49, E77, E47, E57
Shirt :Y26, Y32, Y21
Skirt and Vest: B97, B95, B93, B91
Tights: Y22, YR30
Hedgehogs: E57, E25, E13


~~~~~~~~


Card by ROSA
PRODUCTS:

Colored with Copics

Skin: E000, 00, 11, 13, 21, 93, R01
Hair: E13, 15, 21
Clothes & Accessories: R20, 30, E18, 21, 33
Accessories: E18, 25, Y23

I hope you all have a wonderful crafting week.
Cristena

Friday, October 25, 2019

Inspiration Friday - Interactive Card

Hi everyone! It's MEG here as your host today. Today Team Friday has created some gorgeous projects for you that are all 3D in some way.

We hope that you enjoy this inspiration today!


star pin by MEG
* See Meg's blog for more information


Products:
Best Gnomies clear stamps

Endless Summer paper pack
Golden Sunset paper pack
  Small Stars die
Double Stitched Stars die
Grass Border die


Copic markers used:
skin - E04, 13, 11, 00, 000, 0000, R21, 20, 11
hair - E44, 42
gold - YR27, 24, Y26, 19
green - 100, G28, YG67, 14, 25
black - T7, 4, 1


card by TINA
* See Tina's blog for more information

Products:
Barefoot Luka
Halloween Die
Halloween House Add On Die
Rectangles Die


Copic markers used:
Skin: E50, E51, E53, E55, BG93, BG90
Hair: E49, E25, E11
Flannel: R89, R29, R24, R32
White Shirt: W5, W3, W1
Jeans: B97, B95, B93, W3
Hills and Trees: YG03, YG17, YG67, W1
Sky: W3, W1, R11


card by NICOLETTE
* See Nicolette's blog for more information


Products:
Batty For You Clear Stamp Set
Scalloped Rectangles Die Set
Pierced Scalloped Circles Die Set
Double Stitched Circles Die Set
Haunted Hill Border Die
Heart Wreath Die Set
Small Stars Die Set
Cobweb Die


Copic markers used:
W00 W0 W1 W3 W5/B91 B93 B95


card by TAMARA
* See Tamara's blog for more information


Products used:

Hippo Holidays Clear Stamp Set
No Peeking Clear Stamp Set
Birch Trees Die
Large Stitched Tags Die
Winter Branches Die
Poinsettia Wreath Die
Merry Christmas Die
Postage Stamps Die
Stitched Ribbon Die


Distress inks used:
hippo: hickory smoke, black soot
bow, box: seedles preserves, black soot
teal: broken china


card by SANDRA
* See Tamara's blog for more information


Products:
Birds of a Feather clear stamp set
Summer is Here layering stencil
Golden Sunset Paper Pack
Monstera Leaf Die
Tropical Leafs Die
Luggage Tag Die
Suitcase Box Die
Scalloped Rectangles Die
Hibiscus Die
Palm Leaves Die


Copic markers used: C00/1/3/4/7, YR16, Y11/13/15/18/38, B35
 
Have a great week! See you next time!


Click on the buttons below to find us on these social media sites:


Thursday, October 24, 2019

Tutorial Thursday- How to Make a Pop Up Card

Hello Everyone!
Larisa here and I'm so excited to share a fun tutorial on how to get the most out of your dies by using our SUITCASE BOX Die to make a POP UP CARD!    


To complete this project, you will need:
- Heavy white card stock.  I'm using Neenah Smooth Class Crest White 110lb.
- Coloring medium. Copic Markers I used are listed at the end of tutorial.

Let's get started:

Step 1:  Use the Suitcase Box Die to cut two pieces from heavy weight card stock. 
Then cut a rectangle from the same white card stock 4.5x1 inch and score each side at 0.5 inches.   


Step 2: Trim off the bottom on both panels at the score line.  On one of the panels trim off the little squares so that it looks like the picture below.  


Step 3: Fold on the sore lines and insert the small rectangle piece that you previously cut.  Adhere towards the top like the picture shown below.  


Step 4. Set the box pieces aside and use the stitched rectangle pieces from the die set to cut several pieces of patterned paper to decorate your box.  


Step 5: Adhere stitched rectangle pieces to the outsides and inside of panel pieces. Use the picture below for a reference.  


Step 6: Adhere the front panel to the back panel to create a pop up card.  When finished, it should look like a box with the bottom cut out.  You can press the card flat to mail and pop it up to display.  


Step 7: Decorate your pop up card with stamped images, sentiments, and die cuts.  


Images and diecuts colored with Copic Markers:
Penguins: C0, C1, C3, C5, C7, C9, YR15, YR28, R20
Blue: B24, B26, B29
Teal: BG10, BG11, BG13
Purple: BV000, BV01, BV13
Green: YG21, YG25, YG67
Pink: RV21, RV23, RV25
Sand: E30, E31, E35
Yellow: Y21, Y26

Thank you so much for stopping by!  Have a great day!

Hugs!
-Larisa