Hello everyone! Welcome to Tutorial Thursday!
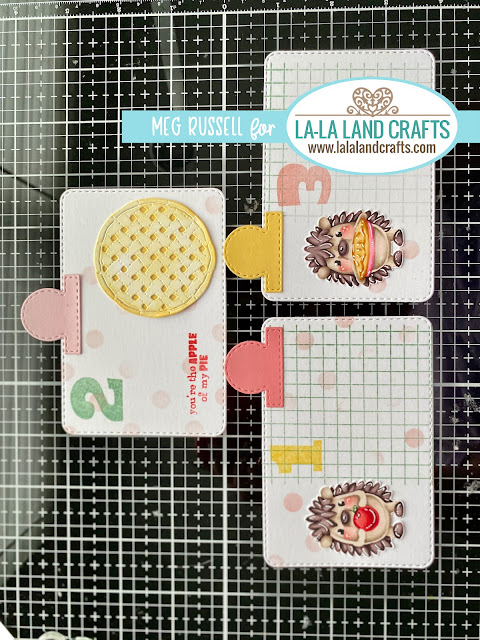
MEG here with you today to share a tutorial with you! I envisioned this project to gift a set of recipe cards for a single recipe, but you can easily make each card stand independently. And the more cards, the merrier! I didn't write my recipes on these samples, but don't forget to do that before gifting!
Today's tutorial is: RECIPE CARD GIFT
PRODUCTS USED
On Point Clear Stamp Set
Bold Numbers Clear Stamp Set
Graph Paper Rubber Stamp
So Many Dots Layering Stencil Set
Rounded Stitched Rectangles Die
Notebook Pages Die
Apple Pie Die
Bold Numbers Clear Stamp Set
Graph Paper Rubber Stamp
So Many Dots Layering Stencil Set
Rounded Stitched Rectangles Die
Notebook Pages Die
Apple Pie Die
COPIC COLORS
red - R59, R29, R24, R27, R22
green - G28, YG17
pie - YR24, Y26, Y21, RV25, RV23
hedgies - E79, E77, E74, E71, R32, R30, R00, E44, E43, E42, E41
CUTTING and SCORING
3 - large white rectangles from the Rounded Stitched Rectangles Die
green - G28, YG17
pie - YR24, Y26, Y21, RV25, RV23
hedgies - E79, E77, E74, E71, R32, R30, R00, E44, E43, E42, E41
CUTTING and SCORING
3 - large white rectangles from the Rounded Stitched Rectangles Die
3 - different colored round tabs from the Notebook Pages Die
1 - Apple Pie Die in white
1 - Apple Pie Die in white
~ now for the tutorial you have been waiting for ~
First, die-cut your shapes as indicated above. Color and cut out your hedgehogs.

Second, stamp some cards with the Graph Paper Rubber Stamp, and stencil with the So Many Dots Layering Stencil Set. The best part about this is that the more imprecise you are, the better. It will all look good in the end. Color your pie with some gold ink, and glue it to a circle in your chosen pie color (gold - apple, red - cherry, blue - blueberry, etc).
Third, using your pie and hedgehogs to establish placement, stamp colorful numbers onto your cards. I chose 1-2-3 to refer to steps in making my apple pie, but maybe your 1-2-3 will be for three unique pies! Glue down hedgehogs and pie (I didn't use dimensional foam because I want my cards to be flat for packaging).
Fourth, position and glue down the top tabs so that when you put the packet together, the top tabs create a series of colors next to one another.
Voila!
We hope that you are inspired to try out your own creation with the amazing stamps and dies from La-La Land Crafts!
Make sure to join our LLLC FAN GROUP on Facebook for more ideas,
inspiration and a general chit chat about our products!
Hoping you all have a great week of Creating
ALLISON
Click on the buttons below to find us on these social media sites:


No comments:
Post a Comment