Alexandra is here today with a Thursday Tutorial, and we will be making a gift card box using some of the La-La Land Crafts stamps, dies stencils.

Marci with rose stamp
Wood Planks stamp
Water Ripples Stencil
Scalloped Rectangles Die
Nested Frames Small Die
Nested Frames Large Die
Double Stitched Circles
Cherry Blossom Fan Die
Stitched Slots Die
Spring Flourish Die
Shabby Flourished Die
Key Holes Die
Heart Handles Die
Before we begin, I would lie to suggest using heavyweight watercolor paper (140 lb) for the base of the box, and card stock which is not less than 65 lb for the rest of the parts.
For creating the base of the box, you will need two pieces of heavyweight watercolor paper measuring 7.5" X 7.5". You will score each of those at 1" from all the four sides, cut the score lines out as shown at the picture below, as well as cut off two little squares on of the paper pieces (see the pic below for the reference), and apply double sided adhesive to the square flaps and to the long flap of one of the paper bases.

As you can notice, I've rounded the corners on one of the flaps of the squares, it is an optional step. But I think that once our box is assembled, its lid will look nicer this way.

Next, measure each one of the panels and embellish with the designer paper of your choice as follows. If you are using a directional paper, please mind how you glue it down. You can enlarge the picture below, to see where the pattern of the paper should be facing.

For easier opening of the box in future, I wanted to create a notch on the lid. I've used the smallest circle from the set of the Double Stitched Circles dies.


Now we are ready to connect together both of the large square parts. Remove the backing from the double sided tape, and glue the part with the notch on top of the other piece, making sure that you don't overlap the score line, otherwise your box will not close properly:


Reinforce now all the score lines, especially those of the small square flaps on the sides:


Try to form square angles to get the aligned and nice looking sides like these:

Repeat the step for the second pair of the little square flaps:

Now, let's assemble the lid. To make sure that it will close properly on top of the box's base, I suggest that at the current stage you already close your box, and while holding the corner with your fingers, remove the backing off the score tape and glue it down to the longer side flap of the lid, kinda wrapping it around the shaping the corner of the lid:


The box is now ready and should look like this:

Let's make the insert for the gift card now. I started with a piece of a card stock, measuring 5 3/8" X 11" and scored it at 3.5" >> 4.5" and 6" on the long side. each one of the resulting panels was embellished them with the designer paper (on one side only):

For cutting the slot for the gift card I used the die which is now one of my favorites - the Stitched Slot die. Make sure that you cut the slot on the wider middle section. Use a piece of a washi tape or a post-it note paper to secure the die in place while running it through your die cutting machine:


Apply scor tape to the back of insert as shown:

Take the backing off the scor tape from the smaller panel of the insert and glue it down to the box's base like so:

Then do the same with the second panel, gluing it down to the lid:

And now you can start to have even more fun, embellishing your ready made box. I suggest that you embellish the inside first. And as far as the embellishment on the inside of the lid are concerned, don't glue them down any lower than about 3" from the top with the notch, as when the box will be closed and the gift card will be inside, they might be smashed by the card, as it will be moving there :))
This is how I embellished the inside of the lid on my box:

I decided to use one of my favorite stamps with Marci - Marci With Rose. She is colored with Copics:
Skin: E04, E11, E00, E000
Hair: E39, E37, E35, E31
Outfit: C3, C2, C1, C0
RV09, RV04, RV02, RV00

I've made a little message card for the inside of the box too, and for creating a background on the inside of the card (rather than keeping it plain), I've used the "Water Ripples" stencil and the flowers and sentiment from the "Wood Planks" stamp set:

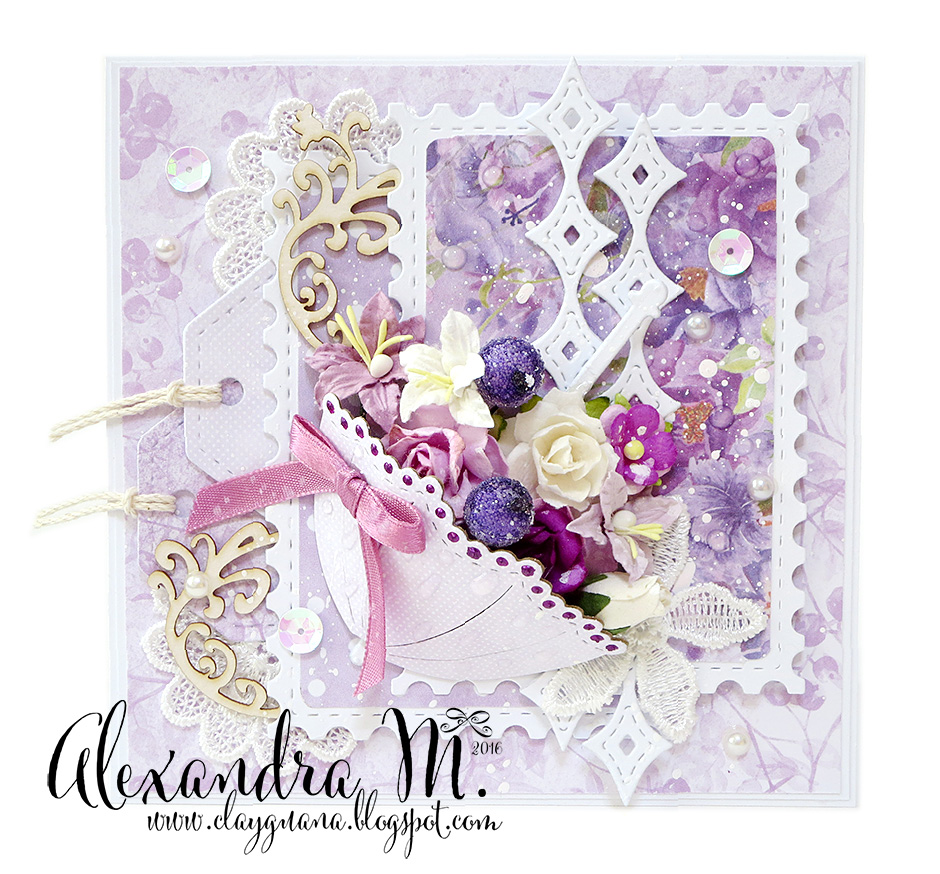
And here is what I've got as a result of this tutorial:


If you have any questions, let me know.
Thanks for watching and have a great Thursday!