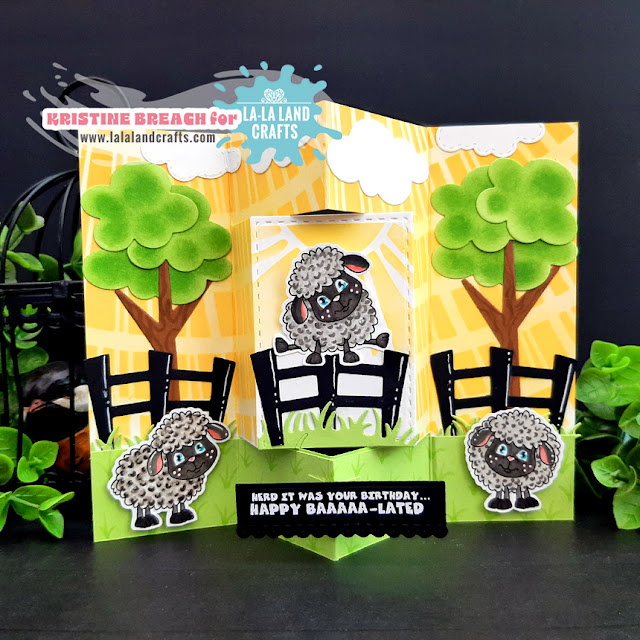
Hello everyone! Welcome to Tutorial Thursday!!
Kristine here to share a fun fold card tutorial with you!
Today's tutorial is: Pop Out Gatefold Card
I created this card for a color challenge on SplitcoastStampers #CC995
Granny Apple Green, Crushed Curry, and Black.
I chose to use the March 2024 KOTM (Kit of the Month) for this cute scene card.
This kit is available as an add-on kit to subscribers starting with their 2nd month.
Here's a top down view
PRODUCTS:
COPIC COLORS:
W2, W3; W5; BG45R20, 21, 00
W2, W3; W5; BG45R20, 21, 00
~ TUTORIAL ~
1. Cut a card base at 8" x 5-1/2"
2. With long edge at top, score at 2", 4" and 6" as shown below
4. Move left edge of cardstock to 4-1/4" and repeat the cut between the 2" and 6" score lines.
5. Turn your cardstock once again so the long edge is at top and score JUST BETWEEN the cut lines at 3" and 5" as shown.
6. Fold and burnish the score lines as shown below. The 2" and 6" scores are valley folds, the 3", 4" and 5" are mountain folds.
*Do not fold the middle 4" score line between the cut lines. That is where we will attach a layer to keep it flat.
7. I flattened out my base and stenciled sun rays from the Rain & Shine stencil set with Wild Honey Distress Oxide ink.
8. Next, I cut a strip of green cardstock at 1-1/4" x 8" and scored it at 2", 4", and 6".
9. I die cut the grass from the March 2024 KOTM and cut (2) sections and attached behind the 2 outer sections. I also added grass patches with a Copic marker. I attached this to the lower edge of card.
10. I die cut the 3rd largest Double Stitched Rectangles set and stenciled the Summer is Here stencil to the top and added a section of the grass die from the kit. (sorry for the blur on this next photo)
11. I die cut the fence, trees and clouds and attached as shown.
12. To add a pop out sentiment that will fold flat, I cut a piece of green cardstock at 1/2" x 2" and scored it at 1/2", 3/4", 1-1/4", and 1-1/2" and folded/burnished as shown below.
13. Add Scor Tape (or glue) to the outer 1/2" tabs
14. Attach so that the folded edge of each outer flap is bumped up against each side of the 4" score line on the lower part of card as shown.
15. Now, you can attach your sentiment onto the flat part of that mechanism.
Done!
This card can fold up a few different ways to fit into an A2 envelope.
• You can flatten the whole card, then fold IN the 2 outer panels like a gatefold.
• You can fold the 2 outer panels backwards into a gatefold.
• You can squeeze the 2 outer panels together so that the 4" score line pops up and then you can fold the top fold to the right (or left) and the bottom the opposite way. ☺
Thanks so much for visiting!
We hope that you are inspired to try out your own creation with the amazing stamps and dies from La-La Land Crafts!
Make sure to join our LLLC FAN GROUP on Facebook for more ideas,
inspiration and a general chit chat about our products!
Hoping you all have a great week of Creating
♡ Kristine
Click on the buttons below to find us on these social media sites:
inspiration and a general chit chat about our products!
Hoping you all have a great week of Creating
♡ Kristine
Click on the buttons below to find us on these social media sites:


No comments:
Post a Comment