


Hello everyone! Welcome to Tutorial Thursday!
MEG here with you today to share a tutorial with you!
Today's tutorial is: Congrats gift tag
Today's project is a Congrats gift tag for new baby - but substitute a different sentiment, and you've got yourself a last-minute Mother's Day gift tag.
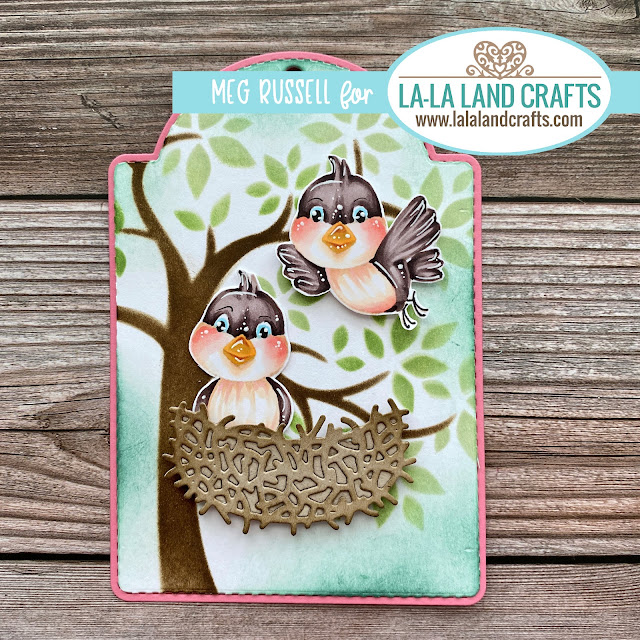
Here is a finished look at today's project.

PRODUCTS USED
Tweet Tweet Clear Stamp Set
Tree in Bloom Layering Stencil Set
Bird Nest Die
Large Birdhouse Die
Large Stitched Tags Die
Stitched Ribbon Die
Tree in Bloom Layering Stencil Set
Bird Nest Die
Large Birdhouse Die
Large Stitched Tags Die
Stitched Ribbon Die
PAPER AND DIE CUTS
1 - tag (largest) in white
2 - bird nests in light brown
3 - bird eggs in cream
1 - tag (largest) in white
2 - bird nests in light brown
3 - bird eggs in cream
1 - tag (largest) in pink
3 - Large Birdhouse hearts in pink
1 - stitched ribbon (medium) in white
COPICS
bird chests and cheeks - E53, E51, R22, R20, R00
bird feathers - E79, E77, E74, E71
bird beaks - YR27, YR24, Y26, Y38
3 - Large Birdhouse hearts in pink
1 - stitched ribbon (medium) in white
COPICS
bird chests and cheeks - E53, E51, R22, R20, R00
bird feathers - E79, E77, E74, E71
bird beaks - YR27, YR24, Y26, Y38

~ now for the tutorial you have been waiting for ~
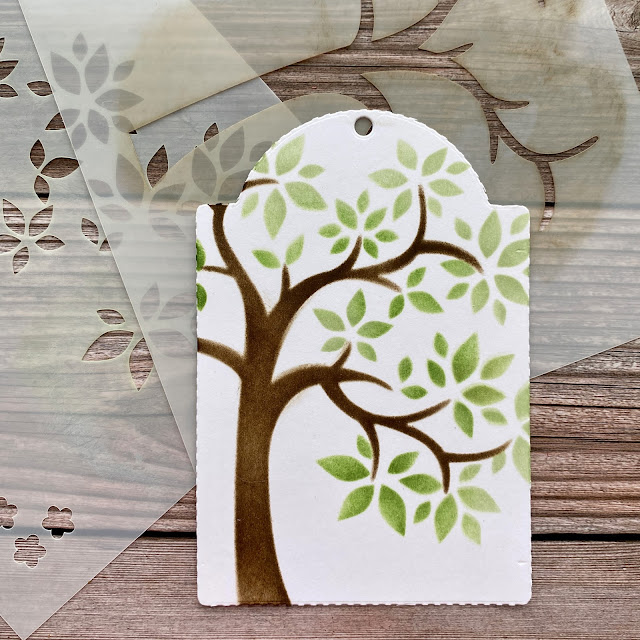
STEP 1. Cut off the stitched edge from the white tag.

STEP 2. Position and stencil the Tree in Bloom Layering Stencil. I did the trunk first, and then the leaves.
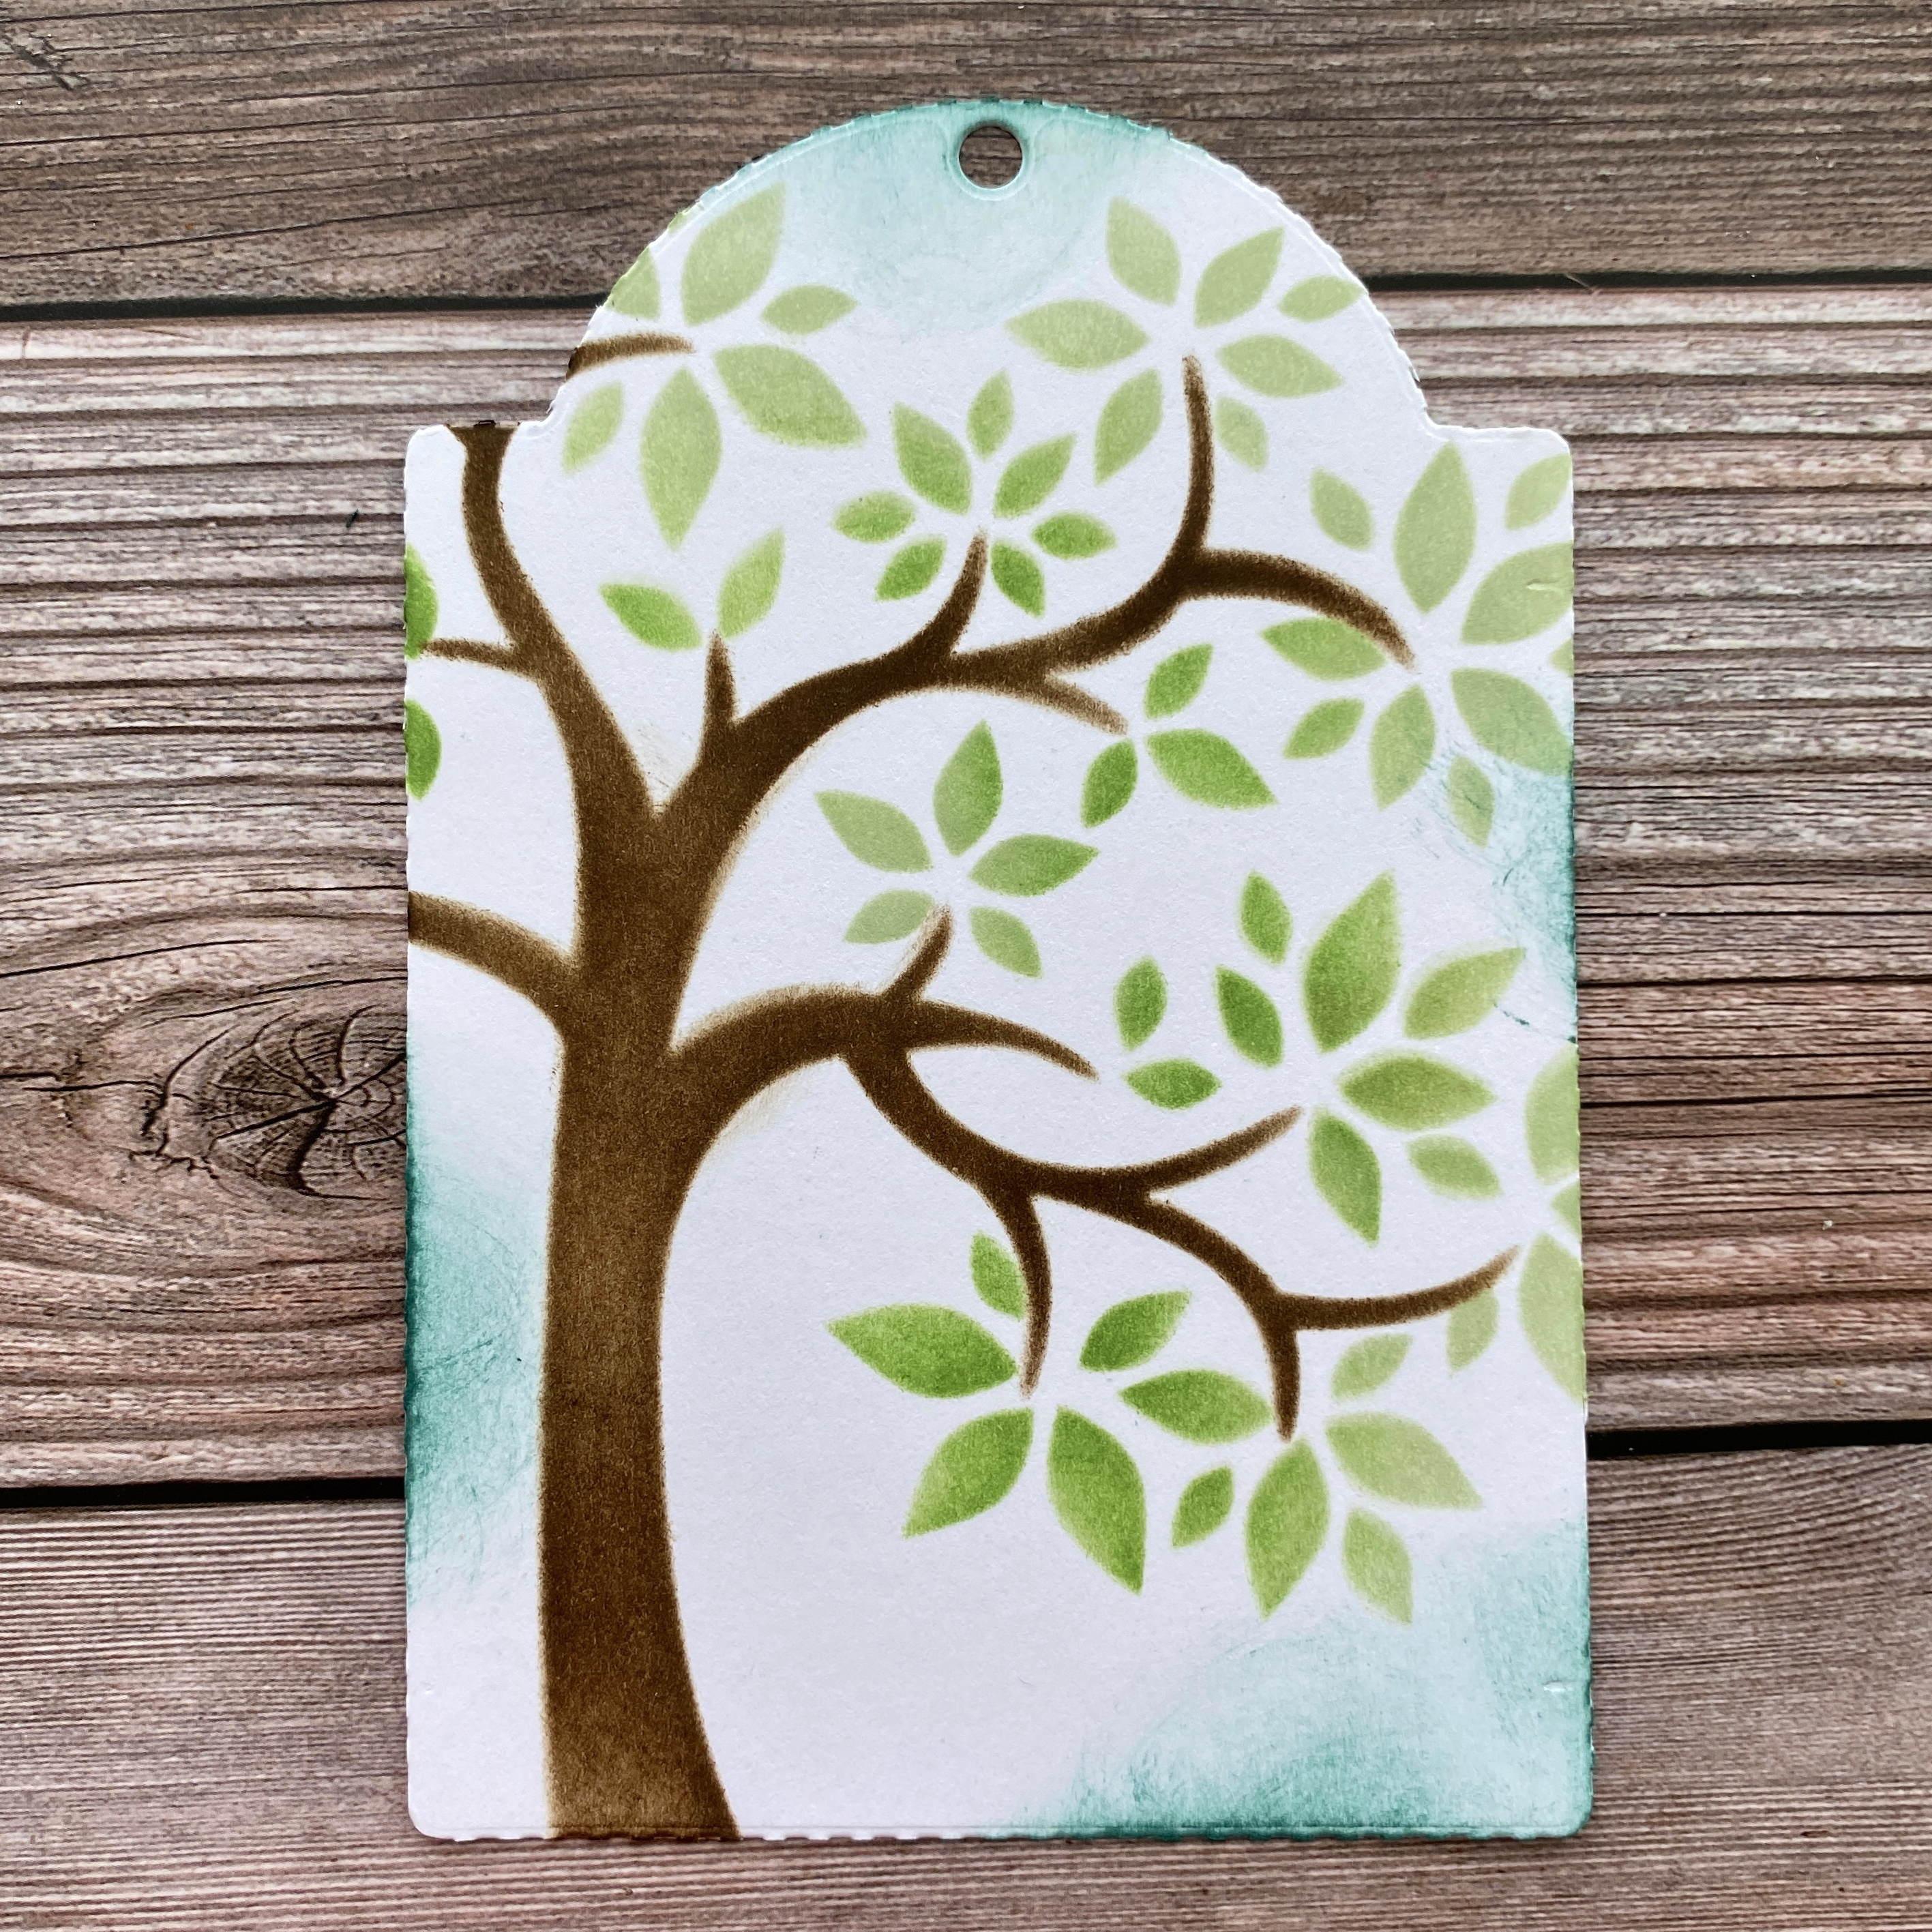
STEP 3. Sponge blue ink onto some edges. I use dark and light inks. I apply the dark blue first, then blend it out with the light blue. Pictured here is the first step - dark blue.

STEP 4. Glue this piece to the pink tag you cut out.
STEP 1. Cut off the stitched edge from the white tag.

STEP 2. Position and stencil the Tree in Bloom Layering Stencil. I did the trunk first, and then the leaves.

STEP 3. Sponge blue ink onto some edges. I use dark and light inks. I apply the dark blue first, then blend it out with the light blue. Pictured here is the first step - dark blue.
STEP 4. Glue this piece to the pink tag you cut out.

STEP 5. Sponge one of the nests you cut out and remove the little pieces from it. Leave the other nest as is.

STEP 6. Position the nest and birds on the tag, and glue down.

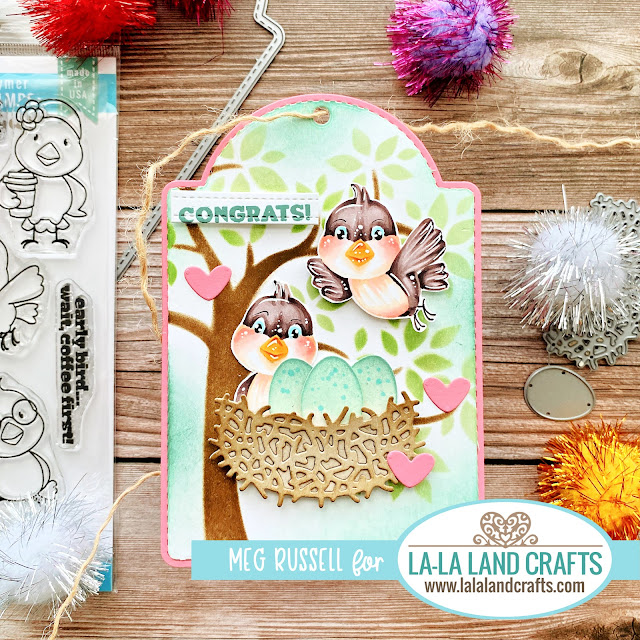
STEP 7. Color the eggs with dark and light blue ink. Adhere eggs and hearts to design.

STEP 8. Complete your design by stamping and adhering sentiment of your choice!


We hope that you are inspired to try out your own creation with the amazing stamps and dies from La-La Land Crafts!
Make sure to join our LLLC FAN GROUP on Facebook for more ideas, inspiration and general chit-chat about our products!
Hoping you all have a great week of Creating
Meg :)
Click on the buttons below to find us on these social media sites:
No comments:
Post a Comment