WELCOME to DAY 17 of our annual
24 DAYS OF CHRISTMAS TUTORIALS ADVENT EVENT!
24 DAYS OF CHRISTMAS TUTORIALS ADVENT EVENT!
Jenny here sharing with you today my tutorial
- FLOATING CARD -
PRODUCTS:
PAPER CUTS & SCORING
Black Card Stock:
8 x Panels 5 5/8inches x 1 7/8inches
1 x Panel 3 5/8 x 1 7/8
1 x Scalloped Square Largest Die
1 x Ornament Frame
1 x Set of 3 Presents
2 x Lamp Posts
2 x Lamp Lights 1 each direction
Green Card Stock:
1 x Base 11x 5 3/4 and Score at 2, 4 and 4 1/2 Inches and do the same from the opposite End.
1 x Floating Card 4 1/4 inches x 8 1/2 inches Fold in Half
1 x Set of 3 Presents
Red Card Stock:
3x Red Large Bows
1 x Set 3 Presents
White Card Stock:
3 x Ornament Frames
Acetate:
1 x Ornament
Gold Card Stock:
1 x Ornament Top
Gold Snowflake Patterned Paper:
1 x Ornament
White with Trees Paper:
2 x 5 1/2 x 1 3/4 inches
Green with Gold Printed Patterned Paper:
2 x 5 1/2 x 1 3/4 inches
1 x 3 1/2 x 1 3/4 inches
Green With Trees Patterned Paper:
4 x 5 1/2 x 1 3/4 inches
Green with Stars Patterned Paper:
1 x Largest Square Die Cut
1. Using your Green base that you have scored as in the picture also
cut in 1 inch top and bottom and cut that centre piece out.
2. Create your Mountain and Valley Folds as in the Picture.
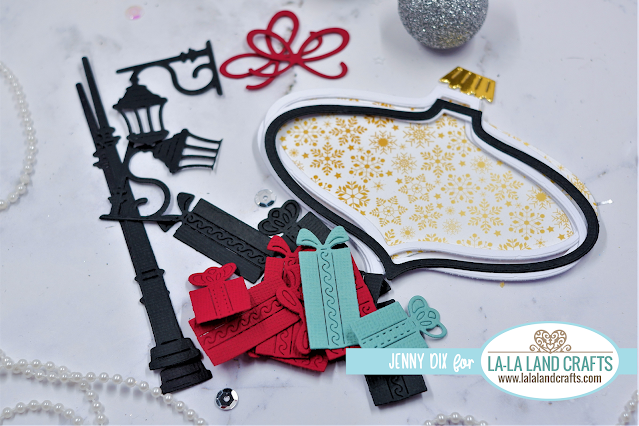
3. All your Black and Patterned Paper Panels cut out.
8. Then lay base flat tape the Floating Card inside the 2 centre score lines and centre
in between top and bottom panels as well.
9. So when it stands up it is floating and doesn'tlook like it is attatched to the Base.
10. I then Created A Shaker using all the Ornament pieces.
The Presents I mixed and matched for the sides of the card.
I then Decorated my Card with all the pieces left.
Voila and it's done.
---------------------------------------
|
|
|
|
|
|
|
|
|
Thank you so much for visiting today!
Please come back tomorrow for DAY 18 TUTORIAL!
Please come back tomorrow for DAY 18 TUTORIAL!
Jenny


.JPG)
.JPG)
.JPG)
.JPG)
.JPG)
.JPG)
.JPG)
.JPG)
.JPG)


What a great idea in making a beautiful floating shaker ornament card! Thank you in showing
ReplyDeletehow to assemble this card! 😊
This is such a fun card and I can see so many possibilities even beyond Christmas.
ReplyDeleteWhat a clever design. I have never seen this before. And I like the ornament and lamp posts. A classic Christmas look. So pretty.
ReplyDeleteI love the shaker ornament and the floating card format! Great project! The presents and street lamps are awesome dies, and I really have my eye on the beautiful ornament die too!
ReplyDeleteAmazing a floating & a shaker card! I can’t wait to try making this card. Thanks
ReplyDeleteSo far, I think this one has been my favorite!! Love it!! Thank you for sharing!!
ReplyDeleteHugs,
Karen C
Amazing card! ❤️
ReplyDeleteThis card is so beautiful, it's a whole little scene, I ❤️❤️
ReplyDeleteJenny this is totally COOL!!! Thank you so much for sharing the stats on the scoring!!! Clever and so awesome!! <3!
ReplyDeleteI love that ornament die! And I am awestruck with how this came together...that bow is spectacular! Thank you for sharing
ReplyDeleteThis is adorable. I love making different cards instead of just the plain old A2 standard card. Loving all of the tutorials!
ReplyDeleteSo clever and easy to follow directions.
ReplyDeleteLove it and great directions.
ReplyDeleteLovely card! Easy instructions to follow. Thanks for sharing.
ReplyDeleteWow this is so pretty!!
ReplyDeleteVery pretty
ReplyDeleteBeautiful card!! Love the design!
ReplyDeleteThis ornament die has been so versatile, I love it!
ReplyDeleteBeautiful card! Looking forward to making this card.
ReplyDeleteWhat an amazing card! I just love the design - you all are soooo TALENTED
ReplyDeleteI love this design and your tutorial was excellent
ReplyDeleteSo pretty Jenny. I love that you made a card that you can stand up and display.
ReplyDeleteBeautifully magical...floating shaker. I showed my granddaughter and this is her favorite. Thanks for directions.
ReplyDeleteamazing
ReplyDeleteSuch a fun design! I love your paper choices too!
ReplyDeleteBeautiful card!!!
ReplyDeleteJulie Zilka: I have never seen a card like this anywhere!! This is very creative and such an interesting layout!! Very Beautiful Card, once again!!❤️
ReplyDeleteThanks for sharing the pattern. It's a beautiful shaker card.
ReplyDeleteLove this it's so cute can't wait to make it..
ReplyDeleteGorgeous card Jenny. Love all the details.
ReplyDeleteVerry pretty, Dina
ReplyDeleteOhhh how amazing- i love this card base! Lovely result
ReplyDeleteLove from The Netherlands Marjolein
Great design, can’t wait to try it
ReplyDeleteI love to watch and learn from such creative people.
ReplyDeleteLove this card layout. I made three just need to finish doing a little bit of decorating Julie Lucian
ReplyDeleteThis is an interesting concept for a card and I will have to try it sometime. It’s beautiful and you did a fantastic job. Thank you for sharing it with us.
ReplyDelete