


WELCOME to DAY 16 of our annual
24 DAYS OF CHRISTMAS TUTORIALS ADVENT EVENT!
24 DAYS OF CHRISTMAS TUTORIALS ADVENT EVENT!
Kristine here sharing with you my tutorial
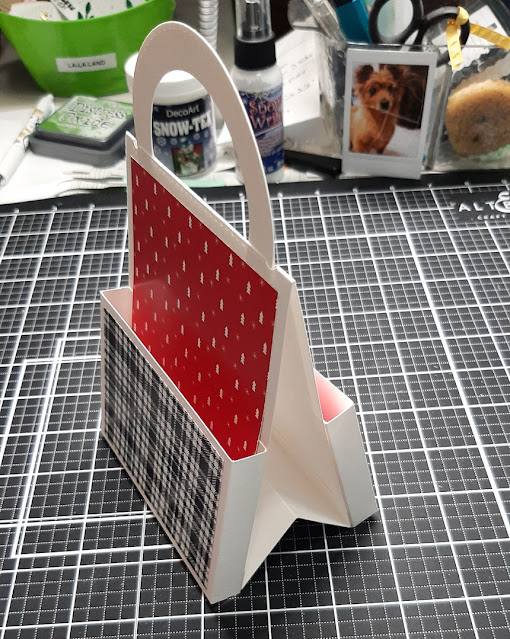
- COOKIE AND COCOA TOTE -
- COOKIE AND COCOA TOTE -
This tote makes a great send-off gift for those guests who drop by during the holidays -
or use as stocking stuffers! The uses are endless.

PRODUCTS:
Bunny: E50, 51, 53, R11, 00
Bunny Boots: E31, 33
Dog: W2, 3, 5, 100, R20
Cat: N0, 1, 2, 3, R11, 00
Reindeer: E50. 51, 53, 31, 33, R00, 11
Reds: R24, 46, 59
Greens: YG06, 13
CUTTING & SCORING:
White Cardstock:
(1) 4-1/4" x 11, scored at 5-1/2" (tote base)
(2) Die cut two handles with the Largest & 3rd largest of the Stitched Nested Circles Die
(the smaller die centered in middle of larger die and tape with low tack tape)
(the smaller die centered in middle of larger die and tape with low tack tape)
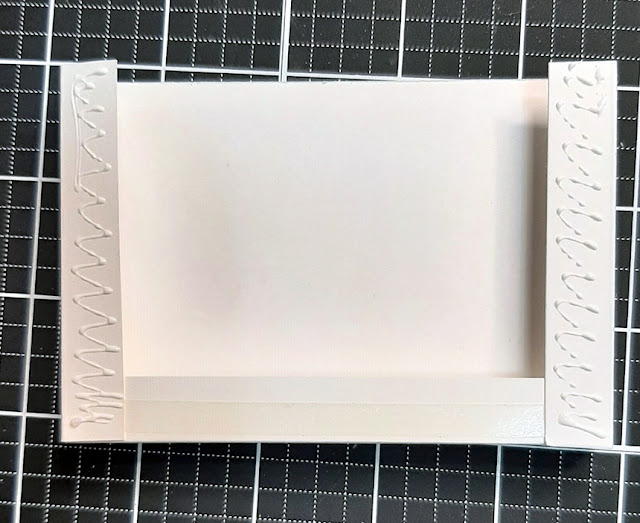
(2) 6-1/4" x 4" -- with longest side at top of score board, score at 1/2" & 1" on each end.
Turn so short side is at top of board and score at 1/2" & 1" on just one side. (pockets)
Turn so short side is at top of board and score at 1/2" & 1" on just one side. (pockets)
(1) 4-1/4" x 4" -- with 4" side at top of score board, score 1/2", 2", 3-1/2" (connector pc)
Green Cardstock:
(1) Die cut smallest tag from the Large Stitched Tags Die
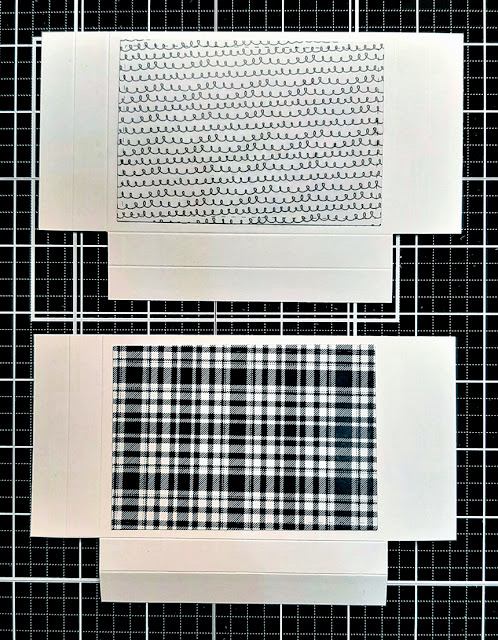
Patterned Paper:
(2) 3-7/8" x 5" (for top portions)
(2) Die cut 2nd largest of the Double Stitched Rectangles Die (layers onto pockets)
(1) Die cut smallest tag from the Large Stitched Tags Die

HOW TO:
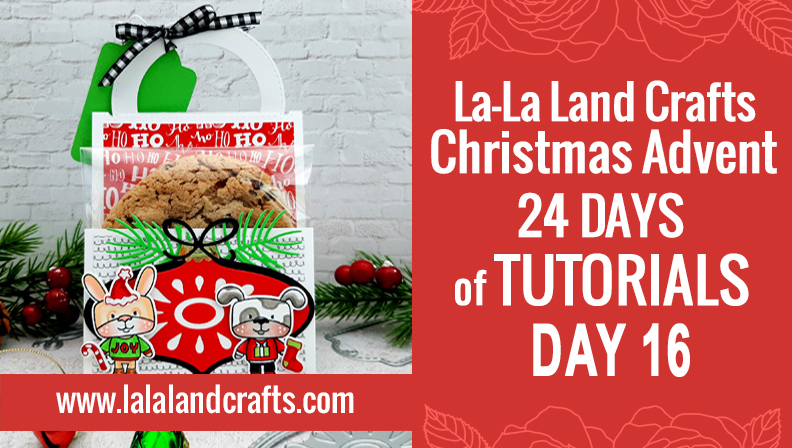
1. With the smallest of the Stitched Slots Die set, center it on the score line of tote base and cut.

3. Open your tote and slide the glued half of the handles thru the slot
- make sure the half showing inside are not glued together.
15. Color and assemble your die cuts and images and attach to your tote.
- make sure the half showing inside are not glued together.

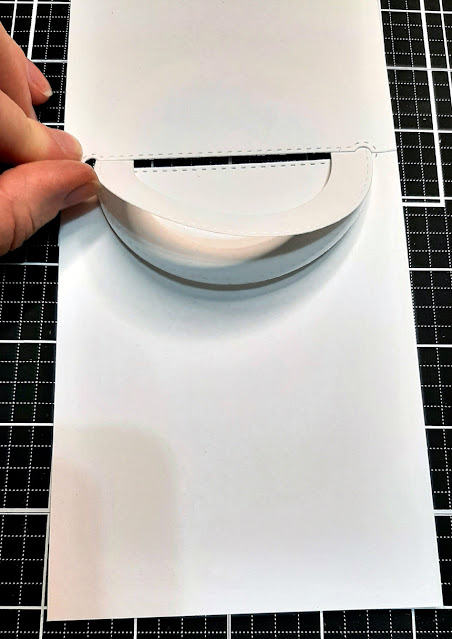
4. Add glue to the lower half of the handle - leave a li'l space close to the slot opening.
Lower the top of your tote onto glued handle and rub to adhere.
Lower the top of your tote onto glued handle and rub to adhere.

5. Flip your tote over and repeat step #4 to adhere the back side.

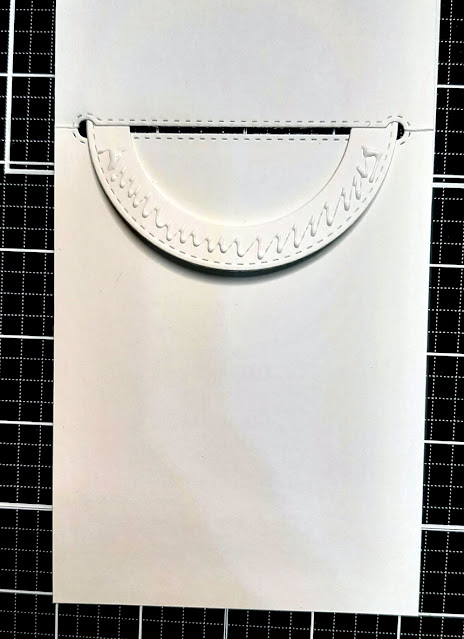
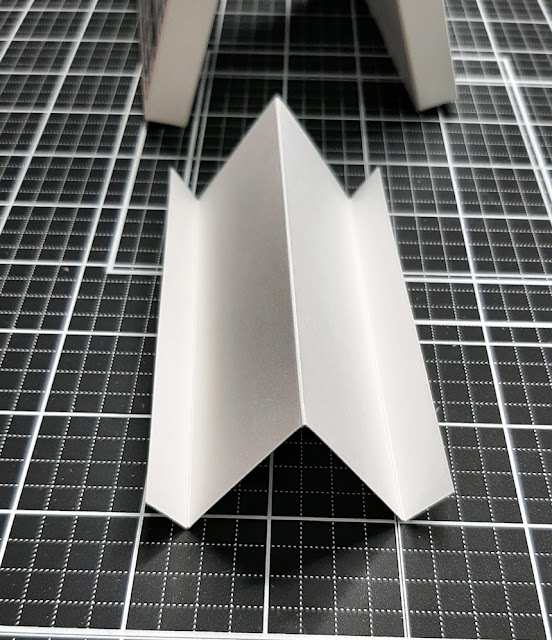
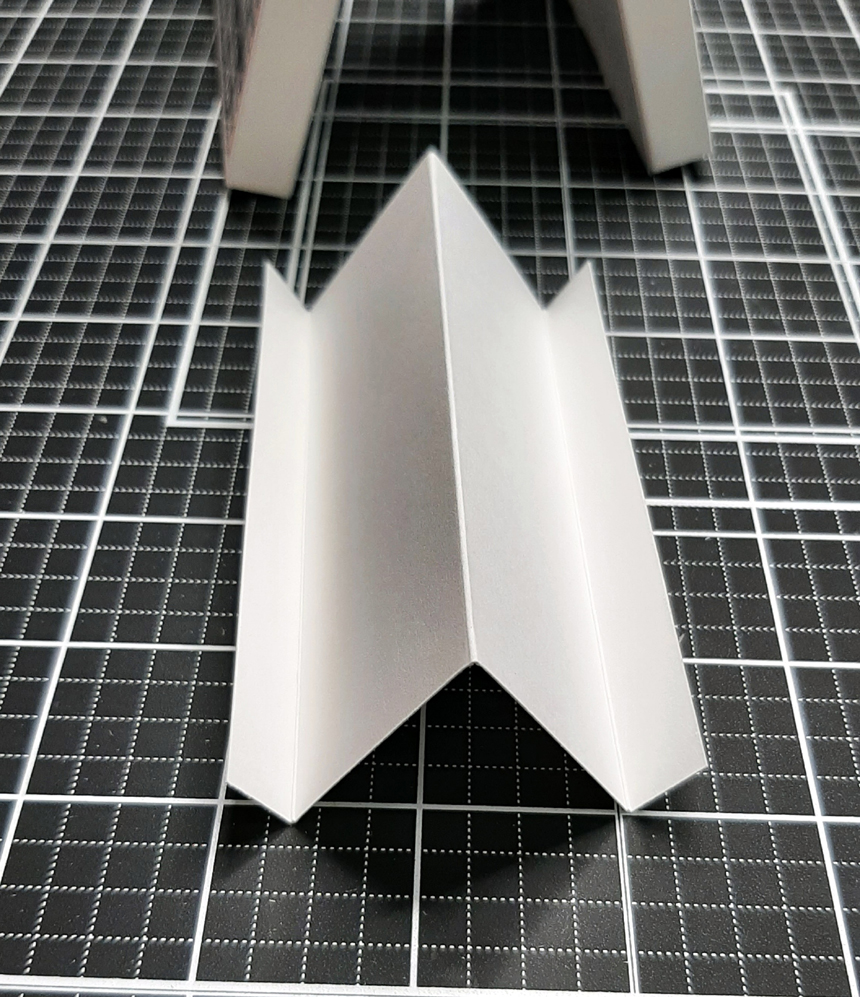
6. Using scissors, cut off the corner "boxes" that are formed from your score lines intersecting.
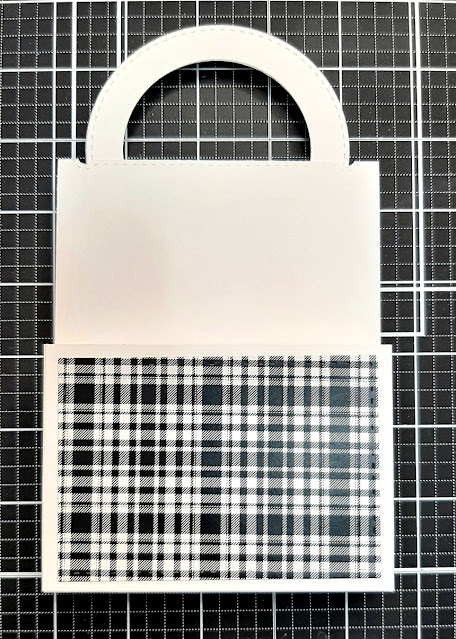
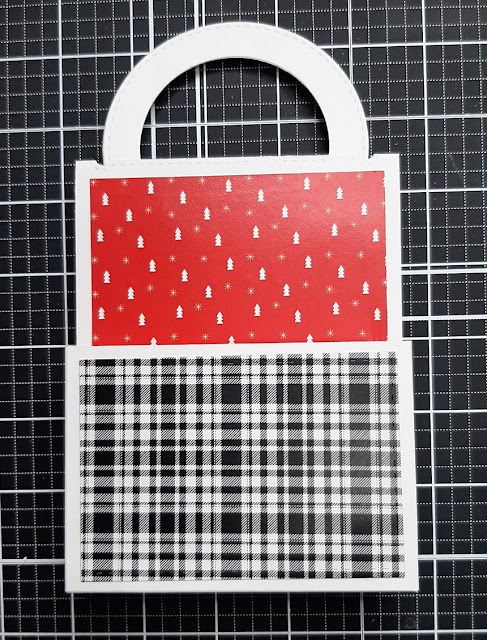
7. Adhere your 2 die cut patterned rectangles to your 2 pockets,
making sure there is equal white border around.
making sure there is equal white border around.

8. Fold and burnish your score lines.
9. Add Scor-Tape to the bottom outside flap only and bring your side flaps over
making sure they are forming right angles and pinch together. (see photo below)
making sure they are forming right angles and pinch together. (see photo below)
10. Add glue to the side flaps
*you could use tape, however the glue really helps to be able
to move them into the correct position
Attach to the bottom of your tote.
*you could use tape, however the glue really helps to be able
to move them into the correct position
Attach to the bottom of your tote.


11. Attach your patterned paper to the top portion, over the flaps of your pockets.
(repeat with patterned paper on reverse side).
(repeat with patterned paper on reverse side).

12. Fold and burnish your score lines - outside scores are valley folds
and center fold is mountain fold.
and center fold is mountain fold.
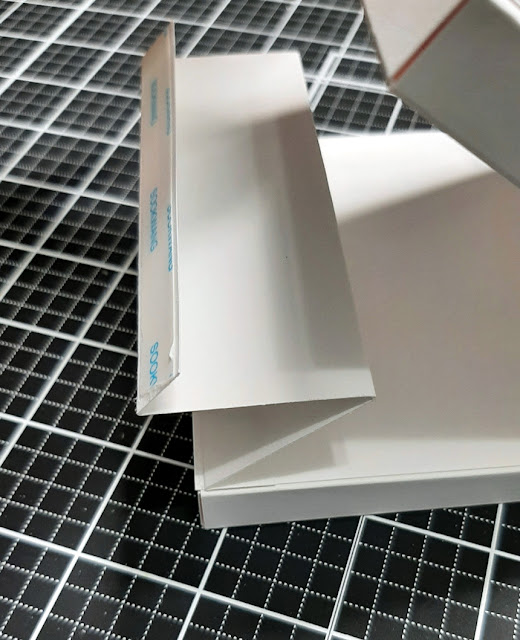
13. Add 3/8" Scor Tape to both outside flaps. Remove one backing and with the "W" folded up,
line up with valley fold line with the bottom edge inside your tote.
line up with valley fold line with the bottom edge inside your tote.

14. Remove backing from other flap and adhere to the opposite opening inside your tote.


16. Stamp your sentiment on the bottom of green tag.
17. Tear the bottom of the patterned tag and glue to green tag. Add ribbon and tie to handle.


18. Add a cookie in one pocket and a hot cocoa packet in the other.
Would be super cute to dress it up a bit by adding a (wrapped) chocolate dipped spoon with the peppermint candies for recipients to stir the cocoa! :)
Would be super cute to dress it up a bit by adding a (wrapped) chocolate dipped spoon with the peppermint candies for recipients to stir the cocoa! :)


|

|
|
|
|
|
|
|
|
Thank you so much for visiting today!
MERRY CHRISTMAS 🎄
Kristine
So cute! This would make a great party favor!
ReplyDeleteThanks for sharing your great idea in designing & assembling a cookie & cocoa tote! 🎅🥰🤶
ReplyDeleteI absolutely love the idea of a gift giving project!
ReplyDeleteI love this, what a great idea as a party favor or class gifts!
ReplyDeleteDang! I needed this last week! Oh well, will save it for next year! I love this! So pretty!
ReplyDeleteSuch a fun idea for a treat holder! I love the ornament die set and the adorable critters! Great paper choices too!
ReplyDeleteA really clever little tote that can be used for numerous things. Those little critters are so cute and I love the papers. I make cookies and take them to work many times and this would be a cute way to give them to special people. I do something special for Cinco de Mayo (I live in Texas) too and this little tote could be used for that too. Thank you for sharing.
ReplyDeleteWhat an adorable treat holder! Tea or coffee and a biscuit for the bigs kids, cocoa and cookies for the littles = perfection!!
ReplyDeleteKristine, this is adorable! All my Christmas gifts are done, but this will be so cute to make for little gifts during the upcoming year. Love it!!!!
ReplyDeleteI like the size of these, and the decorations. The papers and stamps make them adorable!
ReplyDeleteI absolutely love this! What a cute little treat to give.
ReplyDeleteGreat "STEP BY STEP" photos Kristine!!! I Love this!!! What a great way to gift someone with a food choice delight!!! FABULOUS!!! <3
ReplyDeleteYour project is just adorable!! Thanks for sharing such a detailed process! Cant wait to make one of these myself :)
ReplyDeleteI so love this project,so cute ❤️❤️
ReplyDeleteThis is a really cute treat bag. I need to have a few on hand particularly during the holidays. Thanks
ReplyDeleteReally cute treat bag
ReplyDeleteWhat a great idea for cookie exchange parties or just a plain gift. Great precise directions for assembly and coloring.
ReplyDeleteI love this! Have to give it a try! 😍
ReplyDeleteWhat a wonderful way to present gifts to teachers, doctors or office workers.
ReplyDeleteVery Cute!! Thank you for sharing!
ReplyDeleteHugs,
Karen C
Oh, this is just so clever.
ReplyDeleteSo festive!
ReplyDeleteCute little treat tote bag!
ReplyDeleteWhat a fun project
ReplyDeletewhat a great idea thank you for sharing
ReplyDeleteGenius idea! I wish my mind could come up with these things. Very nice!
ReplyDeleteJulie Zilka: This is such a great idea!! It would even be fun to make for a Halloween treat!! I would love to make up a bunch!! Thank You❤️
ReplyDeleteI love this idea! How clever to have two pockets for the mix and a cookie. Very cute!!
ReplyDeleteLove this idea Kristine - thanks for the awesome tutorial!
ReplyDeleteGreat ide i will use it, Dina
ReplyDeleteI love to watch and learn from such creative people.
ReplyDeleteWhat a wonderful gift idea! I need to make several of these ahead for next year!
ReplyDelete