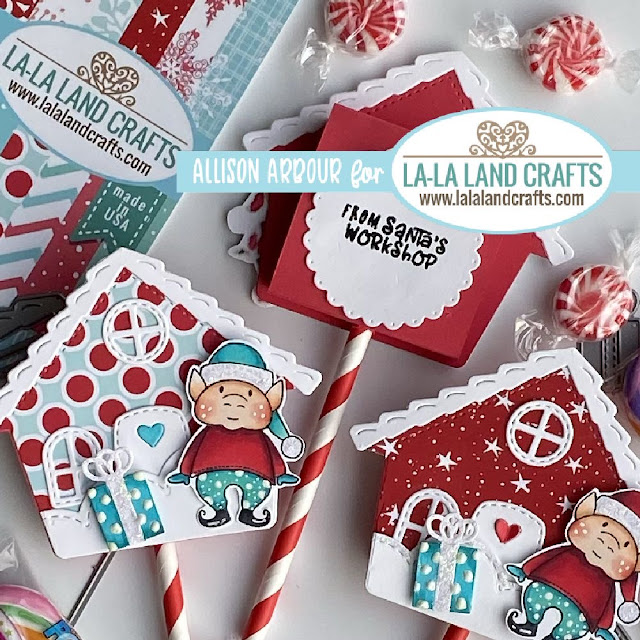
Hello Crafty friends! It's Allison here and I have a super easy and quick but adorably cute tutorial on how to make these lollipop stocking stuffers. I hope you enjoy and give it a try. I think these would be so cute as a stocking stuffer that came right from Santas Workshop.
COLORING DETAILS –
Copic markers
Skin - E0000, E000, E00, E02, E34, R22, R20, R11
Reds - R59, R35, R37
Teal - BG49, BG45, BG11
Greens - YG67, YG23, YG21
FOR THE BOX
Start with cutting your coloured card stock to 5 1/2" x 2 1/4"
On the 5 1/2" side score at 2", 2 3/8", 4 3/8" and 4 3/4"
Using a hole punch, punch a hole in the middle of the first scored section (between 2" and 2 3/8")
Using a pencil, poke through the hole punched hole to expand the size.
I used these paper straws that I cut in half, and on one end cut small slits at the very tip and added a small amount of glue to attach to the box.
To attach to the box I slid the uncut end through the box then flattened out the snipped pieces. The straw is going to be what holds your lollipops stick.
I used the scalloped circles die to create a closure for my box. First I stamped my sentiment then applied liquid glue half way up the scallop. Leave the top portion of your scallop with no glue as this will create an area to tuck the flap closure into.
Your box is now complete and is ready to attach to your front.
For the front I used the Build-A-House Die with papers from the Little Merry Paper Pack. I wanted the backs of the houses to match the card stock and have a more finished look so I cut the houses and roof again from card stock and glued to the back of the house.
I used the Stitched Border Cloud Die to create a snowy bottom to go in front of the winter house scene. After cutting the cloud from white card stock I lined up the house die so it would fit exact and the stitch marks would line up.
Once the house and house backing is finished I attached it to the box with some liquid glue.
Just pop in your lollipop and you have a cute little holder for it. I finished these Lollipop holders with this adorable elf, a present and lots of nuvo glitter glue.
I hope you enjoyed this quick but super cute Tutorial.
Crafty Hugs,
Allison
Make sure to join our LLLC FAN GROUP on Facebook for more ideas,
inspiration and a general chit chat about our products!Click on the buttons below to find us on these social media sites:


No comments:
Post a Comment