


Hey crafty friends, Sandra here with you today and I want to show you how to make a really adorable and cute spring box.


Material:
6 3/4" x 11 3/8" white Cardstock
Score Board
Scissors
Glue
3D Foamtape
Ruler, Pencil
Hole Puncher or Crop - a - Dile
Ribbon
Copic Markers:
Mushroom and Grass Border: YG21/23/63/67, E21/23, R02/05/08/17
Duck: C00/0/2/4, YR14/16, Y11/32/35, RV91/93, Blender, white Gel Pen
---------------
Die cut 2 Mushroom and Grass Border from coloring paper
Stamp the sitting duck twice on coloring paper
Cut your cardstock to 6 3/4" x 11 3/8"
Cut from the Spring Paper Pack 6 pieces in 1 1/2" x 2 3/4"
---------------
Score the short side of your cardstock at 1/2", 1 7/8", 4 3/4"

Turn paper and score the long side at 1 3/4", 3 1/2", 5 1/4", 7", 8 3/4", 10 1/2"

Cut off the right edge as shown below

Make a cut for each section as shown

Mark the middle (7/8") for each section

Score from both edges to your previously marked middle

Fold all your scored lines
Glue the 6 design paper cuts (1 1/2" x 2 3/4") to your box


To get the triangles for the upper part of the box, you have to make a sketch on the back of the design paper as shown in the picture below. Then cut out the triangles

Glue the triangle shaped paper cuts to your box and put glue on the right flap to close your box

It will look like this

Close the bottom


Now the holes have to be punched


Pull the ribbon through your punched holes

Tighten it and make a loop

Color up the 2 Mushroom and Grass Borders by following my photo guide


Color up the 2 ducks by following my photo guide


Attach 3D Foam Tape on the back of the mushroom and some glue at the bottom edge

Stick the 2 borders on the box as shown

Attach the duck to the box, I used 3D Foam Tape

Stamp the sentiment, cut and stick to the box
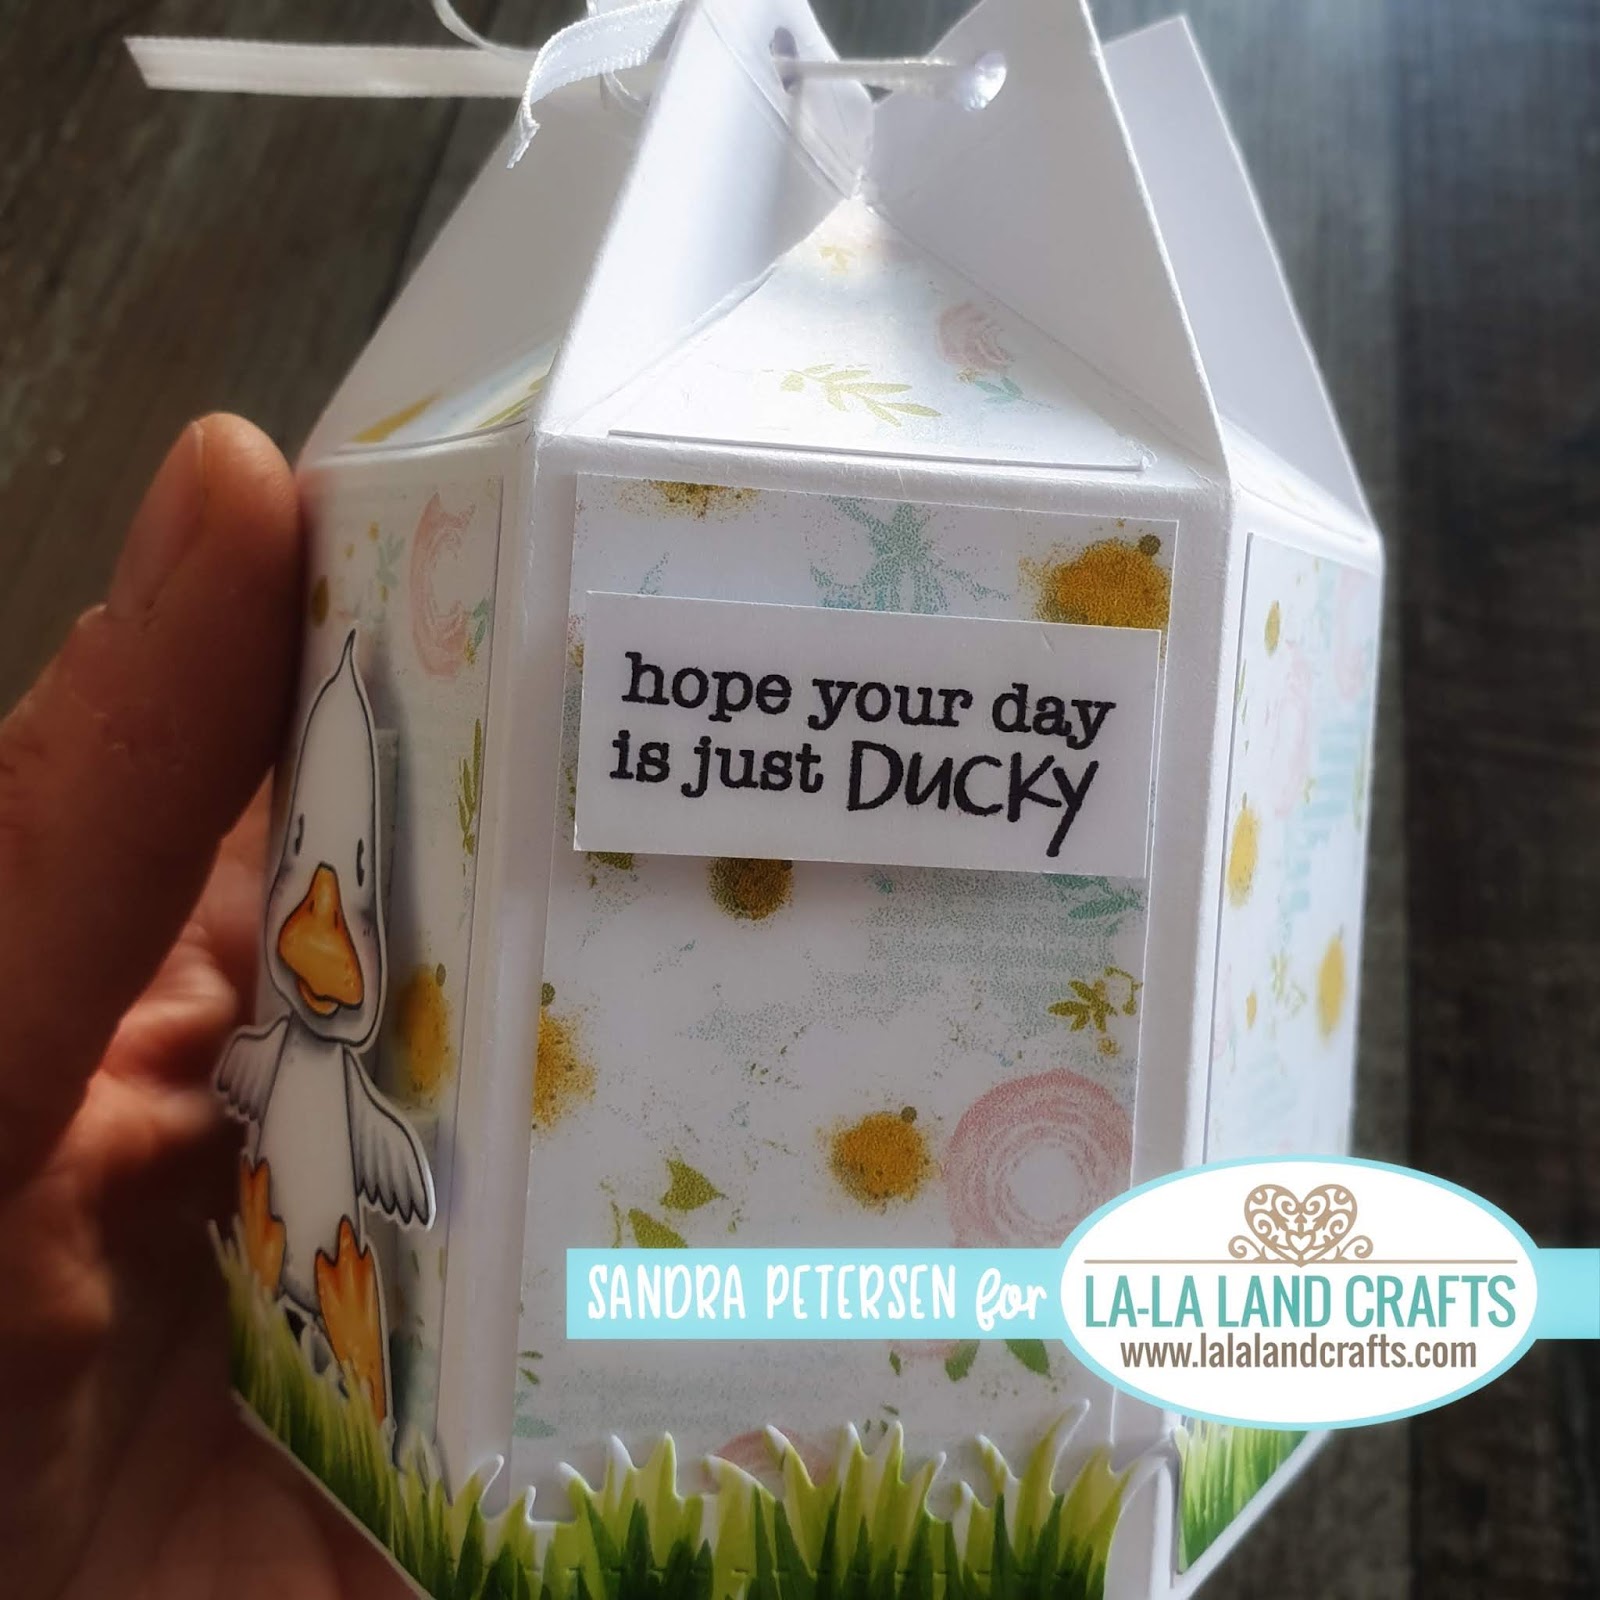
And here is your finished box!


Hopefully you had fun crafting!
Hugs, Sandra
No comments:
Post a Comment