Hi crafty friends, it is Tutorial Thursday at La - La Land Crafts and my turn to show you something really interesting
Do you love using design paper then this is the ultimate cardmaking tutorial for you!
The star folded card looks a bit tricky but it is so simple and easy to make. Just give it a try and your cards a new twist!
You can use every colored cardstock as cardbase and for decorating any design paper, it is really up to you.
The card I made for this tutorial is just one sample ;)
And here is another sample I made.
Materials needed:
Cardstock in 8 1/4 x 7 1/8" (21 x 18cm)
2 sheets of La - La Land Crafts Paper Packs
Pencil
Scissors
Glue
Eraser
Score Board
Ruler
Instructions:
Take your 8 1/4 x 7 1/8" (21x18cm) cardstock and make a mark at the middle - 4 1/8" (10.5cm) - of the long side
Draw a fine line from both edges to the marked middle as shown in the photo
Cut the paper along these lines, your paper should look like this
Mark again the middle - 4 1/8" (10.5cm) on all sides of your triangle
Connect the 3 points with another fine line, so you`ll get another small triangle within the big triangle
Draw a parallel line with 1 1/8" (3cm) height above all the 3 lines you had drawn before
It should look like this. Erase the fine line in the middle of your triangle
Score all lines
Fold all sides like shown in the photo
This is the look of your folded card without Design Paper
Cut 6 stripes 3 3/4 x 1" (9.5 x 2.5cm) from the design paper of your choice
Lay one stripe down on your card and draw on the left and right of your stripe a fine line like shown
Cut the paper
Lay the next stripe on your cutted stripe and use it as a template
Cut the paper. Do this with all the remaining stripes
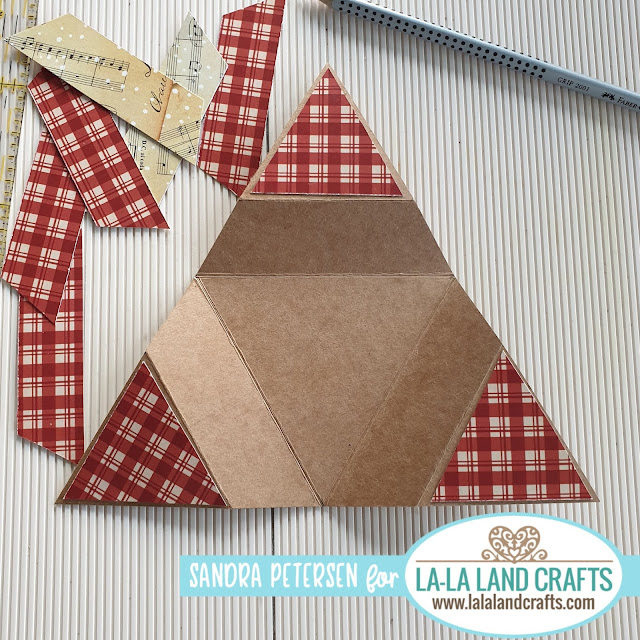
Cut 3 pieces from your design paper in 2 3/8 x 2 1/8" (6 x 5.5cm)
Mark the middle on the longest side and draw a line from each edge, then cut the paper. Do this with all 3 pieces
Your pieces should look like this
Decide which side of your paper you want to use and will show up on your card.
I decided to use the red checkered side. Glue it onto your card as shown
Glue 3 of the stripes to your card
Turn the card and glue the remaining 3 stripes to the back of your card
I added some distress ink "Grounded Espresso" to all the edges
Stamp some of the notes and a small sentiment to the middle
Add your colored image
Copic Marker used on this image:
N0/1/3/5, R20/46, BG00/02/05, E21/23/25
Copic Marker used on this image:
N0/1/3/5, R20/46, BG00/02/05, E21/23/25
Now let´s fold the card! Follow the photo instruction
When you have folded the last side, you need to put one edge of this side under another side so that your card can´t open from alone
Your star folded card is ready!
I hope you had fun crafting and I would love to see your cards!
Crafty hugs, Sandra


Love this quick design, thanks for sharing.
ReplyDeleteThank you for all the measurements! I've never made one of these, but now I want to try one =)
ReplyDeleteOk, I had to order the mice and some of the paper. Too cute! Will definitely try one of these =)
ReplyDeletemerci beaucoup pour ce tuto très bien explique
ReplyDeletebizzz