Showing posts with label Wings Set. Show all posts

Friday, November 14, 2014

INSPIRATION FRIDAY ~ IT'S COLD OUTSIDE~


Hi there it's TRACEY here today bringing you INSPIRATION FRIDAY.

Our theme this week is

IT'S COLD OUTSIDE

Here are Team Friday's projects.


STAMP
DIES


Copics:
Skin: E04, E11, E00, E000, RV21
Hair: E11, E15, E18
Outfit: V99, V95, V93, V91
BV29, BV25, BV23, BV20
RV99, RV95, RV21, RV91


DIES


STAMP
DIES


STAMP
DIES

Colour pencils:

Skin: Prisma Premier PC939, Derwent Coloursoft C130;
Hair: Prisma Premier PC1081;
Mittens and socks: Prisma Premier PC1031.


STAMP
DIES


Copics used:
Face: E000, E00, E21, R20, R02, R08
Hair: Y21, YR23, Y28
Outfit trim:R02, R05, R08, G20, G24, G28


STAMP
DIES


Copic Markers:
Skin - E000, E00, E11, R20
Hair - E50, E51, E55
Clothing - YG91, YG93, YG95, YG99. E71, E74, E77, E79.


STAMP
DIES


Copic Markers:

Skin: E000, E00, E21, E11, R20, BV00
Hair: E43, E44, E49
Dress/Hair Bows: YG91, YG93, YG95, YG97 + glitter
Boots: E31, E35, E57, E79
Snowflake garland: B01 + glitter


Don't forget to join in all the La-La Land Crafts fun by adding your creations to our Facebook Page and Twitter and for more Inspiration we are now onPinterest

Have a crafty weekend
Tracey & Team Friday
xXx


Thursday, September 25, 2014

Tutorial Thursday - A card with a Pocket Insert


Hello everybody!

It's Thursday and in La-La Land this means 'tutorial time".

The type of card I'm going to show you how to make is for those who feel that a regular card is not enough for them, because it doesn't offer space for all the die cuts and embellishments. It's also for those, who wanted to make a mini album, but were a bit afraid to start (all those elaborate binding methods, and chipboard covers and etc....).

The card we will make today (in my opinion) may be a perfect fit for a holiday memory. You can easily place several pictures inside and add a bit of journalling, as well as simply add more die-cut elements inside or a few more stamped images.

So, without further ado, let's begin!

Supplies:
Cardstock cut to the following sizes:
11 3/4" x 5 3/4" - for the card base
5.5” x 6.5” - for the pocket
5.5” x 5 3/4"- for the pocket
5.5” x 3 3/4" - for the page flap
5 3/4" x 3 1/4"- for the page flap
5.5” x 1 1/4" - for the honge
5 1/8” x 5 5/8” – for the inside tag/photo mat.
Scoring Board
Bone folder
Score Tape
Scissors
Free time and creative mood 

Step 1
Take a 11 3/4" x 5 3/4" cardstock piece  and score it at 5 3/4" and 6” on the long side:


Step 2
Take a 5.5” x 6.5” cardstock piece . Score it at 3/8” and 6 1/8” on the longer side and apply score tape on the scored flaps as shown


Step 3
Take a piece of cardstock measuring 5.5” x 5 3/4" and attach it to the cardstock from step 2 to form a pocket with the opening from both sides:


Step 4
Take a piece of cardstock measuring 5.5” x 1 1/4".  Score it on the shorter side at 5/8” and 3/4". Apply the score tape as shown below, next to the score lines but not overlapping them. Turn the hinge to the back side and attach score tape there to, but only on the larger flap. Trim the corners of the larger flap (to the score line only) just a little bit (it will help us easier to slide the pocket page on top).


Attach this hinge to your card base (don’t forget to fold it first, so you see the score lines clearly). Leave 1/8” space from the top and from the bottom:


Step 5
Remove the tape backing from the hinge and after centering the pocket on top of it, press firmly to attach the pocket to the base hinge.


So far what we’ve made will look like this:


Step 6
Take the cardstock pieces measuring 5.5” x 3 3/4" & 5 3/4" x 3 1/4". Attach the score tape to the flaps as shown below. Trim the corners:


Step 7
Attach these pages to the pocket inside your card:


Step 8
We are done. What is left to do is only sliding the left piece of cardstock measuring 5 1/8” x 5 5/8” inside the pocket of our card. The whole construction is ready now and may be embellished with designer papers, die cuts and stamped images of your choice:


You can add another tag (like I did on the card below) between the card base and the designer paper. To leave a space for the tag, just glue the DP along the 3 sides only, so that you could slide a tag from the top.

I embellished the inside tag/photo mat with the Lattice Border die cut, so that it will be easier to pull it out.

All the rest is left to your fantasy and creativity.

My card looks like this:


You will find all the coloring details about this card in tomorrow's post, here on La-La Land Crafts blog.

Have fun creating!


Hugs,
Alexandra

Wednesday, May 28, 2014

Inspiration Wednesday - Fun Folds


Hello it's Margot here today and this weeks theme is
Fan Folds
Team Wednesday has created some beautiful designs
to inspire you. 

Margot 


Don't forget to join in all the La-La Land Crafts fun by adding your creations to our Facebook Page and Twitter. And for  more inspiration, we are now on Pinterest .

Have a lovely week!

Margot

Monday, May 5, 2014

Inspiration Monday - For a Special Lady...

Hello, it's SILVIE here with a new La-La inspiration for you. This week's theme is ...

For a Special Lady... 


And here are the amazing creations the Team Monday have come up with to inspire you:

Stamp:  BATH TIME MARCI
Dies: CHERRY BLOSSOM FLOWERS, PICKET FENCE, PRETTY POINSETTIA
Copics Used
Skin - E13, E11, E00, R24, R20, R11
Hair - E29, E19, E15, E13
Ribbons - B05, B02, B00
Bath and Bubbles - YR27, Y19, B02, B00
Duck - YR27, YR24, YR21, Y19, Y13, Y11

JOY
Stamp: KIMONO MARCI WITH UMBRELLA, KIMONO MARCI WITH FAN (sentiment)
Die: CHERRY BLOSSOM BRANCH 
Copics Used
Skin: E000, E00, E02, E11, E13, R20
Hair: N1, N3, N5, N7
Umbrella Handle: E35, E37, E39
Shadow: C1

LINDA
Stamp: SASSY PRINCESS MARCI
Dies: FILIGREE CROWN, WINGS SET
Copics:
Skin: E0000, E000, E00, E11, R20, R11
Hair: E50, E30, E31, E33, E37
Outfit and Crown: BG10, BGBG13, BG15, R00, R12, RV42, YR20, YR21, YR24

Copics Used
Face E0000,E000,E00,E01,E11,R20
Hair E50,E51,E55
Dress, Veil, Flowers RV000,RV00,R81,R83
Leaves YG11,YG67,G21

Dies: CHERRY BLOSSOM BRANCH , BIRDCAGE, OPEN LEAF FLOURISH
Copics Used
Skin E50 E51 E11 E02 ROO R20
Hair C1 C3 C5 C7 C9
Robe and Flowers RV0000 RV000 RV00 RV10 RV11 RV32 C1 C3 C5

Don't forget, you can join in all the fun here at La-La Land Crafts by adding your creations to our Facebook Page and Twitter. And be sure to stop Back on Friday to see some more aweosme projects from the Friday La-La's!

Thanks for stopping by today.
 Have a lovely day and a great week... Silvie xxxx

Thursday, February 13, 2014

Tutorial Thursday - Heart Pocket Valentine card

Hello SILVIE here with a new tutorial to share.  This projects is just in time for your Valentine cards - it's easy and quick !


SUPPLIES
For the Heart Pocket:
Spellbinders dies - Classic and Scalloped Hearts
Spellbinders dies - Classic and Scalloped Circle
White cardstock, design paper
Bone folder
Ranger Distress inks – Walnut Stain and Vintage Photo
Ranger distressing tool (or sponge)
Adhesive
Die cutting machine
La-La Land Crafts - Heart Doily
La-La Land Crafts  - Heart Key and Lock set
La-La Land Crafts - Wings Set
Embellishment of the card:


* STEP 1 *
Cut 1 classic heart, 1 scalloped heart, 2 classic circles and 2 scalloped circles.

* STEP 2 *
Stamp some swirls around the edges of the heart. 
Stitch around if you like.

* STEP 3 *
Distress edges with Ranger Distress inks – vintage photo and walnut stain (I used Walnut Stain one on the very edge as it’s darker)

* STEP 4 *

Score the classic and scalloped circles in half.

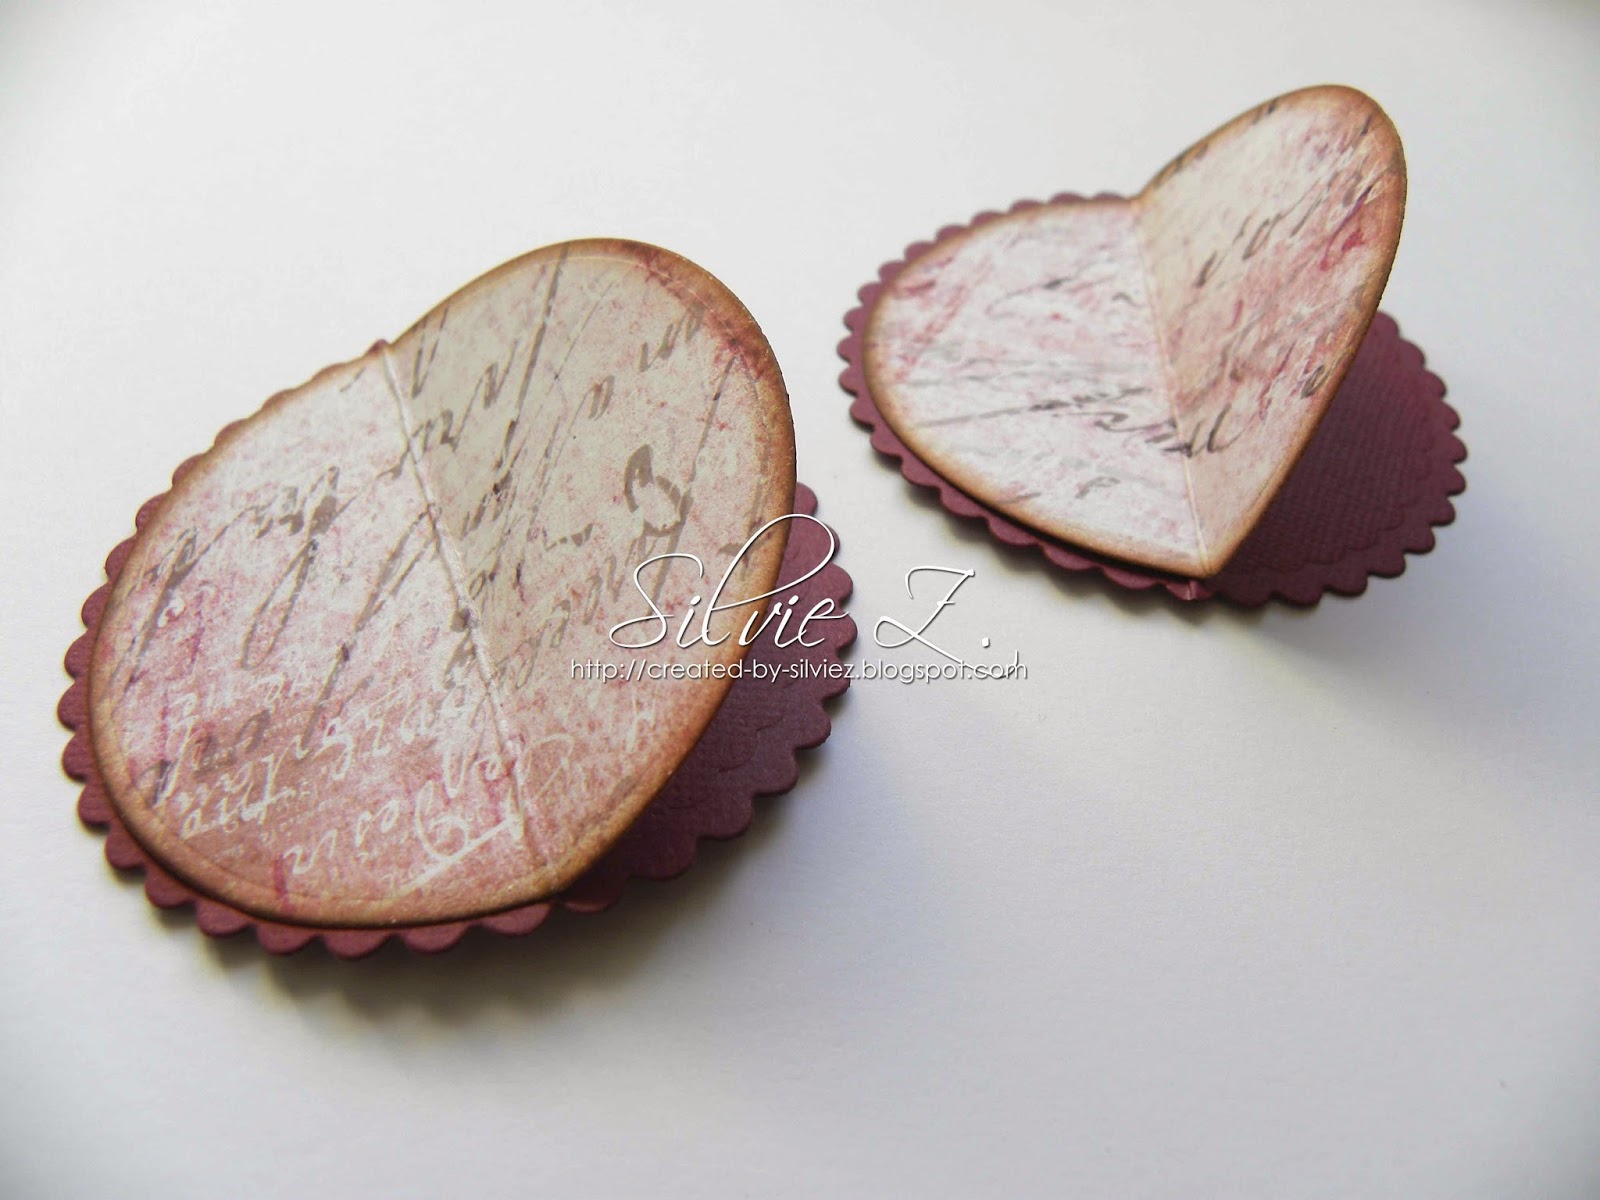
* STEP 5 *
Glue only the halves of the circles together. Do not apply glue near the fold.
(it's better to glue only the halves rather than the whole cirle because there'll be no tension on the fold once the circles are glued to the heart and the design paper won't tear)

* STEP 6 *
Place one of your circles with the glued part on the top of the heart; make sure it’s aligned with the edge. 

Glue at the back 
(the classic circle won't match the scallops at the back but this is totally fine as you will glue the back to your scalloped heart (see step 8). 

* STEP 7 *

Place the second circle over, make sure it’s aligned and glue at the back. Glue the front parts together. Make sure your adhesive is only where the circles overlap and not on the heart (so that you can slide in a tag, a little note, etc)

This is how it looks like from the back.

* STEP 8 *
Glue your heart pocket to the scalloped heart. 
I have also added some chunky embossing powder.

* STEP 9 *
Glue the LLLC lock over the circles to make it look like the heart is locked (you can also add a brad, a bow, a charm, etc)

* STEP 10 *
Cut a smaller heart (or any tag) that will slide into the pocket. 
Stamp a sentiment or write a name and/or personnal message on it....

To finish my Heart Pocket, I used La-La Land Crafts - Heart Doily behind and added 2 wings from La-La Land Crafts - Wings Set to each side. Then I mounted the heart to my card using foam tape for more dimension. To embellish the card, I have used La-La Land Crafts - Scalloped Border under the heart; La-La Land Crafts - Filigree corner; some  satin ribbon, charms, lace and fuchsia gems.

 I hope you have enjoyed today's tutorial, and we look forward to seeing your creations
You can share them with us at  La-La Land Crafts by adding your creations to our Facebook Page or Twitter 

Thank you for stopping by!
have a lovely day
Silvie xx