


Hello Everyone, Welcome to Tutorial Thursday!
Martha here with you.
Today I'm going to show you how to make a Tag Mini Album, and for the base of the Album you only need Two Dies! You won't even need to pull your paper cutter out!
So lets get started
Here is what you will need.
Kraft Cardstock
Green Cardstock
Red Cardstock
Christmas Patterned Paper

Cut Six Tags from the Kraft Cardstock with the Stitched Tags Die (set of 4).
Then Cut Twelve Tags from the Christmas Patterned Paper Also using the Stitched Tags Die (set of 4), Also cut Ten of the Tab Shapes from the Stitched Elements (set of 7).
Now adhere One patterned paper Tag to each side of the Kraft Cardstock Tags. Repeat this step for all Six Tags.

Next we will need to score and fold all Ten of the Tab shapes from the Top Middle Point to The Bottom Middle Point.

Next Adhere one Tab Shape to the top of each Tag Covering the Hole in the Tag.
This is what your Tags should look like.

Now Lets attach them all Together.
Take your center Tag and attach two of the Tab Shapes from the Stitched Elements (set of 7) as Shown, make sure the Score Line is Just past the outside edge of the Tag or it won't fold properly.

Now flip the center Tag over, adhere a tag to both exposed tabs again being sure the Score Line is Just past the outside edge of the Tag, once you you have done this, adhere two more Tabs as Shown.

Now Flip these Three Tags to the Opposite side, and using the tabs Adhere two more Tags, again being careful to leave the score line exposed. Now add your final tab to the top right of the last tag on the right hand side, and adhere the Last Tag.

This is what your end result should be.

Now fold your Tag Mini Album in a Accordion style

Next lets make our Belly Band!
You will need a 1 1/2 x 7 1/8 piece of red card stock, place the cardstock on the landscape side in your scoring board, score and fold at 2 3/4, 3 1/8, 5 7/8, and 6 1/4.

place adhesive on the inside of the small rectangular flap that the scoring created and fold over to create your belly band!!

Now Slide it on from the top of your Album down.

Lets Decorate the Front of our Album. Here is what you Will need

Place the Ornate Scroll Flourish Die About half way down the front of the Album so that it acts as a stopper for the Belly Band.
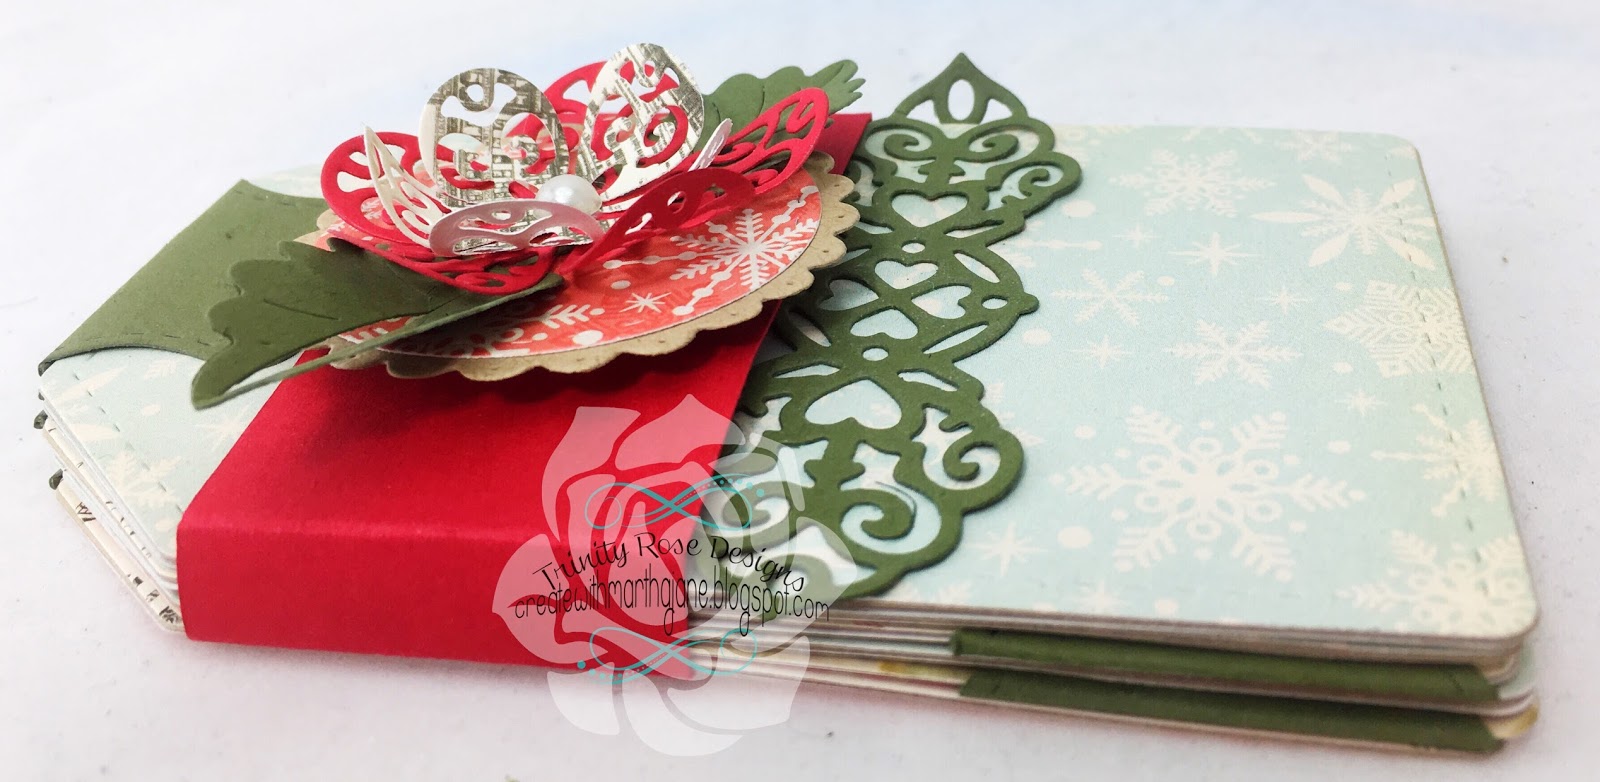
Now adhere the rest of your Die Cuts on top of each other starting with the Scalloped Circle Die.
And thats it, your done!
Here are a few more pics!


I hope you Enjoyed!! And if you do create this album please post it in the La-La Land Crafts Facebook Fan Group so I can see it!!
Hugs
Martha
Love your tag album!! Thank you for the tutorial!
ReplyDeleteHermoso, muy hermoso!!! gracias!!
ReplyDelete