


Hello Everyone! Mindy here with you today to show you how to create this gorgeous Butterfly Marci Card with added dimensional flowers using La-La Land Crafts flower dies.

Here is what you will need...
Plus...
Double Sided Ball Stylus
Fine Mist Spray Bottle
Foam Pad or Mouse Pad
Blending Sponges
Foam Tape
Double Sided Tape
Rhinestones
Glossy Accents
Distress Inks in: Mermaid Lagoon, Picked Raspberry, Candied Apple, Vintage Photo, Mustard Seed, Crushed Olive, Lucky Clover, Stormy Sky
White, Pink, Red, and Blue Cardstock
Patterned Papers

Step-by-Step:
Step 1: First cut the card base and mats to the following measurements:
white card base- 6 1/8"w x 9 1/2"h (fold in half to make a card that is 6 1/8"w x 4 3/4"h)
pink card stock- 5 7/8"w x 4 1/2"h
pink stripe pattern paper- 5 3/4"w x 4 3/8"h
red card stock- 5 3/8"w x 4 1/4"h
blue card stock- 5 1/8"w x 4"h
tan butterfly pattern paper- 5"w x 3 7/8"h
Step 2: Cut all of the die cuts from plain white card stock. To create the grass border that matches the postage stamp die bottom edge make sure to cut 2 of the largest postage stamp frame. You will take one of the large postage stamp frames and line up the grass border die as shown below.

Make sure that the bottom of the Postage Stamp Die does not cross the bottom edge of the Grass Border Die. Once you run the die through your machine you will end up with your grass border that looks like this.

Step 3: Next start attaching the bottom 2 mats to your card base with double sided tape, and then glue the Spring Flourish to the top of the first 2 mats with some overhang.

Step 4: You will then attach the top 3 mats with foam tape to one another and then add foam tape to the back of the red mat for some added dimension.

Step 5: Remove the backing of the foam tape and attach the top mat stack to the card base. Your card should now look like the photo below.

Step 6: Using Distress Ink in Mermaid Lagoon and Stormy Sky blend from the bottom edge up to the center, and the top edge to the center on your second postage stamp die cut. Make sure to let the color fade to white just slightly above the center of the die cut.

Step 7: Next we will shade the Grass Border with Distress Inks. First blend Mustard Seed only on the top of the grass border.

Then blend crushed olive from the bottom of the grass border stopping at the edge of the mustard seed that you added before.

To finish the grass border blend Lucky Clover just along the bottom edge. Your finished grass border should look similar to the photo below.

Step 8: Attach the blended postage stamp background, grass border, tree branch die, and sentiment cut out with the border from the Stitched Elements dies to the front of your card like the photo below.

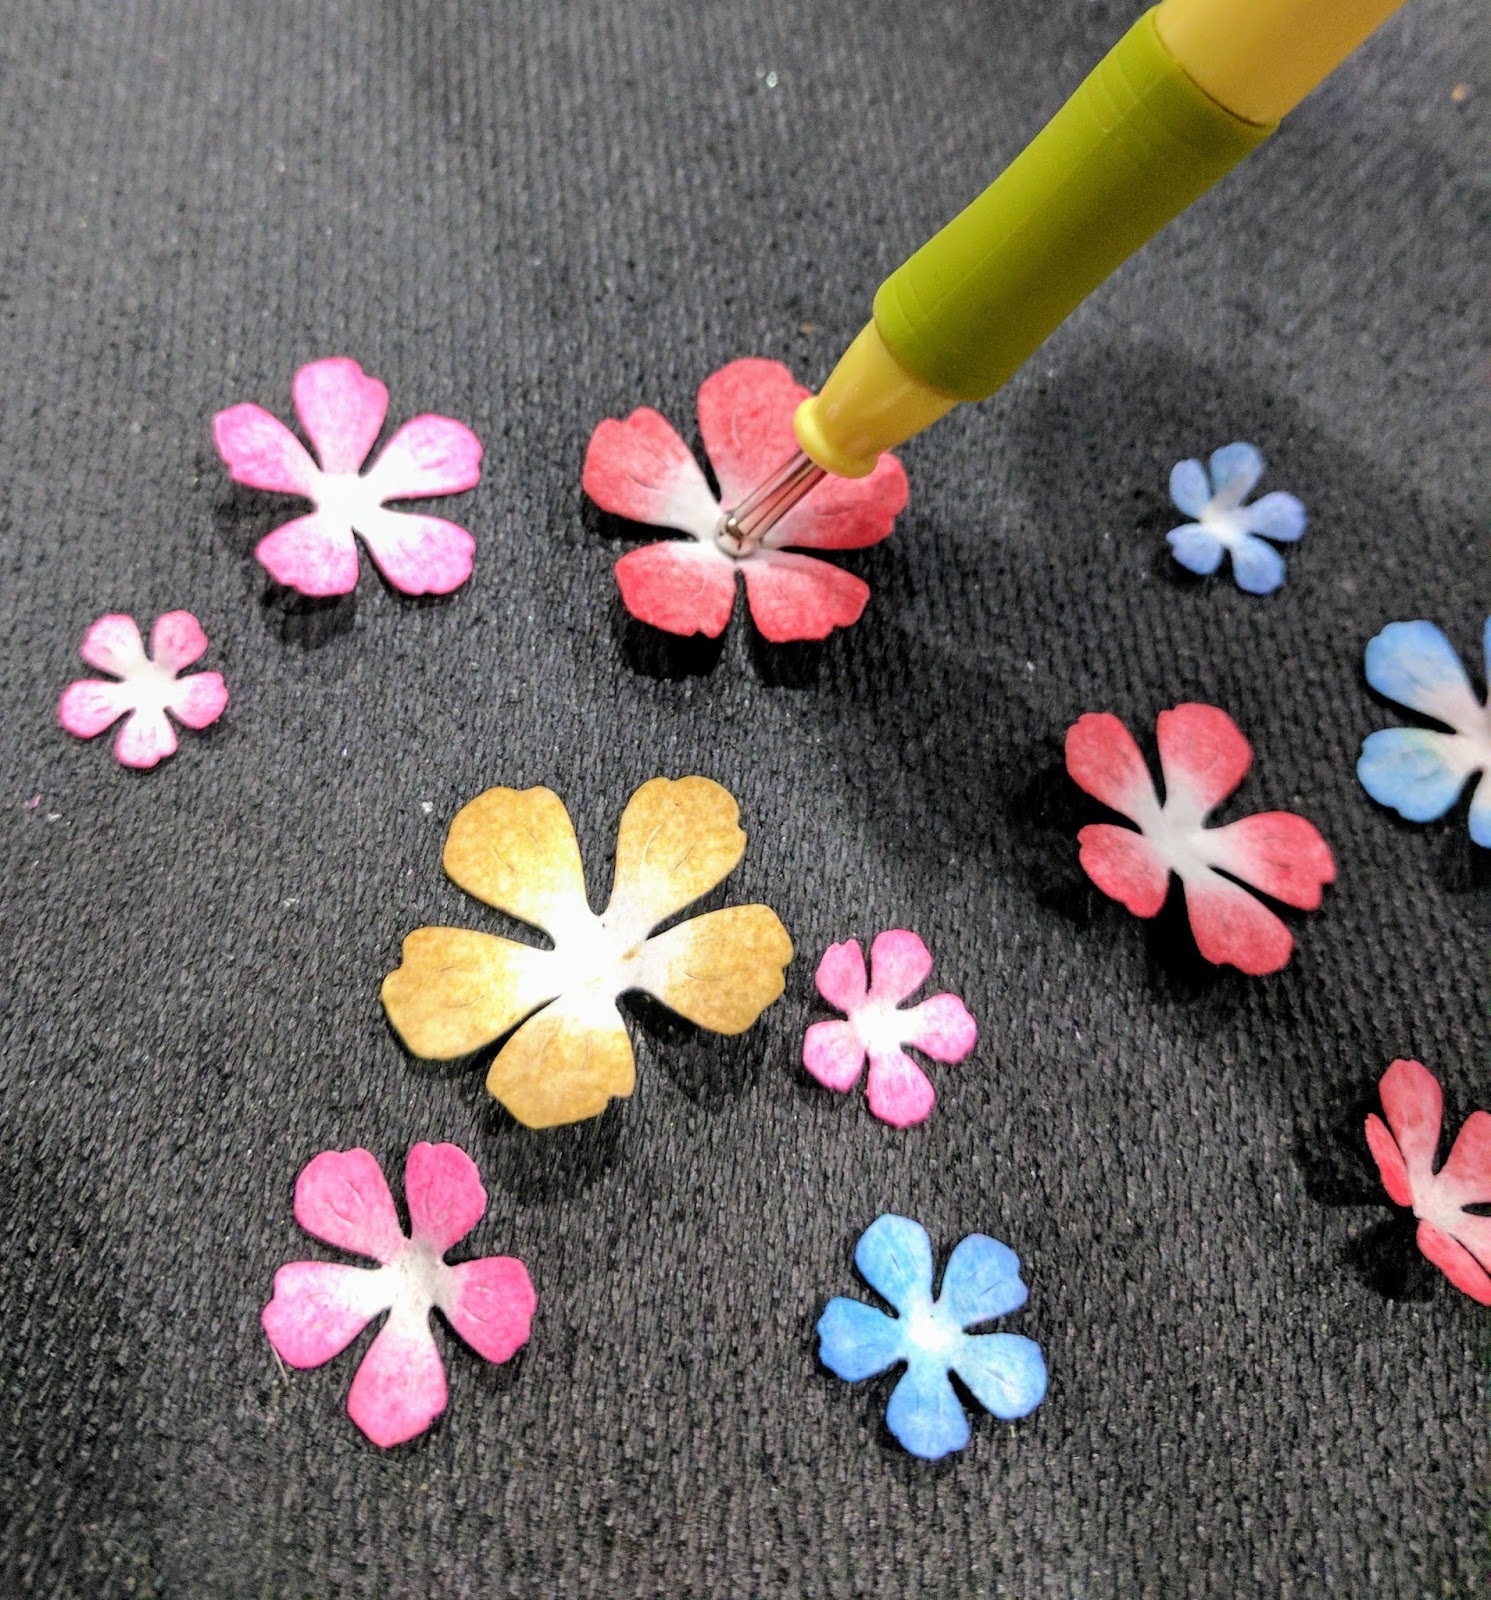
Step 9: Use Distress Ink in Picked Raspberries, Mermaid Lagoon, Candied Apple, and Vintage Photo to blend color on just the edges of each petal on the die cut flowers. Be sure to leave the centers of the flowers white for added dimension.

Step 10: After you shade the flowers, lightly spritz them with the spray bottle and then flip them over. You will then use the ball stylus to rub from the center to the outside edge of each petal. Make sure you are doing this on your foam mat or mouse pad. As you shape each petal you will see them curl in towards the center of the flower like the photo below. Continue to do this with all of the flowers.

Step 11: Next flip all the flowers back to the top sides facing up. You will then use the smallest side of your stylus to press the centers down. You will then see your flowers take shape like below.
Step 12: Glue all of the flowers onto your card base and then glue different sizes of rhinestones into each flower center. You can also layer multiple flowers onto one another to create a fuller flower.

Step 13: I then stamped the Gorgeous Butterfly Marci onto 110 lb plain white card stock and colored her in with the following Copic colors:
Skin: E11, E00, E000, E0000, RV21, R20
Hair: E35, E31, Y00, 0
Wings: B14, B12, B00, 0, RV21, RV10, RV000, C-1, C-3
Outfit and Shoes: R59, RV29, R22, RV42, RV000, RV04, RV21, B12, B00

Step 14: To finish I fussy cut Butterfly Marci out, and then attached her to my card base with foam tape.
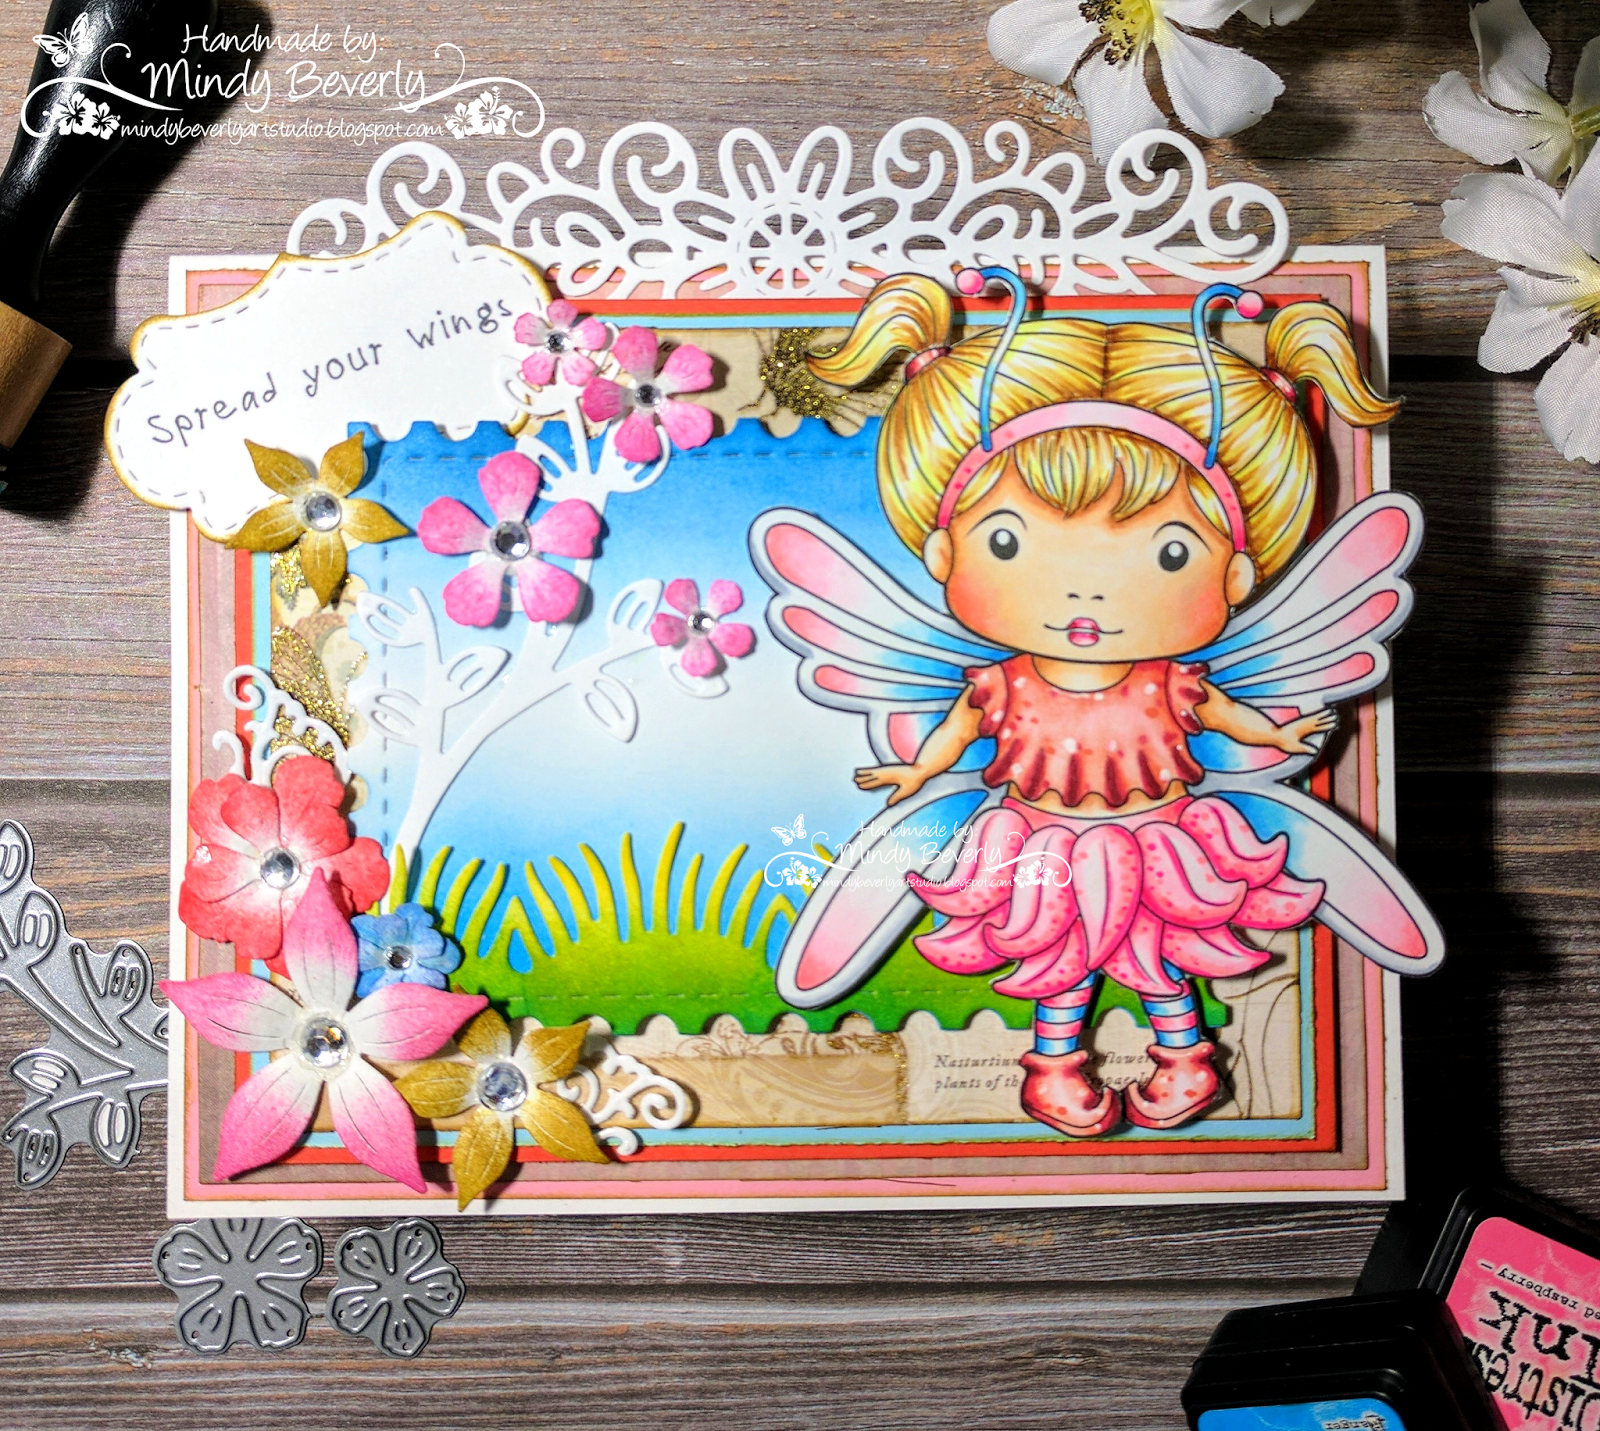
Thank you so much for stopping by! I hope that my card has inspired you to try out your own creations using La-La Land Crafts Amazing stamps and dies!
Click on the buttons below to find us on these social media sites:


Love this card and thank you for showing how to make the flowers!
ReplyDeleteThank you so very much! I am so happy that you enjoyed the tutorial! You are very welcome! DT Mindy
DeleteBeautiful card Mindy! Thanks so much for sharing and you flowers are amazing!!!
ReplyDeleteThank you so very much Dana! I am so happy that you loved the tutorial!
ReplyDelete