Showing posts with label Wrought Iron Fence. Show all posts

Friday, December 4, 2015

Inspiration Friday - Add Roses


Hi! 

Tamara here today to show you the amazing projects made by Team Friday! Our theme this week is 
add roses
and here's what we made with amazing la-la land crafts products to inspire you.


Coloring with copics
Skin : E13, 11, 21, 00, 000, R20, 00
Hair : E59, 57, 55
Clothes and accessories : R85, 83, 81, C3, 2, 1, 0


Copic used :
Skin (E000-00-21-11-13-04, R20)
Hair (E15-18, YR23, Y21)
Clothing (B60, BV31, C3-5, RV21-23-25-29, E40-42-43, Y23-26-28, W3-5-7-9)

Alina
Stamp: Flamenco Marci (with sentiments)
Dies: heart fan, stitched nested circles (set of 7), build -a -snowman, strawberry blossoms (July 2015 Club Kit), daisies (August 2015 Club Kit).


Colour pencils:
Skin: Prisma Premier PC939, Derwent Coloursoft C130;
Hair: Prisma Premier PC 1093, PC1081.


Distress markers and ink pads used:
skin: vintage photo
cheeks: worn lipstick
hair: black soot
outfit: picked raspberry, twisted citron, black soot


Copics:
Skin: E04, E11, E00, E000, E0000
Hair: E21, E25, E29
Outfit: B97, B95, B93, B91
W5, W3, W1, W0
G24, G21, G20
 
Remember  to join in all the La-La Land Crafts fun by adding your creations to our Facebook page and for more Inspiration we are now on Pinterest.

Hugs,
Tamara

Wednesday, October 28, 2015

Inspiration Wednesday - Halloween / Fall


Greetings everyone. 
I'm Aga :)
Today is the first time to say Hello to you all for the first time.

Today with Wednesday Team we will inspire you with Halloween/Fall works. We hope that our works will inspire you to create something beautiful for taday.


Aga 


Remember to join in all the La-La Land Crafts fun by adding
your creations to our Facebookpage and Twitter and for
more Inspiration see us on Pinterest.
The Wednesday Team 

 Aga
 

Wednesday, April 1, 2015

Inspiration Wednesday - Spring or Easter


Hello, Anna here. Today, for the first time,
I have the pleasure of being the host of Wednesday's inspirations.

Our theme is :

Spring or Easter


. Please take a look at the beautiful projects prepared by our Team.


Anna  


I hope that our projects will somehow inspire you to make your own
beautiful and original card's. 
We will see them with pleasure in our Facebookpage and Twitter.
 For more Inspiration we are now on Pinterest


Happy Crafting!
Anna


Wednesday, March 4, 2015

Inspiration Wednesday- 3 Types of Embellishments


It is Sue here to share today's Inspiration with the Wednesday Team

'3 Types of Embellishments

Wednesday team has some more inspiration for you to make that special something!

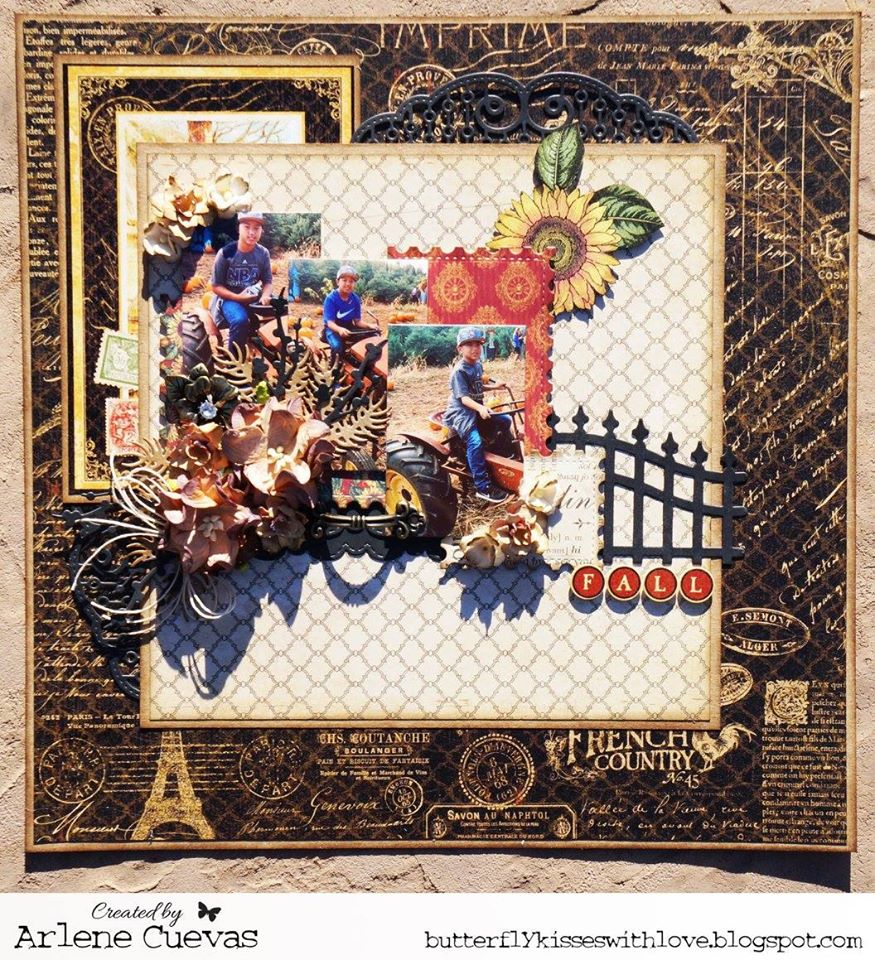
We are welcoming a new member to Team Wednesday, Arlene (formally with Team Friday) will be sharing her LLLC die based creations with us on a Wednesday, Arlene will be a great asset to the team!

Let's see what gorgeous creations the team have to share........

Arlene
Dies: Wrought Iron Fence, Feathers, Heart Fan, Cherry Blossom Flowers, Pretty Poinsettia (leaves), Berry Flourish (leaves)


Don't forget you can play along and join all the La La Land Crafts fun over on our Facebook Page, where you can post all your La-La Land creations, remember you can also find us over on Twitter and our Pinterest boards

Have a great week, see you next week!

Sue and the Wednesday Team

Wednesday, February 11, 2015

Inspiration Wednesday- Valentine


It is Sue here to share today's Inspiration with the Wednesday Team

'Valentine

With love in the air, the Wednesday team has some more inspiration for you to make that special something for the one you love!
Let's see what gorgeous creations they have to share........


Don't forget you can play along and join all the La La Land Crafts fun over on our Facebook Page, where you can post all your La-La Land creations, remember you can also find us over on Twitter and our Pinterest boards

Have a great week, see you next week!

Sue and the Wednesday Team

Thursday, January 15, 2015

Tutorial Thursday - Die Cuts with Dimension


Hi, everyone! It's Kathy here today, with a tutorial on a few of my favorite techniques for adding dimension and texture to die cuts. I could go on for hours with fun ways to do this, but for the sake of your sanity and time, I'll limit myself to three! :)

The first is a tried-and-true technique of paper piecing and shadow layering, and I'm using the Flag Banner Die to demonstrate how a few extra steps can add a lot of interest to the finished cut.


Start by die cutting your flag banner three times - once in a dark shadow color (black here), once in an accent color (pink), and once in a white or cream top layer.

(If you choose to stamp letters or a design on the white/cream top layer, it's easiest to do it at this point, right after die cutting, before you start cutting it apart for layering.)

Using the perforated lines on the banner pieces as a guideline, trim the white/cream piece around the inside of each flag...


(If you want to ink or distress the edges of the white/cream piece, do it at this point.)

Then, using foam tape pieces, or small pop-dots, attach each white/cream banner piece inside the perforated edges of the pink banner...


Now, using a clear-drying liquid glue, attach the black banner behind the pink, offsetting just a bit to give the illusion of shadow.

*Note: you don't have to use liquid glue, but I prefer it because it leaves some "open time" to shift the top layers around until you get just the amount of shadow you want from the black piece.

And, you're done...a few extra steps, and a tiny amount of time, can give a whole new sense of dimension to your piece...the black shadow piece is subtle, but effective. It looks like the whole banner is "popped up," doesn't it? But it isn't...the black layer is flat against the background paper...


Another technique I like is using metallic rubs and sprays to give cardstock die cuts the look of distressed metal.

I'm using the Street Lamp Die to demonstrate how I use metallic rubs for this look, and then the Diamond Wire Die to show how metallic sprays can give you a totally different texture.


In my sample, I'm using Viva Inka Gold, "old gold" metallic rub. There are other products like this that work just as well, like Rub N Buff, etc. I just chose this one because it was handy to my desk at the time. :)

I should also note that I'm using 110 lb/297 g/m cardstock for these die cuts. It's not a prerequisite...I just find it easier to fingerpaint and spray on sturdier cardstock.

Using your fingertip covered with a small amount of metallic rub, *lightly* paint over scattered areas on your die cut lamp. Think about how you see metal lamp posts on the street...the whole post isn't shiny and bright...you usually see parts of the metal reflecting the shine, and others with a flat finish...that's the look I'm trying to achieve. Here's how the die cut looks after a light, random rub...


My next step was to use small pieces of foam tape to adhere the other black die cut lamp piece behind the painted one, to give extra dimension to the final product...


You can get a different kind of distressed metal look with the use of liquid metallic mists. In my sample, I'm using the Diamond Wire Die, and liquid metallic mists in dark gold and copper...


Lay the die cut pieces on your craft mat or covered worksurface, and spray away...don't worry about those puddles...they'll dry with a different intensity, and make the piece look more realistic...


I don't have a lot of patience, so I usually hit the sprayed pieces with my heat gun to move things along more quickly. :)  When dry, you'll have a piece that looks like wire that's been out in the elements for a while and has aged with a cool patina...


My final example uses the Wrought Iron Fence Die to illustrate a fun way to get an aged, shabby look to the fencing (shadow layering is also used on this piece).  Start by die cutting your fence in white (or whatever color you'd like your fence to be) and once in a darker shadow color...


No, we're not going to use ALL these mediums...LOL...I just wanted to give you an idea of how many different types of texture mediums there are out there to do this technique (heavy gesso will also work, but I forgot to lay that out for this photo and didn't realize that until I was writing up this post)...


In this case, I used the one of the crackle pastes for my fence. Lay the die cut down on your craft mat or covered worksurface, and lather away with a palette knife, or even your fingers...have fun....get messy!


A tip if you're using crackle mediums: If you're impatient like me and like to speed the drying time along with your heat gun, know that you might not get as much crackling in the finished piece as you would if you let the crackle medium air-dry. It's not a big deal on pieces like this fence that have small surface areas, but on larger pieces, you might find the amount of crackle more important to your piece.

After the piece was dry, I rubbed on some Distress Ink (in this case, Pumice Stone) to accentuate the texture created, and give the fence an old, weathered look...


The final step was to adhere the black shadow piece using small spots of liquid glue, and I have a shabby fence that you'll see on a card next month.  :)


I hope you've gotten some fun inspiration today...go forth and get messy and have fun with your die cuts, no matter what your style is!