Showing posts with label Tutorial Thursday. Show all posts

Thursday, April 11, 2024

Tutorial Thursday - Pop Out Gatefold Card

 Hello everyone! Welcome to Tutorial Thursday!! 

Kristine here to share a fun fold card tutorial with you! 

Today's tutorial is:  Pop Out Gatefold Card

I created this card for a color challenge on SplitcoastStampers #CC995 
 Granny Apple Green, Crushed Curry, and Black. 

 I chose to use the March 2024 KOTM (Kit of the Month) for this cute scene card.  
This kit is available as an add-on kit to subscribers starting with their 2nd month.


Here's a top down view


PRODUCTS:

COPIC COLORS:
W2, W3; W5; BG45R20, 21, 00 

~ TUTORIAL ~

1.  Cut a card base at 8" x 5-1/2"

2.  With long edge at top, score at 2", 4" and 6" as shown below


3.  Turn your cardstock 90 degrees (short edge at top) and with left edge at 1-1/4", CUT from the 2" score line down to the 6" score line.  

4.  Move left edge of cardstock to 4-1/4" and repeat the cut between the 2" and 6" score lines.


5.  Turn your cardstock once again so the long edge is at top and score JUST BETWEEN the cut lines at 3" and 5" as shown.


6.  Fold and burnish the score lines as shown below.  The 2" and 6" scores are valley folds, the 3", 4" and 5" are mountain folds. 

*Do not fold the middle 4" score line between the cut lines.  That is where we will attach a layer to keep it flat.  


7.  I flattened out my base and stenciled sun rays from the Rain & Shine stencil set with Wild Honey Distress Oxide ink. 


8.  Next, I cut a strip of green cardstock at 1-1/4" x 8" and scored it at 2", 4", and 6".

9.  I die cut the grass from the March 2024 KOTM and cut (2) sections and attached behind the 2 outer sections.  I also added grass patches with a Copic marker.  I attached this to the lower edge of card.


10.  I die cut the 3rd largest Double Stitched Rectangles set and stenciled the Summer is Here stencil to the top and added a section of the grass die from the kit.  (sorry for the blur on this next photo)


11.  I die cut the fence, trees and clouds and attached as shown.


12.  To add a pop out sentiment that will fold flat, I cut a piece of green cardstock at 1/2" x 2" and scored it at 1/2", 3/4", 1-1/4", and 1-1/2" and folded/burnished as shown below.  


13.  Add Scor Tape (or glue) to the outer 1/2" tabs 


14.  Attach so that the folded edge of each outer flap is bumped up against each side of the 4" score line on the lower part of card as shown. 


15.  Now, you can attach your sentiment onto the flat part of that mechanism.  


Done!

This card can fold up a few different ways to fit into an A2 envelope.  

• You can flatten the whole card, then fold IN the 2 outer panels like a gatefold. 

• You can fold the 2 outer panels backwards into a gatefold.

• You can squeeze the 2 outer panels together so that the 4" score line pops up and then you can fold the top fold to the right (or left) and the bottom the opposite way. ☺


Thanks so much for visiting!  

We hope that you are inspired to try out your own creation with the amazing stamps and dies from La-La Land Crafts!

Make sure to join our LLLC FAN GROUP on Facebook for more ideas,
inspiration and a general chit chat about our products!

Hoping you all have a great week of Creating

 ♡ Kristine

Click on the buttons below to find us on these social media sites:


Monday, April 1, 2024

Tutorial - Double Pop Up Box Card


Hello everyone! Welcome to Tutorial Thursday... on a Monday!! 

Kristine here to share a tutorial with you for the card I'm sharing today in our Team Monday post.

Today's tutorial is:  Double Pop Up Box Card

I'm excited to share this cute Sock Hop fun fold card today 
featuring products from our March 2024 Release!  


~NOTES~
• I made this to fit into an A2 size envelope - folded size is 4-1/4" x 5-1/2"
• To help minimize bulk, I used 65 lb. cardstock

Here's just a quick video clip of the card
- you can click on the box in bottom right corner to make it full screen.


PRODUCTS:
TUTORIAL:

1.  I cut my black card base at 10-3/4" x 5-1/2" and with long edge across top, I scored at 1-5/8", 3-1/4", 7-1/2", and 9-1/8" 

• Fold & burnish the outer score lines as mountain folds and the 2 inner scores as valley folds.


2. I cut (2) strips the same size at 10-3/4" x 1-1/4" then scored at 1-5/8", 3-1/4", 4-7/8", and 6-1/2".

• Fold & burnish the 2 outer scores as mountain folds and the 2 inner folds as valley folds as shown below. 


3.  *Optional:  If you want a shelf or two inside either box to add images or die cuts to, cut a piece of base color cardstock at 3-1/4" x 1" and score 3/8" on each end.

• Fold and burnish opposite ways as shown - it supposedly helps to collapse better ☺


Now it's time to cut patterned paper and decorate BEFORE you add your bridge strips. 

~NOTES~ 
• For the center (black/white) piece I used a paper from the Love You More Paper Pack.  For all else, I used the Celebrate Paper Pack.

•  To minimize bulk, I did not cut full strips of patterned papers on the parts where the strips will be attached.  

• I like to cut layering panels down by 1/16" from the normal 1/4" -- I just like the look of the amount of border by doing this.  If it bugs you, feel free to round up or down to the closest 1/4" etc. ☺ 

CUTTING LAYERING PANELS:

4.  Cut (1) B/W Center Panel at 4-1/16" x 5-5/16"  - adhere to center 

5.  Cut (2) Inner Pink/Polka Dot Panels at 4-1/16" x 1-7/16" -- For the left one, align the top with the top of the b/w center panel.  It will be short on bottom as that is where the strip will go.  Again, this was to minimize bulk. For the right one, align with the bottom of the b/w panel.

6.  Cut (2) Front Striped Panels at 2-15/16" x 1-7/16" - To find the placement of front panels, place (but do not adhere) one of the black strips and adhere striped panel just above, leaving about a 1/16" space.  Repeat for other front panel.


Now we need to cut panels for the strips.  I used the green grid paper from the Celebrate Pack for the bottom as I thought it kinda resembled a light up dance floor.  For the Top, I used the confetti paper from the same pack 

7.  Cut (2 pieces - one of each design) - at 4-1/16" x 1-1/16"

8.  Cut (8 pieces - four of each design) - at 1-7/16" x 1-1/16" 

• adhere to strips, then attach one strip on top and one on bottom of card as shown below.  

9.  Add glue to each end flap of the shelf/shelves and insert into lower box as shown.


We're done creating the card base and now we just need to add our stamped images and die cuts!

This card folds flat-ish to fit into an A2 envelope.  
• Fold the right side in first, then fold the left in, overlapping the right. 


COLORING:

I used the following Copic Markers for Luka:

Skin:  E00, 000, 0000, 21, 13; R00
Eyes:  BG45 + white gel pen & Pigma Micron 05
Hair:  E51, 53, 55, 57
Shirt/Socks:  BG10; G00
Tie:  R20, 21
Greys:  W3, 5, 7, Blk00


I used the following Copic Markers for Marci:

Skin:  E00, 000, 0000, 21, 13; R00
Eyes:  BG45 + white gel pen & Pigma Micron 05
Lips:  R20
Hair:  E51, 53, 55, 57
Skirt/Socks:  R20, 21, 22; Blk 00 + white gel pen
Shoes:  W7; E53 + white gel pen


Because this style of card could get bulky, I opted to glue my images (where they touch the outer panels) instead of popping them up, as I normally would do. 


Here is the Retro Turntable.  I die cut 2 of them and layered the black behind the coral, and I cut the buttons and needle head from iridescent cardstock.  I attached this to the center panel with foam tape.
  

I also die cut the records and dice and glued those on ☺  

For the sentiment, I added an iridescent mat behind it, then I glued it to the top of the shelf in the lower box.   


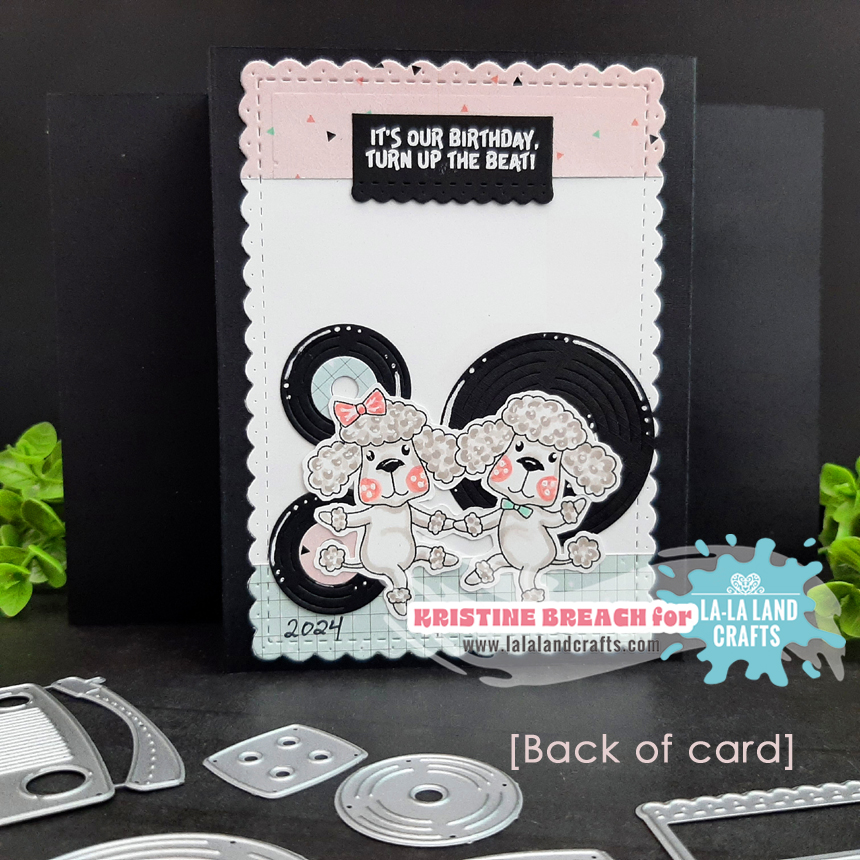
BACK OF CARD:

PRODUCTS:

COPIC COLORS:
W2, W3; R20, 21, 00; G00


We hope that you are inspired to try out your own creation with the amazing stamps and dies from La-La Land Crafts!
Make sure to join our LLLC FAN GROUP on Facebook for more ideas,
inspiration and a general chit chat about our products!

Hoping you all have a great week of Creating

 ♡ Kristine

Click on the buttons below to find us on these social media sites:


Thursday, November 9, 2023

Tutorial Thursday~ Batch Making Christmas Tags


Hello everyone! Welcome to Tutorial Thursday!

Vic here with you today to share a tutorial with you!

Today's tutorial is:  BATCH MAKING CHRISTMAS TAGS

Hi! With Christmas just around the corner I thought it was time to start getting those Christmas tags ready! I never really seem to have enough so I'm going ahead and getting a head start on my Christmas tags this year.


PRODUCTS USED
Snow Globe Die

COPIC COLORS
E11, E13, E41, R20, R24, R29, YG67
~ now for the tutorial you have been waiting for ~


To make a lot of Christmas tags takes up lots of time however if you use the same images and dies your time will be cut in half. I stamped out my images onto a piece of comic friendly card using memento black ink. Stamp as many images as you need for each tag.


Using the above copic markers I started colouring my images. 


 Once the images are all coloured in fussy cut them out with your scissors and place aside. 


I then die cut four circles using the Double Stitched Circles Die. Using the Pierced Scalloped Circles Die I went and die cut some coloured card. You can keep this all the same colour to save even more time while batch making your tags. 


I am now going to slightly ink the circles using the Sweets Stencil Set and a light red ink. 


I used distress ink barn door with an ink blending brush to gently apply the ink. 


Using one of the greetings from the stamp set I stamped each circle.


To add a hole into the tags I used a crop-a-dile hole punch, but any hole punch will work. If you don't have a hole punch you can use a small circle die.


To add some extra details to the tags I die cut two trees from the Snow Globe Die. I used two trees per tag but you can skip this step if your prefer.


I then added some twine to the top of the tags. 


I knotted the twine and now they are ready to attach to your gifts.


Your tutorial is now complete. I hope you have making your Christmas tags. 


We hope that you are inspired to try out your own creation with the amazing stamps and dies from La-La Land Crafts! 


Make sure to join our LLLC FAN GROUP on Facebook for more ideas,
inspiration and a general chit chat about our products!

Hoping you all have a great week of Creating

VIC

Click on the buttons below to find us on these social media sites: