Showing posts with label Mini Album. Show all posts

Thursday, January 21, 2021

Tutorial Thursday - Waterfall Folio


Hello everyone! Welcome to Tutorial Thursday!

Allison here with you today to share a tutorial with you!

Today's tutorial is:  Waterfall Folio

A mini waterfall folio with a inner pocket


PRODUCTS USED


COPIC COLORS
Cat - E35,53,51,50
Greens - YG03,00
Blues - BG53,000
Yellows - Y38,32,000


PAPER CUTS & SCORING
Chip board 
(2) 6"x 3.5"
(1) .5" x 6"

Coloured Card Stock
(6) 3" x 3.5" Scored at 3"
(1) 7 1/4" x 5 3/4"
(1) 9 1/8" x 7 5/8" Score 3/4"on all 4 sides
(2) 5 3/4" x 3 1/4"

Patterned Paper
(3) 3" x 5.5"
(11) 2 3/4" x 2 3/4"


~ now for the tutorial you have been waiting for ~ 


Start by cutting chipboard pieces and attach with score tape to 9 1/8" x 7 5/8" coloured card stock.  Line up chipboard to score lines.  Cut corners on an angle to remove excess bulk.  Add more score tape and fold score lines over chipboard, burnish.


Use tape runner or score tape and add 7 1/4" x 5 3/4" coloured card stock.


Attach patterned paper (3" x 5.5") to coloured card stock (5 3/4" x 3 1/4"). Attach one to back cover set the other aside. 


Add score tape and glue to ribbon and add attach to front cover.  I wanted my ribbon showing at the back but not the front.  You can add the ribbon under the front and the back if you want.


Attach the set aside panel and add a scalloped square with the stamped sentiment.


Attach with glue runner or score tape the 2 3/4" 2 3/4" patterned paper panels to the 3' x 3.5" scored panels.


Using score tape line up panels on the right inside.  Working your way down lining up one at a time butt each panel below the one above.  The very first one I used a die cut square from white card stock instead of patterned paper because I wanted to add an image.


Add patterned paper 3" x 5.5" to inside left and attach pocket.


Die cut and colour flowers and Doily.  Arrange on front cover.


We hope that you are inspired to try out your own creation with the amazing stamps and dies from La-La Land Crafts! 

Make sure to join our LLLC FAN GROUP on Facebook for more ideas, 
inspiration and a general chit chat about our products!

Hoping you all have a great week of Creating

Allison 

Click on the buttons below to find us on these social media sites:


Thursday, May 3, 2018

Tutorial Thursday - Easy Envelope Mini-Album

Good morning everyone!!!!
Today is TUTORIAL THURSDAY and I have a easy and fast mini album to show you.

Step-by-step:

You going to need 3 DL envelopes with 11x22cm. You must to close the envelope using double sided glue and cut one millimeter on both ends. I fixed the middle of my envelopes to 21 cm in length.


Then in the center of each I marked 10 centimeters on the right side and 10 centimeters on the left side. I was exactly one centimeter in the middle of the envelope


These will be my page pocket. I will create an opening at the end of each pocket using the STITCHED NESTED CIRCLES DIE.

Now I'll move on to the assembly of my mini album cover. For this I will need two card boards with 12x12cm and for the spine 3x12cm.

I will use a white card stock as the base to cover my cardboard with the measurement of 31x15cm. I align my 3 plates to allow 2 mm of spacing between the first plate and the spine to make it easier to handle.
We go to the decoration choosing a decorative paper and a palette of colors that match our previously painted image.


For the back cover we will use a rectangle with 26.3x11.70cm.
I glued our envelopes folded in half by 1 cm separation and attach to the spine of our album.
 We will now decorate our pockets using the same initial mechanism to create the small circular ledge.


For the Photo-Mats I cut 6 squares with 10x10cm as well as 12 squares with 9,60x9,60cm for the decoration of the same ones.


I put on the cover and back a tape so that in the end I can make a nice bow and keep my mini album closed. For the spine I created two small holes using eyelets to permanently attach my envelopes to the spine.


Now to finish we move on to the most fun part of the project: THE DECORATION!!!!!!!
And now the final project!!!!


My List Supplies:

Distress Markers
Skin: Tattered Rose, Vintage Photo, Walnut Stain, Tea Dye
Cloths: Scattered Straw, Faded Jeans, Tumbled Glass
Beret: Vintage Photo, Walnut Stain, Scattered Straw 
Shoes: Vintage Photo, Walnut Stain, Scattered Straw 
Hair: Vintage Photo, Walnut Stain
Outline: Weathered Wood, Tumbled Glass
Grass: Peeled Paint, Forest Moss, Twisted Citron


I hope you Enjoyed and Make sure to post in the La-La Land Crafts Facebook Fan Group if you create one!
I send wishes for love, joy, and crafty inspiration!!!!
Hugs
Irene Mendes


Thursday, November 24, 2016

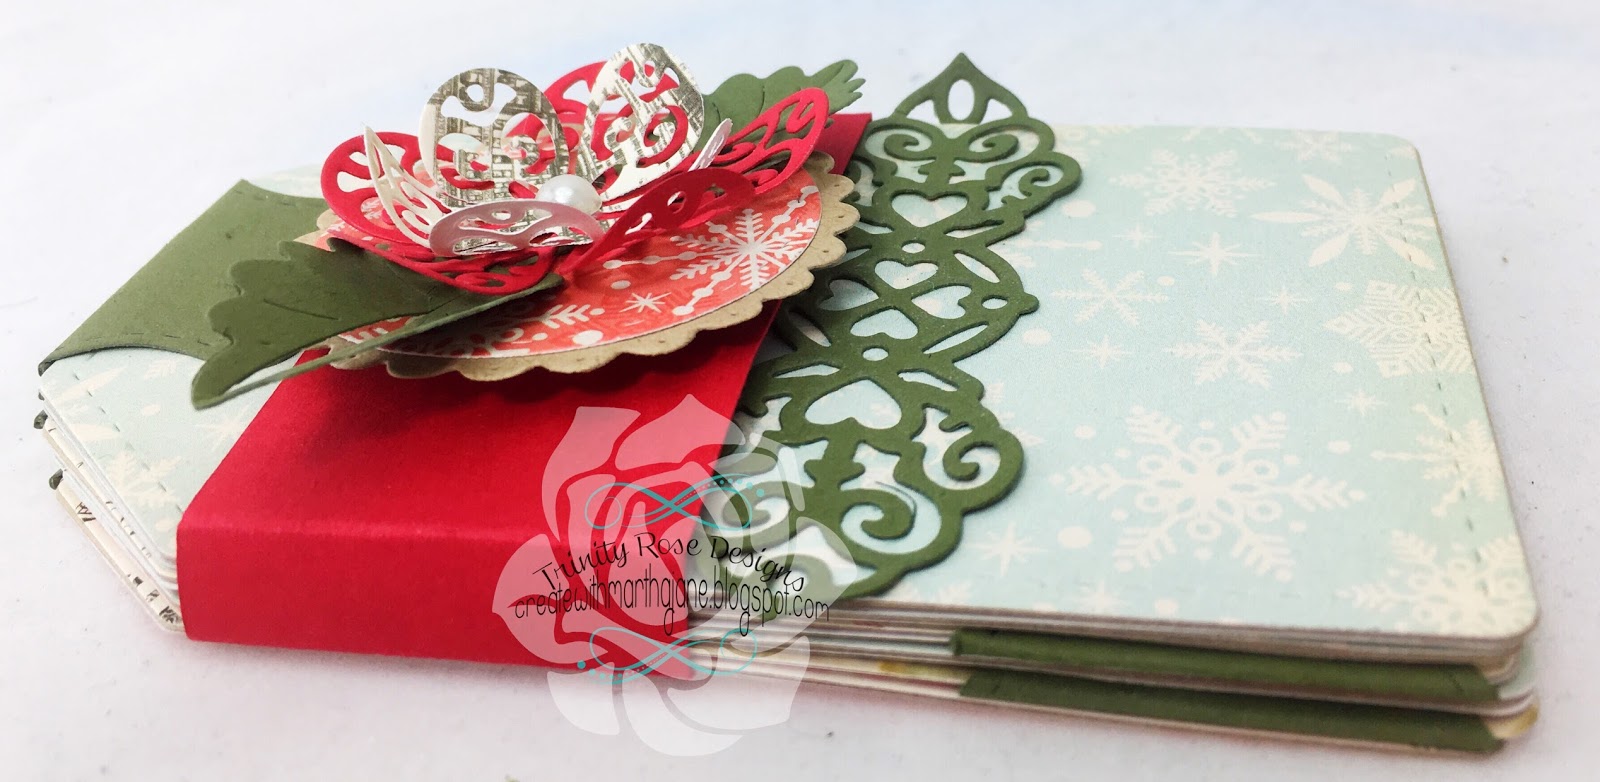
Tutorial Thursday: Tag Mini Album


Hello Everyone, Welcome to Tutorial Thursday! 
Martha here with you.
Today I'm going to show you how to make a Tag Mini Album, and for the base of the Album you only need Two Dies! You won't even need to pull your paper cutter out!

So lets get started
Here is what you will need.


Kraft Cardstock
Green Cardstock
Red Cardstock
Christmas Patterned Paper


Cut Six Tags from the Kraft Cardstock with the Stitched Tags Die (set of 4).
Then Cut Twelve Tags from the Christmas Patterned Paper Also using the Stitched Tags Die (set of 4), Also cut Ten of the Tab Shapes from the Stitched Elements (set of 7)

Now adhere One patterned paper Tag to each side of the Kraft Cardstock Tags. Repeat this step for all Six Tags.

Next we will need to score and fold all Ten of the Tab shapes from the Top Middle Point to The Bottom Middle Point.

Next Adhere one Tab Shape to the top of each Tag Covering the Hole in the Tag.
This is what your Tags should look like.

Now Lets attach them all Together. 
Take your center Tag and attach two of the Tab Shapes from the Stitched Elements (set of 7) as Shown, make sure the Score Line is Just past the outside edge of the Tag or it won't fold properly.


Now flip the center Tag over, adhere a tag to both exposed tabs  again being sure the Score Line is Just past the outside edge of the Tag, once you you have done this, adhere two more Tabs as Shown.
 Now Flip these Three Tags to the Opposite side, and using the tabs Adhere two more Tags, again being careful to leave the score line exposed. Now add your final tab to the top right of the last tag on the right hand side, and adhere the Last Tag.

This is what your end result should be.
Now fold your Tag Mini Album in a Accordion style

Next lets make our Belly Band! 
You will need a 1 1/2 x 7 1/8 piece of red card stock, place the cardstock on the landscape side in your scoring board, score and fold at 2 3/4, 3 1/8, 5 7/8, and 6 1/4.

place adhesive on the inside of the small rectangular flap that the scoring created and fold over to create your belly band!!
 
Now Slide it on from the top of your Album down.
Lets Decorate the Front of our Album. Here is what you Will need


Place the Ornate Scroll Flourish Die About half way down the front of the Album so that it acts as a stopper for the Belly Band.

Now adhere the rest of your Die Cuts on top of each other starting with the Scalloped Circle Die.
And thats it, your done!
Here are a few more pics!


I hope you Enjoyed!! And if you do create this album please post it in the La-La Land Crafts Facebook Fan Group so I can see it!!

Hugs
Martha