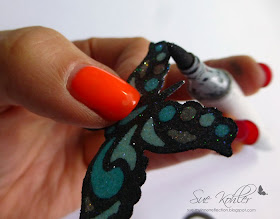
It's Sue here ,welcome back for another La-La Land Crafts Thursday tutorial.
Today I will be sharing my take on this technique shared by Jennifer McGuire, taking your dies in a totally new direction, who doesn't love a little (or a lot) of glitter!
Caution: this is a messy technique, but the outcome is well worth the cloud of glitter that will descend on your craft area!
Supplies you will need:
Die- Fancy Butterfly
Glitter- Black and colours
Glitter clean up cloths- Scor-pal ones work well
Scor-tape or double sided tape
Heavy weight Cardstock
small zip lock bag
Copic ink refill
Painters tape or washi tape
If you find you don't have the right colour glitter, you can make your own perfectly suited to your project.
Start will some clear glitter in a small ziplock bag
Add a few drops of Copic Ink
Reseal the bag and start massaging the colour into the glitter
Your finished bag of glitter should now be all the one colour.
Open the bag to let the glitter dry before using on your project.
Make different shades of the same colour by adding less Copic ink or more glitter
Step 1
Cut cardstock large enough for your chosen die, cover with Scor-tape.
I have used 2 1/2" wide tape, thinner tape will also work
Step 2
Attach your die, secure in place with painters or Washi tape, run through your die cutting machine.
Step 3
It should cut through the tape layer but not right through the cardstock
Step 4
Remove the top layer of tape around the outline of the die cut
Step 5
Cover with a dark coloured glitter, I have used a black
Step 6
Use a piece of scrap paper to cover the glitter, using a bone folder push the glitter into the tacky layer.
Step 7
Wipe away the excess glitter
Step 8
This is where you will start adding colour and your own flare to the design/
Start by removing the top piece of the scor-tape where you would like the next colour or you may decide to make the centre pieces all the one colour.
For each colour you add repeat steps 4-6
Once all the inner parts have been glittered cut out your die cut or remove the top layer of scor-tape around the die cut and glitter the surrounds
Sorry for the quality of this pic, but you get the idea
Step 9
If you are cutting out the die cut, run a copic marker to match the colour of your outline glitter around the edges to finishing the design off.
I have layered my glittered butterfly onto a black one which will replace the antenna, they were a little challenging to cut out!
Hope you have enjoyed this tutorial and can find some time to get glittery too!
You can find us on our Facebook group and page and you can also see all of our Design Team creations on our Pinterest boards.
Remember to pop back in tomorrow for more inspiration from Team Friday, showcasing 'Snowflakes' !


Beautiful project. I learned a lot. TFS.
ReplyDeleteI use Scor Tape for glitter things all the time but this is a new process to me! I will have to give it a try. TFS, Lizzy
ReplyDelete